
tcpScancyr
Analysis of points - TNSB3
5.2 Analysis of points
In order to accelerate calculations you need to have imported all points from the scanner that have been analyzed with respect to the horizontal alignment. If you follow the normal order when creating a project, the points will be analyzed on exiting the point's management dialog box.
In the event of changing the alignments, or if you have imported the points before establishing the project alignments, you should use the option "Points -> Analyze" in order to analyze the points with respect to the horizontal alignment.
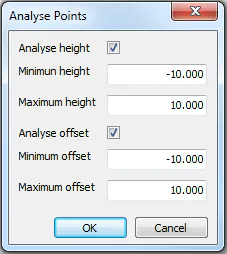
Figure 13 - Window for analyze points
[TcpScancyr Advanced] If you check "Analyze height" and "Analyze offset", the program will not analyze the points out of this intervals. These options are used for some cases where the tunnel has different heights or irrelevant points.
If you do not analyze the points, the application will not know what set of points fall within a specific station and you will not be able to calculate cross sections.
Once the project has been defined with the alignments and points files analyzed, you can use the project tree displayed on the left of the main window in order to view the points.
By selecting a node which corresponds to a points file you will activate the "Vision" tab, allowing you to view the selected file. By using this view you can independently apply filters at each file.
If you activate the projection with perspective, this window will appear in order to help you move over the alignment. If you have calculated and enabled the cross sections (using layer control) it will be easier to filter by selecting the points that distort cross sections calculation.
If no horizontal alignments have been defined, this window will not appear.
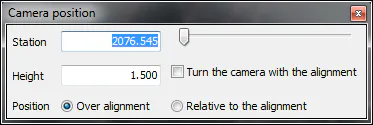
Figure 14 - Help window for positioning the camera
Changing the station allows you to move over the alignment.
Station: The station where the camera is located. You can write a specific station or use the space bar to move in real time. If you write a value, press ENTER in order to apply the changes
Height: The height of the camera with respect to the vertical alignment.
Turn the camera with the alignment: If you have this option checked, when you change the station by using the controls, the camera will position itself at the azimuth of the alignment.
The following options indicate where the camera will be positioned on changing the station.
Position over alignment: Place the camera on the alignment at the indicated height - if you have moved, the camera displacement will be cancelled.
Position relative to the alignment: Here you move by following the alignment but by maintaining the existing relative distance.