
tcpGPS
GNSS receivers - GPS v2
3.1 GNSS Receivers
tcpGPS allows one to use two data sources: the device\'s internal GNSS receiver, if it has one, or an external GNSS receiver, connected via Bluetooth, Bluetooth LE or TCP/IP (normally using WiFi network).
In 02 01 GNSS RECEIVER CONNECTION ASSISTANT SCREEN - GPS v2 - Aplitop EN - Aplitop or Device > Connection section are available the needed options for selecting and configuring the different types of receivers. Once the type of receiver is selected and the needed configuration is completed, the communication will be established by pressing Connect. With Disconnect button the application is disconnected from the current receiver.
 |
|---|
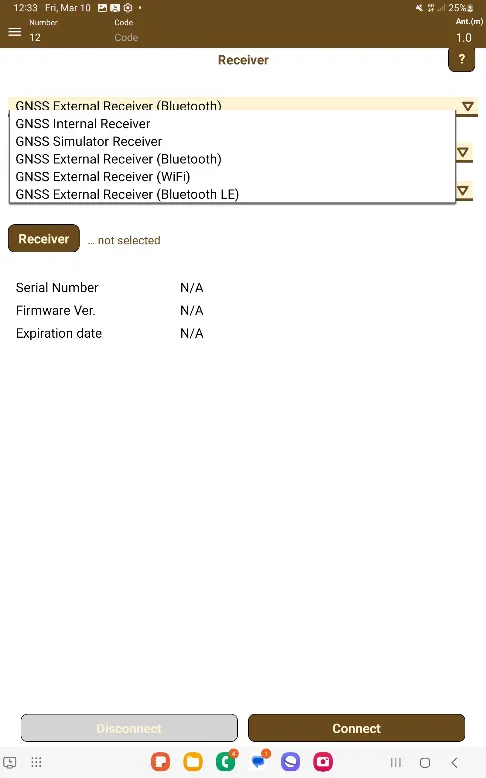
Figure 6. Selection of the GNSS receiver |
GNSS Internal Receiver: It allows to use the device's internal GNSS receiver, using the system parameters (Generic / LOCAL option) or NMEA output (Generic / NMEA option), if the operating system version allows it. Also, it's possible to connect with external receivers using mock locations through third-party apps. In this case, receiver's brand and model must be selected.
GNSS Simulator Receiver: This mode uses a file of geographic coordinates, in WGS84 datum, to simulate the locations in the application. The file extension must be TXT and must contain one point per line with the following format:
PointNumber,Wgs84LatitudeInDegrees,Wgs84LongitudInDegrees,AltitudeInMeters
Ex.: 1,36.73191533,-4.46158488,138.994
The latitude must be between -90.0 and 90.0 degrees and longitude must be between -180.0 and 180.0 degrees.
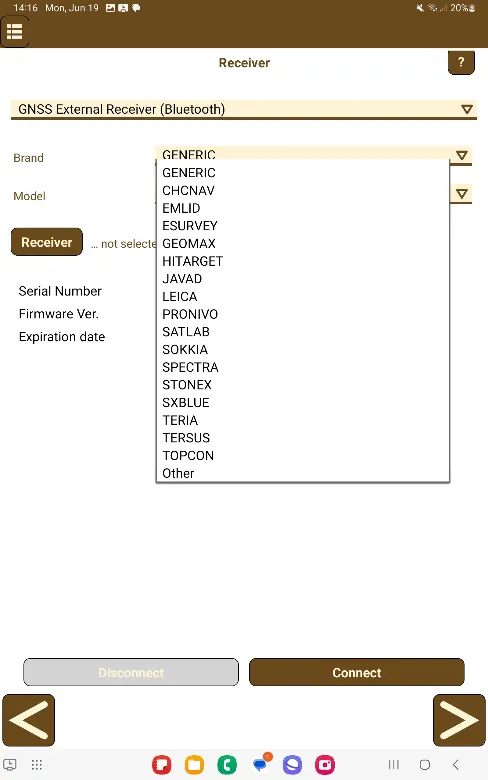
GNSS External Receiver (Bluetooth): It allows to connect with GNSS receivers through Bluetooth classic connection (no BLE).
 |  |
|---|---|
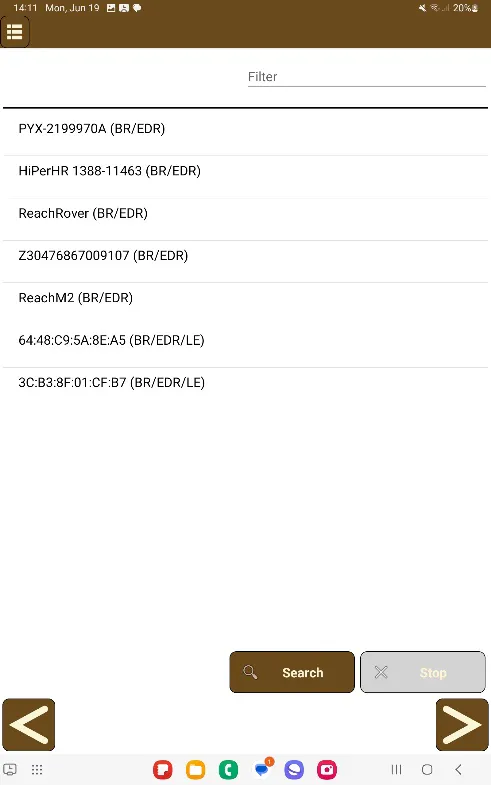
Figure 7. Brand and model selection | Figure 8. Search of a GNSS device |
The application stores the information of the last GNSS connected, but if no one was used before, a GNSS can be found by pressing the button Device.
In this screen, Search button will start the searching of near Bluetooth devices. When the friendly name (or the MAC address, if the name is not available) is shown in the list, it can be selected.
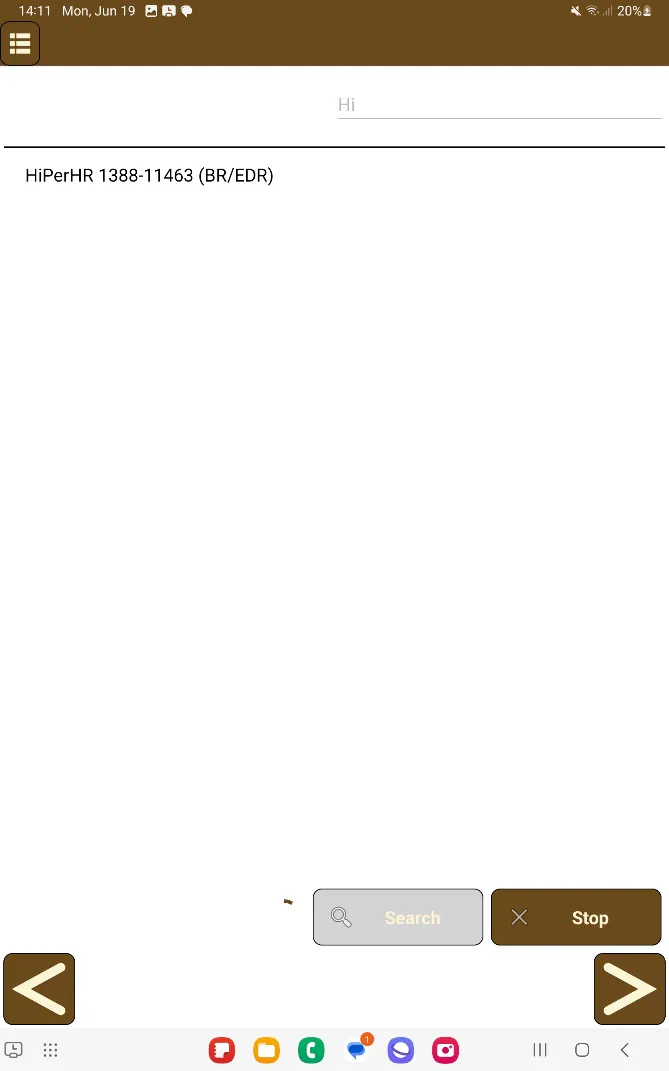
In the upper right corner of the screen it is possible to perform a filter by the names of the receivers in the list, writing the name and then pressing the "Search" button.
 |
|---|
Figure 9. GNSS devices list filter |
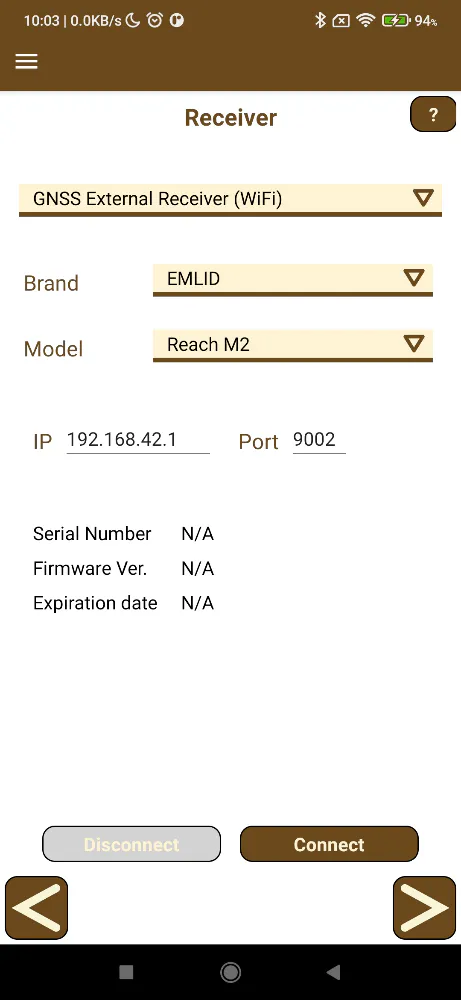
GNSS External Receiver (WiFi): It allows to connect with GNSS receivers through TCP/IP, normally, when connecting to the same WiFi network. After selecting the brand and model, it must be entered the IP address and the port used to send the receiver's data.
 |
|---|
Figure 10. Selection of the GNSS receiver |
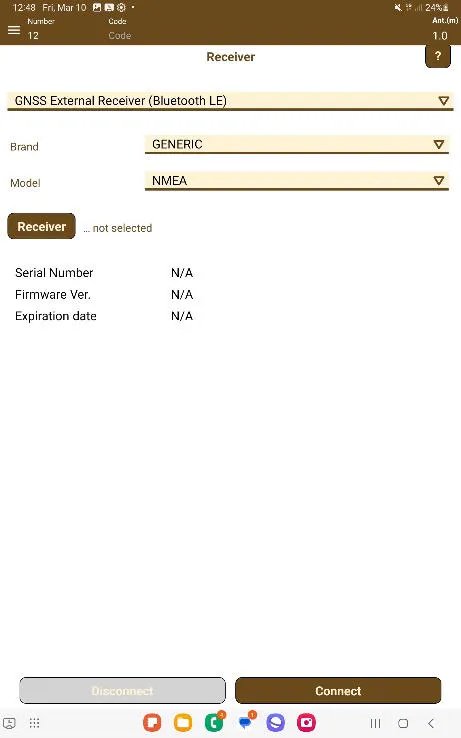
GNSS External Receiver (Bluetooth LE): It allows to connect with GNSS receivers through the Bluetooth LE protocol, choosing a brand and model that are compatible with Bluetooth LE.
 |
|---|
Figure 11. Selection of the External BLE GNSS receiver |
Configuration of the external GNSS receiver
Once the app is connected to the receiver, it can be configured by setting its parameters in Device > Set up receiver.
Each supported brand and model have a set of specific forms where modifying these parameters and send the configuration to the receiver.
Usually, GNSS receivers can be configured in two modes: base or rover, and each one can establish different types of data links, depending on the capacities and hardware available.
Base configuration
This option enables the user to configure the receiver in RTK mode, what allows the rover receivers to work with centimetric precision.
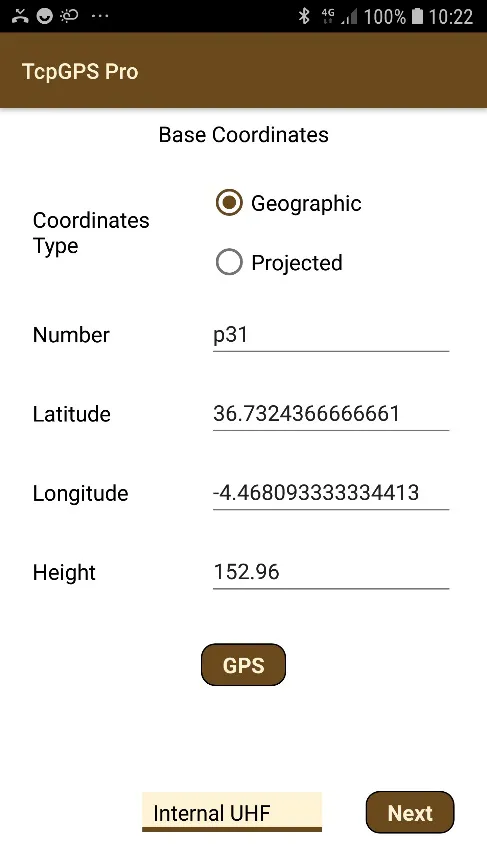
Firstly, the position where the base is located must be set. It can be introduced by two ways:
Getting the position for the receiver, by using the GPS button. This location will be taken with the receiver in autonomous mode, what can be ideal when a local system is going to be created, then the location of the base is not important, or it will be placed in a different location in each session.
Using a point from the current project. This option is only available once a project is loaded.
Typing the location manually. It allows to configure the base introducing the values manually. The distance between the current location and the location introduced must be less than 100 meters.
The user can use projected or geographic coordinates in all cases.
Next step is to choose the type of data link. When clicking Next, the screen for configuring the data link will be displayed. This screen depends on the brand and model of the receiver and the set of parameters will change. Check the technical notes available in our website (Device connection and configuration ) for detailed information about the configuration of different GNSS brands and models.
Rover configuration
This option enables the user to configure the receiver in RTK mode, what allows the rover receivers to work with centimetric precision.
Firstly, the position where the base is located must be set. It can be introduced by two ways:
Getting the position for the receiver, by using the GPS button. This location will be taken with the receiver in autonomous mode, what can be ideal when a local system is going to be created, then the location of the base is not important, or it will be placed in a different location in each session.
Using a point from the current project. This option is only available once a project is loaded.
Typing the location manually. It allows to configure the base introducing the values manually. The distance between the current location and the location introduced must be less than 100 meters.
The user can use projected or geographic coordinates in all cases.
Next step is to choose the type of data link. When clicking Next, the screen for configuring the data link will be displayed. This screen depends on the brand and model of the receiver, depending on the one chosen, the set of parameters will change. Check the technical notes available in our website (Device connection and configuration ) for detailed information about the configuration of different GNSS brands and models.
 |
|---|
Figure 12. Base configuration |
Static
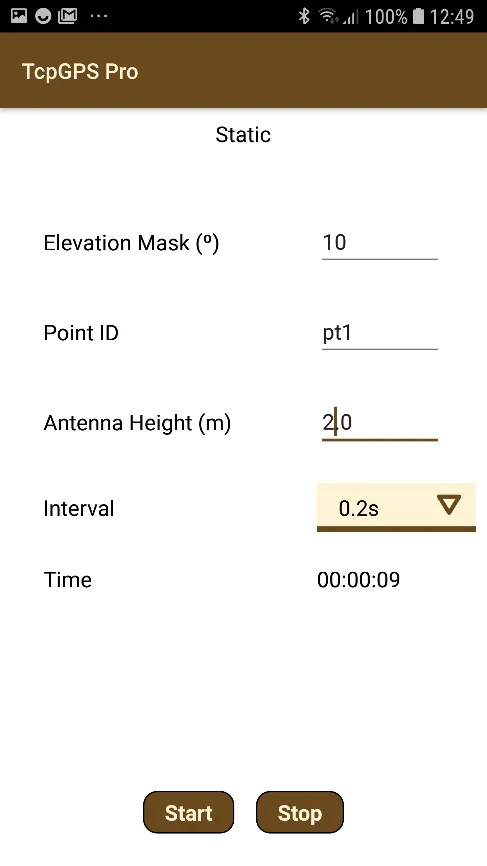
Some devices allow the user to record data in static mode, for postprocessing. In this case, the option Static will be present in the menu.
 |
|---|
Figure 13. Static recording configuration |
After setting the parameters, the recording will be initialized by pressing Start button and finished using Stop button.
Terminal
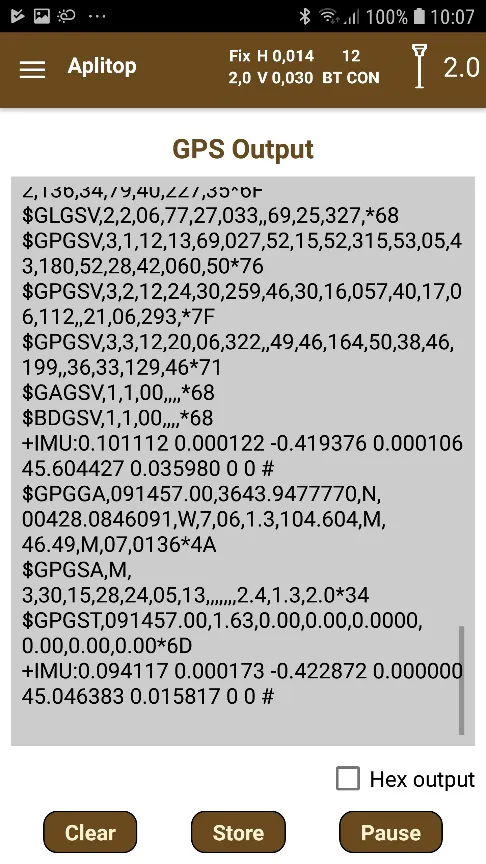
A terminal is available for advanced users who wants to know what the receiver is sending, where is shown the frames and messages received. This terminal is accessed from Device > Terminal or in the button  in the GNSS receiver connection assistant screen - GPS v2 . This terminal has the following options for interacting:
Pause/Continue: The user can pause and continue receiving data into the terminal. However, while the reception is paused, the messages received will be discarded by the terminal.
Record: Store the messages to a log file.
Clean: Remove all the frames shown in terminal.
Hex output: The messages are shown with hexadecimal values.
 |
|---|
Figure 14. Monitor of the messages received from the GNSS |
GPS Status
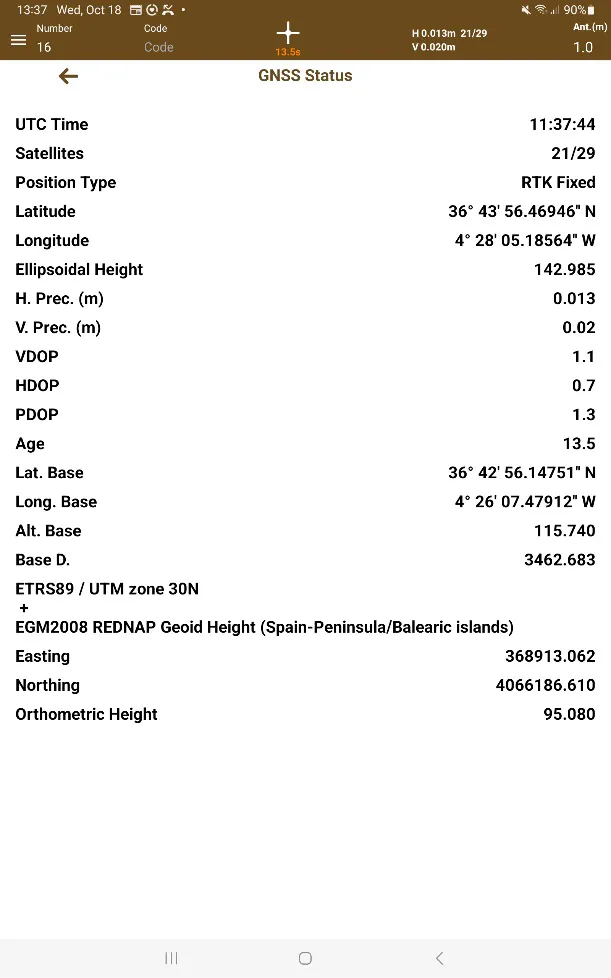
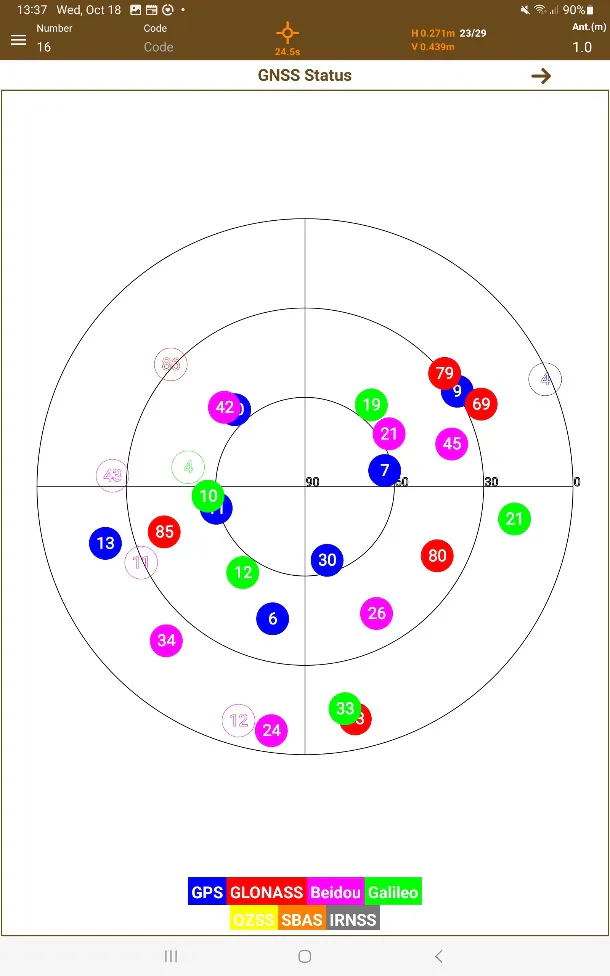
It is possible to consult the GPS status by opening the GPS status section, pressing on the communications toolbar.
In this section, you can find information on both GPS and available satellites. The arrows in the options menu can be used to navigate between one view and another.
In the following table are described the parameters shown in the numerical screen of this section:
UTC Time | Current UTC time. |
Satellites | Number of satellites used in the measurements. |
Position Type | Position type of the measurements. |
Latitude/ Longitude/ Ellipsoidal Height | Coordinates of the current position in WGS84. |
H. Prec/ V.Prec | Horizontal and vertical precisions of the current measures (meters). |
HDOP (Horizontal Dilution of Precision) | Empirical and dimensionless indicator of the quality of the horizontal measure. The lower it is the higher is the quality. |
VDOP (Vertical Dilution of Precision) | Empirical and dimensionless indicator of the quality of the vertical measure. The lower it is the higher is the quality. |
PDOP (Position Dilution of Precision) | Empirical and dimensionless indicator of the quality of the measure. The lower it is the higher is the quality. |
Age | Real Time Age of the corrections received by the GNSS. |
Easting/ Northing/ Orthometric Height | Coordinates in the coordinates system used in the project (shown above these parameters) |
 |  |
|---|---|
Figure 15. GPS status | Figure 16. Satellites constellation |