
tcpGPS
Set out points - GPS v2
14.2 Set out points
In this section, individual points are staked out. To make the job easier, tcpGPS incorporates various modes for staking out.
Map Mode
In this mode, a map is displayed showing the available points for setting out and the current position of the GPS. You can select the point to set out simply by clicking on it. A signal indicating the point and a line between the current position and this one will serve to advance towards it in the correct direction. Over this line is shown the distance to the point.
Compass Mode
In this mode, the direction in which the point is relative to the north from the GPS position will be indicated. It is a mode that is recommended to locate points at a long distance, since in the vicinity of the point the measurement of the angles can be erratic. To use it, the device must have a magnetometer.
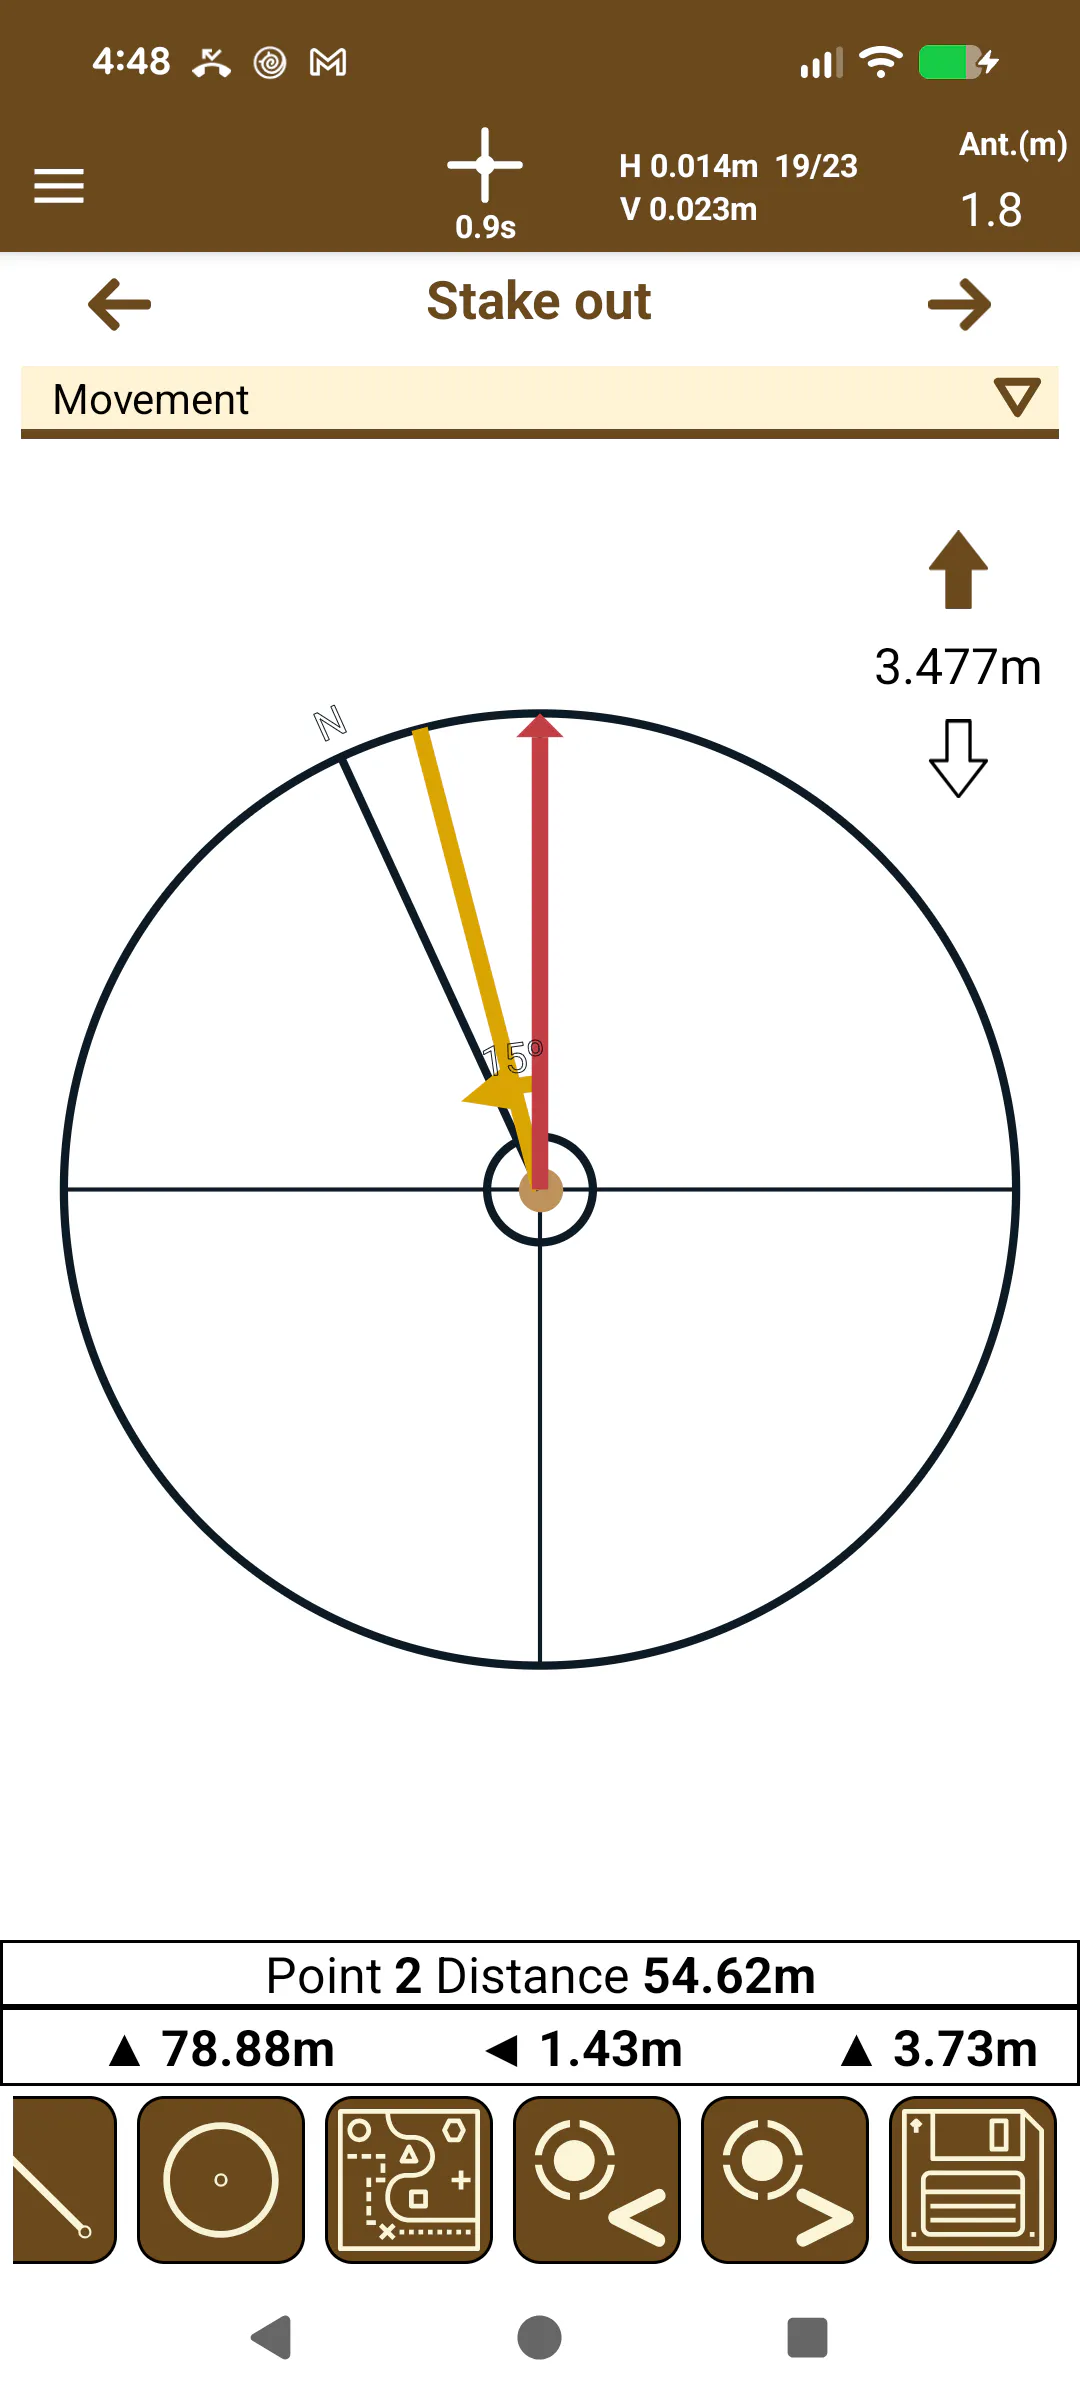
In the compass, three lines are highlighted:
 |
|---|
Figure 127. Compass staking out mode |
The red line is fixed and indicates the current direction the user device is pointing. This line changes its color to green when the line indicating the point to be set out matches with her.
The black line indicates the direction of the north.
The orange line indicates the direction to the point to be staked out.
Between the red line and the orange line is indicated the angle the user must turn to face the point.
On top of the compass is indicated the distance to reach point.
Target Mode
 |
|---|
Figure 128. Target staking out mode |
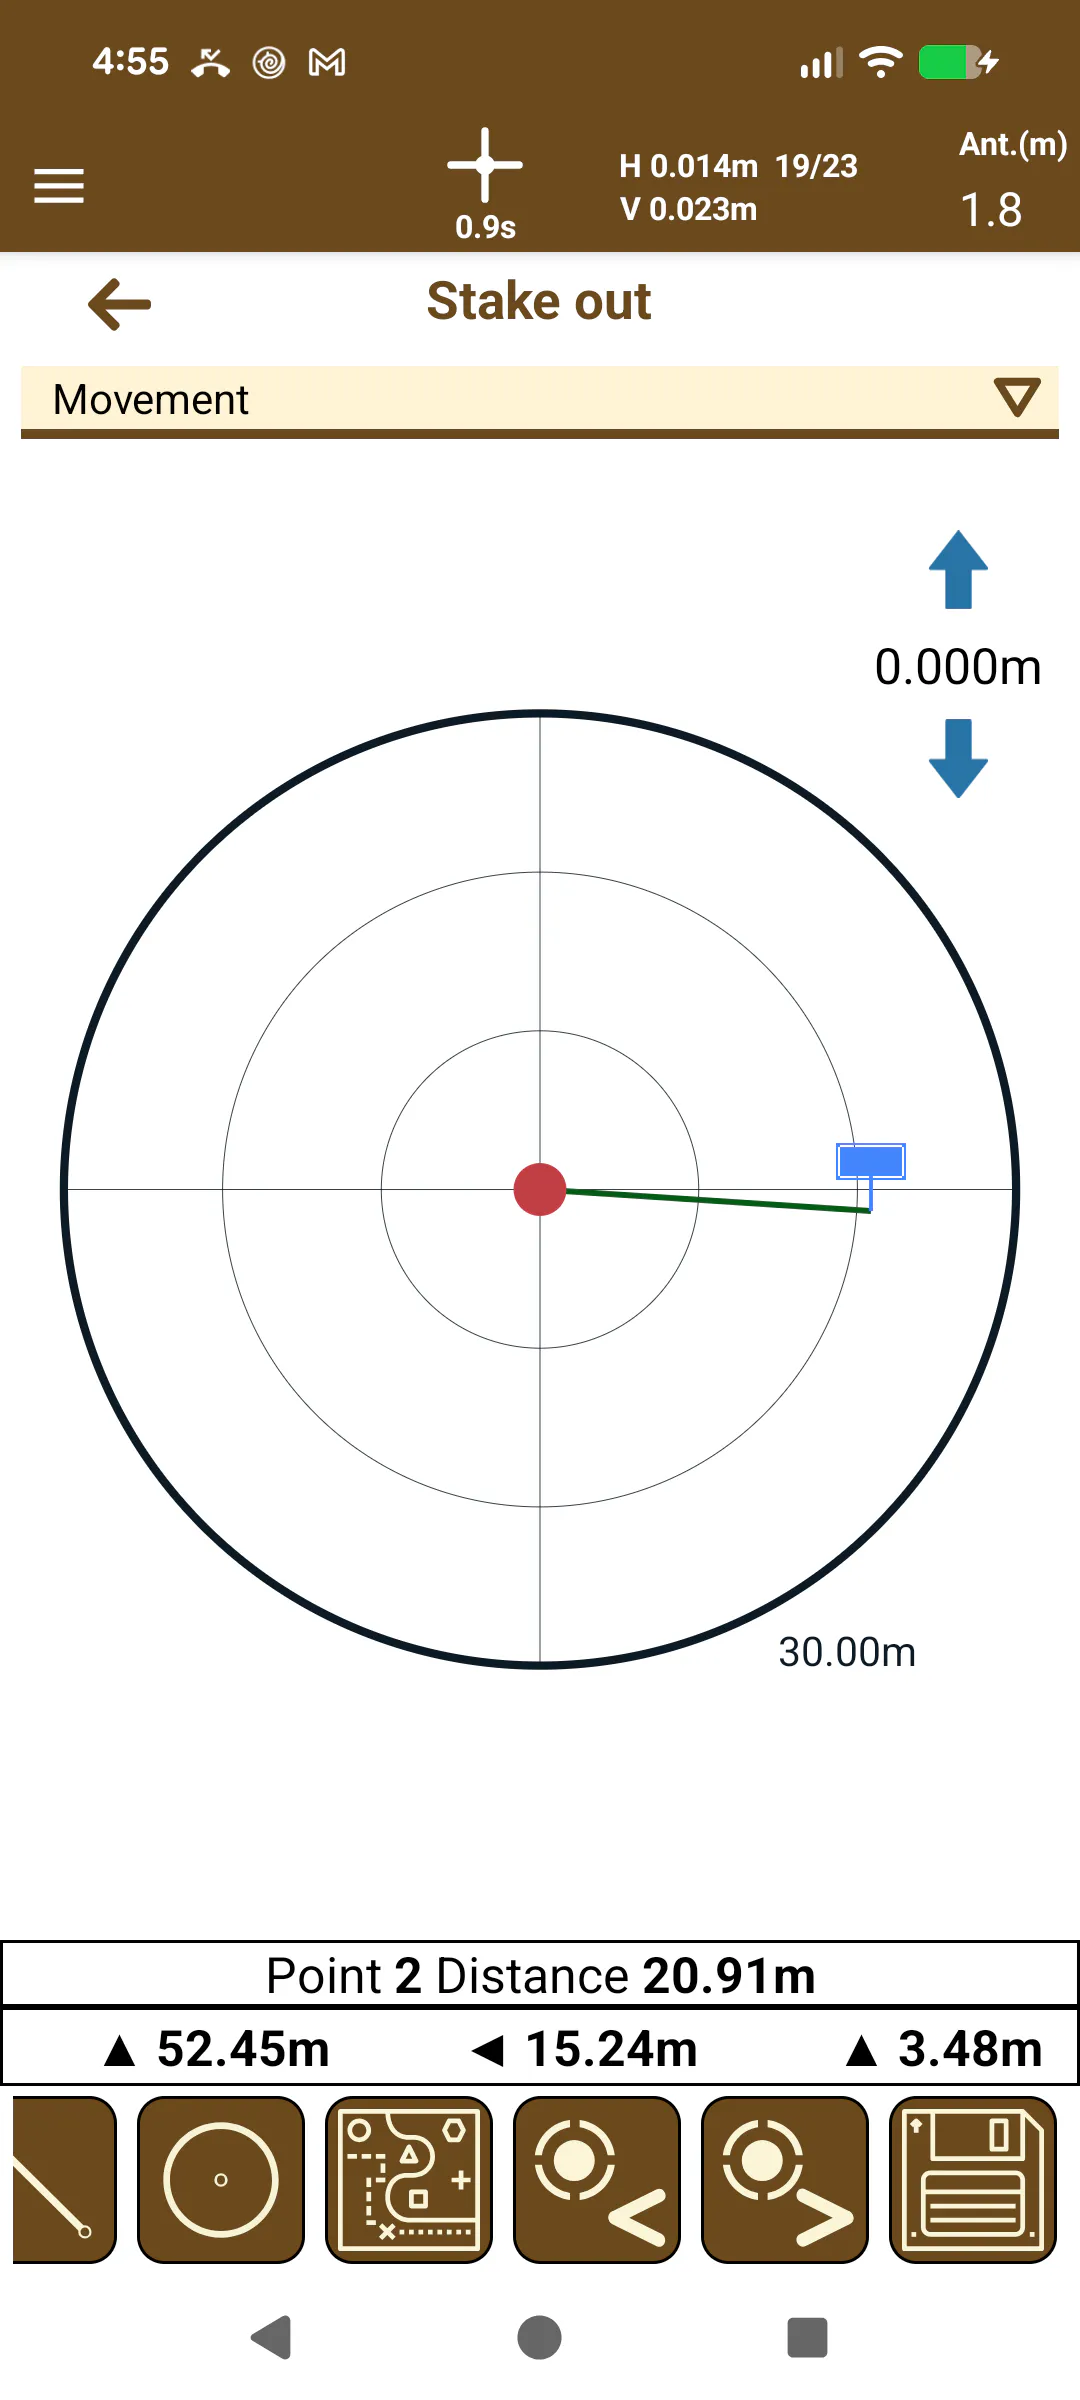
In this mode, the current position of the GPS (in green) is shown in relation to the center of a target that marks the point to be set out (in red at center of the dartboard). The position of the GPS within the target will be determined by the movements to be made depending on the selected setting out mode. In this mode, a greater precision is obtained when locating the point, so its use is recommended in the vicinity of the point to be set out.
On top of the dartboard are shown the movements the user should make to reach the point: left or right for lateral movements and forward or backward for advance movements.
Stake out via epochs
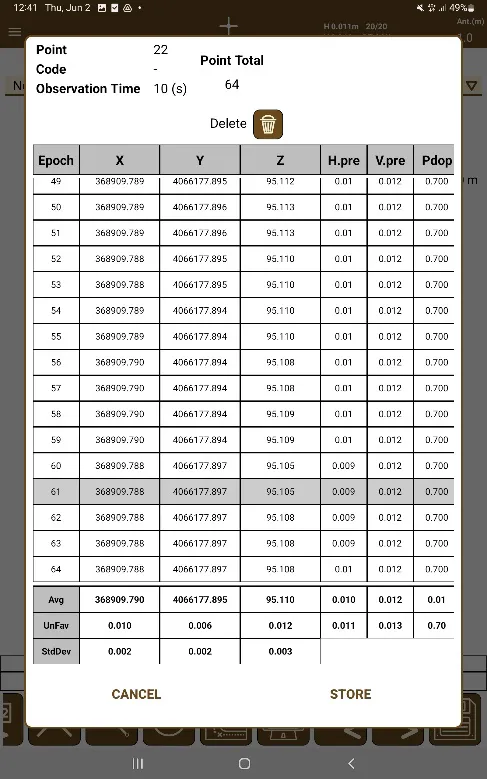
As shown in the section Configuring the workspace, it is possible to stablish the point observation time. When the stablished observation time is more than 0, and the stake out button is pressed, or the option Long press for precision points is activated, and a long press is performed in the stake out button, its possible to perform a stake out of a point via epochs.
After performing the checks signaling the point validity, the point observation dialog is opened, where epochs from the GNSS Receiver are taken, and once it is finished, the average of all epochs are shown.
 |
|---|
Figure 129. Point via epochs |
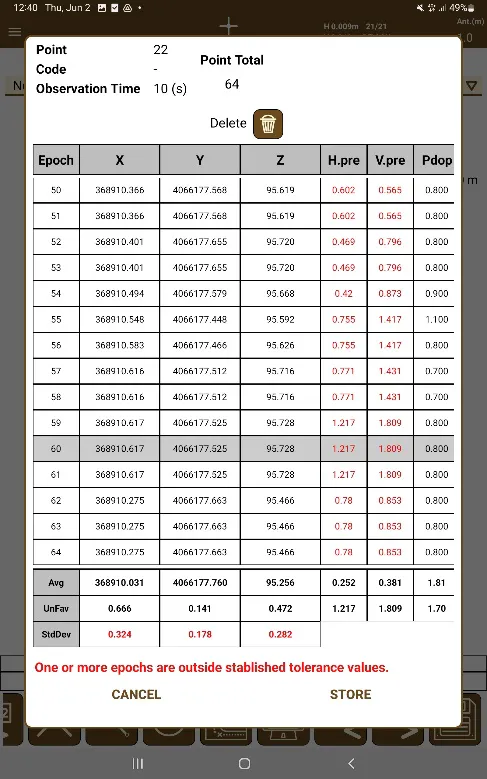
In the case that one or more epochs are not in the specified tolerance measures specified in the configuration, the dialog will warn of this fact. If there is a need to remove unwanted epochs, it is possible to touch them to select them and then touch the delete button.
 |
|---|
Figure 130. Point via epochs outside of allowed tolerances |
Changing the staking out mode
To change the mode, the controls 
 can be used. In addition, when the minimum distance to the point configured in the application is met, the target mode is automatically passed to obtain more precision in setting out.
When the current location is at a distance lower than the set in Menu > Settings > Stake out > Target Mode Distance, the application will display the target mode automatically.
Staking out options
The following options are provided for working with staking out of points:
Staked out point
 : Saves the point staked out in the database by recording the current GPS data.
Next
 /previous
 point: Allows selecting the point to be staked out by scrolling through the list of points according to their numerical order.
Select code
 : Allows selecting a specific set of points according to their code. Another option is associated with this one to allow you to return to the full list of points
 .
Add Image to Last Point
 : Allows the adding of an image to the last point taken, either by updating it from the gallery or by using the device's camera.
Point selection
 : Allows selecting a point by entering its number.
Intersection stake out
 : Allows selecting a point pressing on the intersection of two lines or polygons, or a line that has an intersection with itself.
Vertex stake out
 : Allows selecting a point pressing on a line or polygon and the application will select the vertex closest to the point pressed onscreen.
Circle Center stake out
 : Allows selecting a point pressing on a circle, and the application will calculate the center of the circle for it to be staked out.
In each setting out mode, help is provided in the form of voice prompts to mark the movements to be made or the remaining distance to reach the point.