
Support
HiTarget / SatLab GNSS Receivers Configuration
Objective
Configure HiTarget and SatLab GNSS receivers to work in different modes, such as RTK and static.
Requirements
Hardware: Android device (tablet or smartphone), GNSS receiver.
Receiver | Firmware version |
|---|---|
SatLab SL700 | 1.8.8.8 |
SatLab SL800 | 2.3.0 |
SatLab SL900 | 5.8.8.8 |
HiTarget iRTK5 | 1.8.8.8 |
HiTarget V90+ | 5.8.8.8 |
HiTarget V100 | 2.3.0 |
HiTarget INNO1 | 1.1.0.2 |
Software: TcpGPS v2.0+
Operating System: Android
Details
TcpGPS v2.0 allows configuring SatLab SL700 / SL800 / SL900 and HiTarget iRTK5 / V90+ / V100 / INNO1 GNSS receivers in different modes, depending on the integrated hardware.
GNSS receivers can be configured with the wizard, when starting the app, or using the Receiver option from the main menu.
The following table shows the supported working modes:
Mode | SL700 | SL800 | SL900 | iRTK5 | V90+ | V100 | INNO1 |
|---|---|---|---|---|---|---|---|
Static | |||||||
Base Internal UHF | |||||||
Base External Datalink | |||||||
Base Internal GPRS (iRTK) | |||||||
Rover Internal UHF | |||||||
Rover External Datalink | |||||||
Rover Internal GPRS (iRTK) | |||||||
Rover Internal GPRS (NTRIP) | |||||||
Rover Data Collector Internet (iRTK) | |||||||
Rover Data Collector Internet (NTRIP) |
Static
It allows recording GNSS raw data on a fixed position for further processing. The data is recorded in the receiver's internal memory.
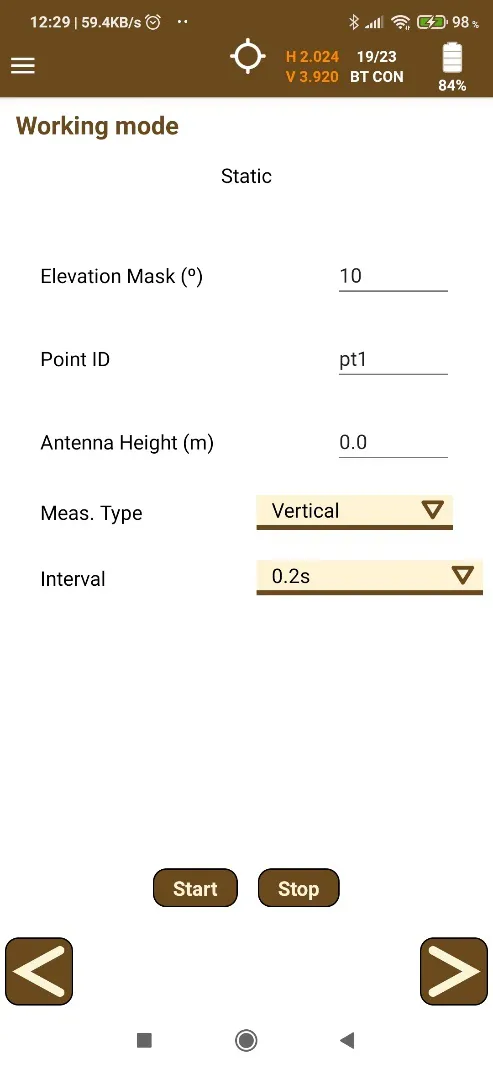
The Point ID, the Elevation Mask and the Antenna Height must be entered.
The point ID length must be 4 characters or less.
The antenna measuring type can be Vertical or Slant.
The recording interval ranges from 5Hz to 60 seconds for SL700, SL900 and iRTK5, and from 1 to 60 seconds for SL800, V90+, V100 and INNO1.
After clicking the Start button, the receiver starts recording data and the recording status (internal filename, start time, current recording time, etc.) is shown at the bottom of the screen. If the file already exists, an error message is shown.
Click the Stop button to finish the recording.
Note that, for SL800 and V100 receivers, the recording of the file starts approximately 1 minute after clicking the Start button.
Base RTK
Base working modes are only available for SL700, SL900, iRTK5 and V90+ receivers.
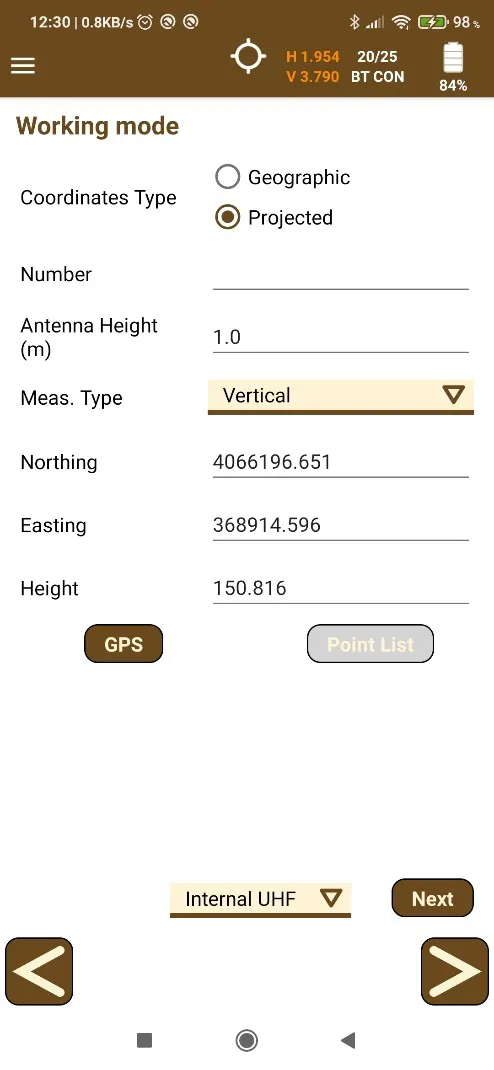
The Number or point ID, the Antenna Height and the base coordinates must be entered on the first configuration screen.
The base coordinates can be entered as WGS84 geographic coordinates or projected coordinates. They can be entered manually, measured from GPS or selected from the project Point List.
The antenna measuring type can be Vertical or Slant.
There are 3 different data links available, Internal UHF, Internal GPRS and External Datalink, which can be selected at the bottom of the screen.
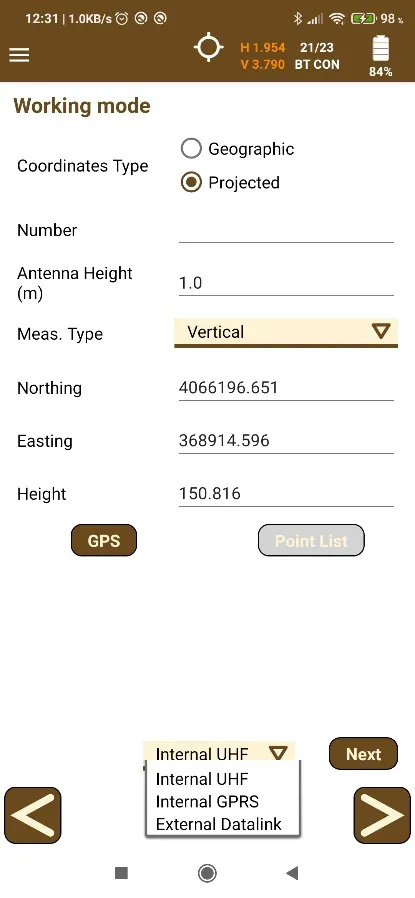
After clicking the Next button, a second configuration screen is shown. Some parameters on this screen are common to all data link modes, such as Elevation Mask and RTK Correction Type, and other parameters depend on the data link selected.
The RTK correction format can be CMR, RTCM 2.x, RTCM 3.0 or RTCM 3.2 (MSM).
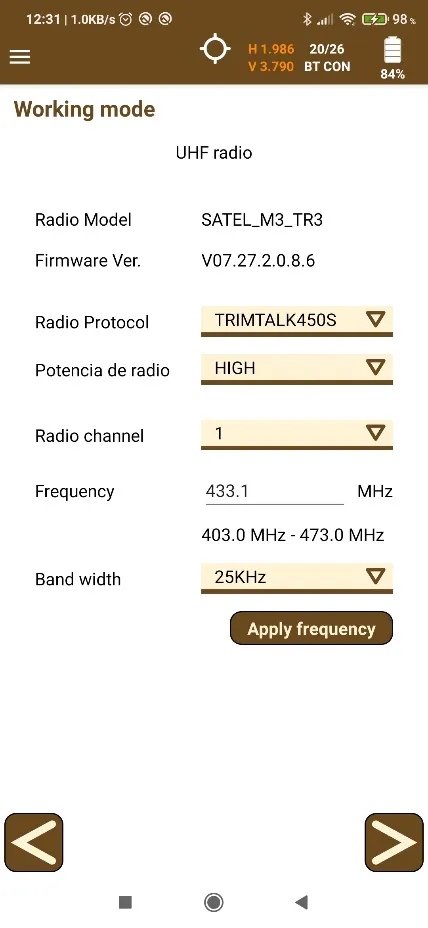
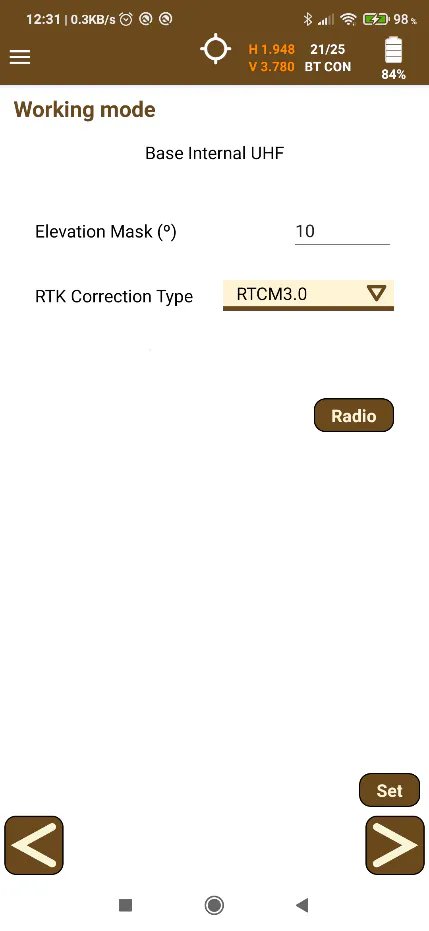
When selecting Internal UHF mode, only the common parameters must be entered and, optionally, UHF radio parameters such as channel, protocol, frequency, etc. can be configured by clicking the Radio button.
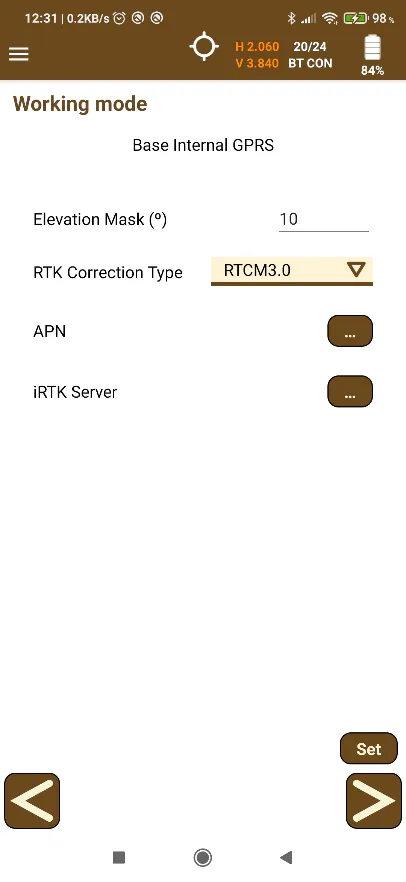
When selecting Internal GPRS mode, the link between base and rover is established by connecting to a server through the Internet, so, apart from the common parameters, APN and iRTK server data must be entered.
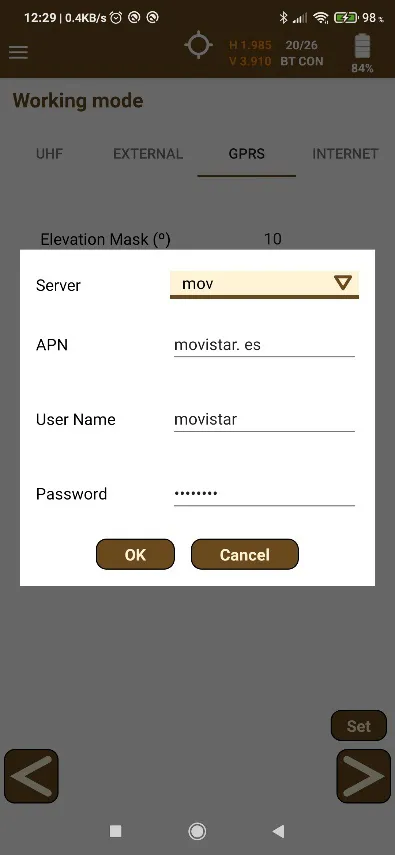
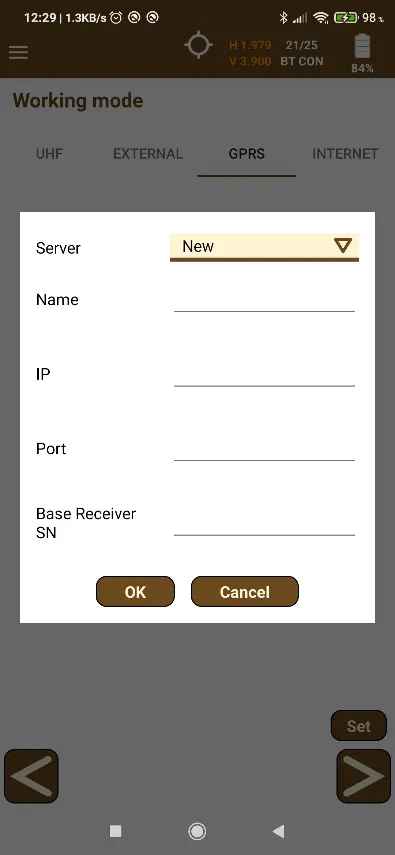
For APN, the app asks for the domain name, User Name and Password, and for the iRTK server, it asks for Name, IP, Port and Base Receiver serial number.
The last available mode is External Datalink, where only the common parameters must be configured.
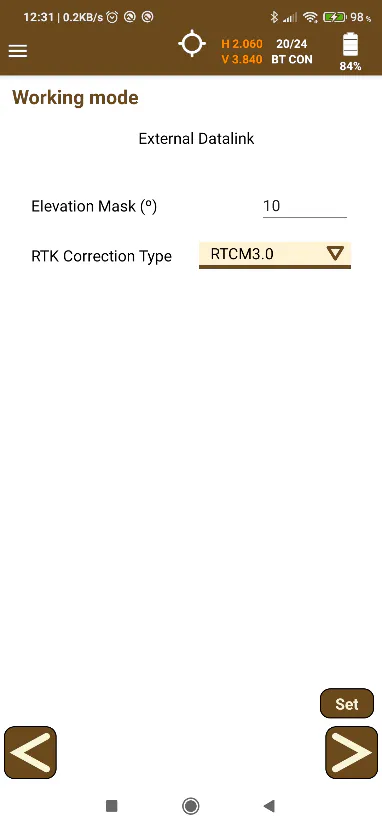
After clicking the Set button, the app starts configuring the receiver as base.
Rover RTK
Rover configuration modes are the same as the base ones and also include NTRIP modes.
Internal UHF
The app only asks for the Elevation Mask and, optionally, UHF radio parameters can be configured.
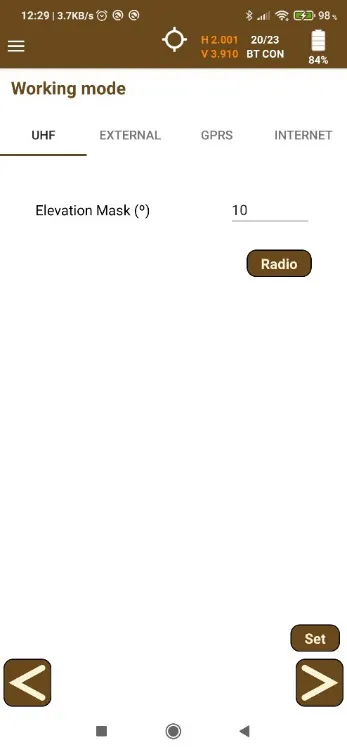
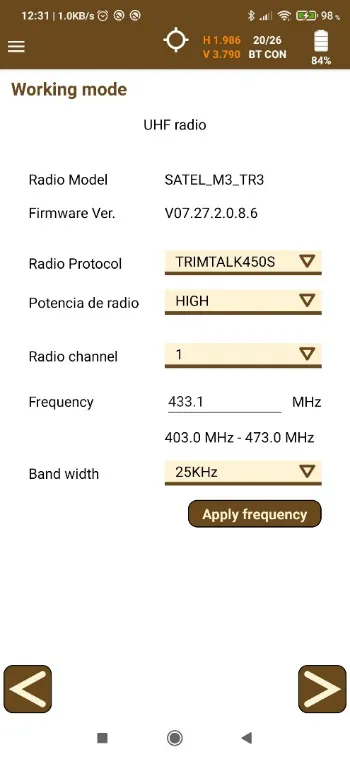
External Datalink
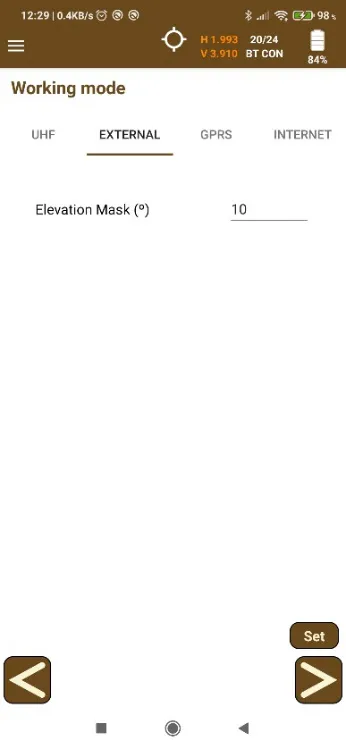
The rover uses an external device to receive the RTK corrections. Only the Elevation Mask must be configured.
Internal GPRS
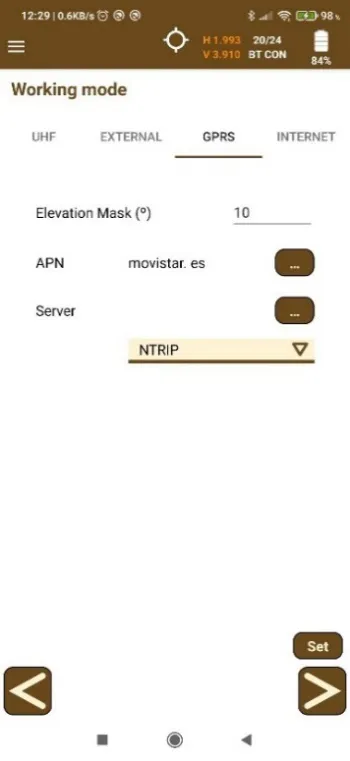
In this mode, the receiver can work using the NTRIP or iRTK protocol. In both cases, the Elevation Mask and APN parameters must be configured. For APN, the app asks for the domain name, User Name and Password.
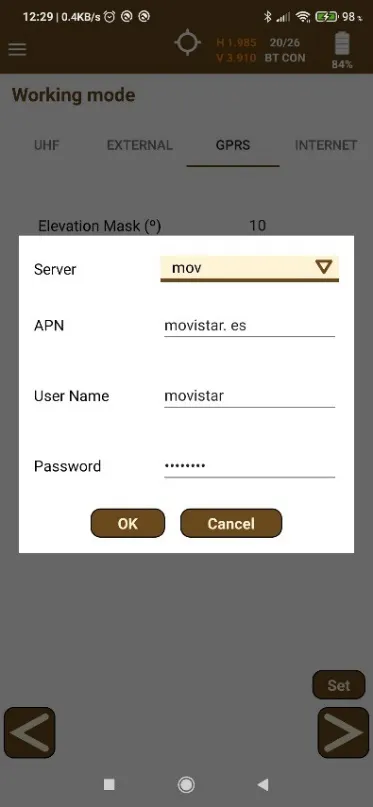
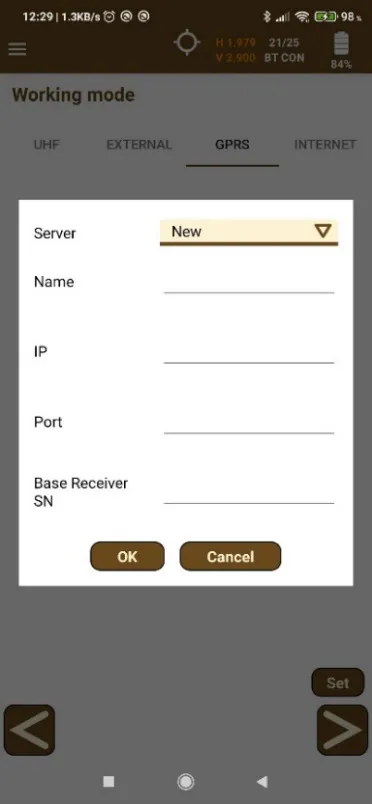
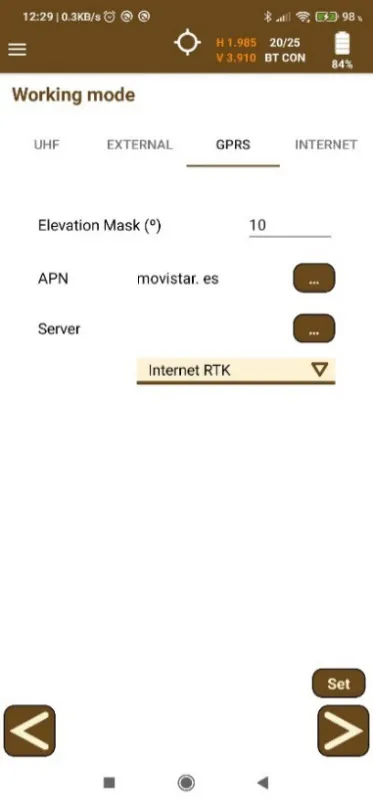
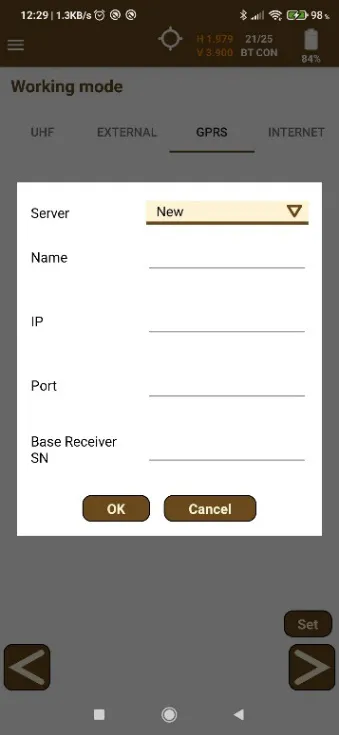
When selecting iRTK, the connection between base and rover is established by connecting to a server through the Internet. In this case, the iRTK server parameters must be configured.
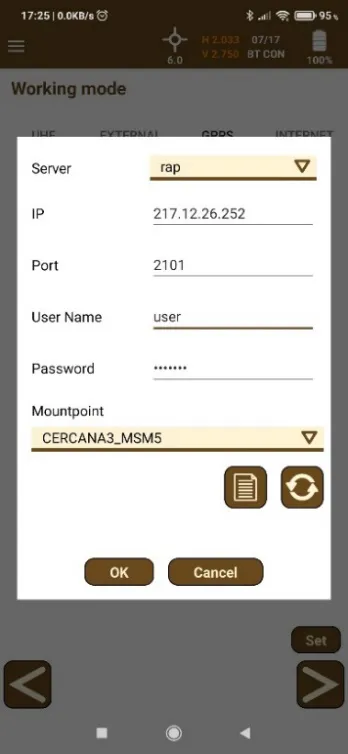
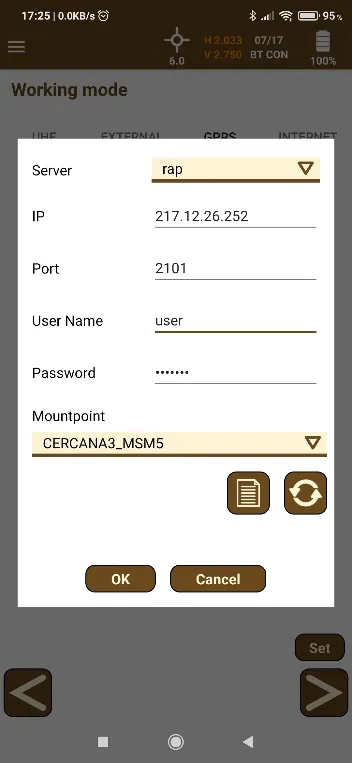
If the selected mode is NTRIP, the app asks for the caster parameters, such as IP, Port, User Name, Password and Mountpoint.
Data Collector Internet
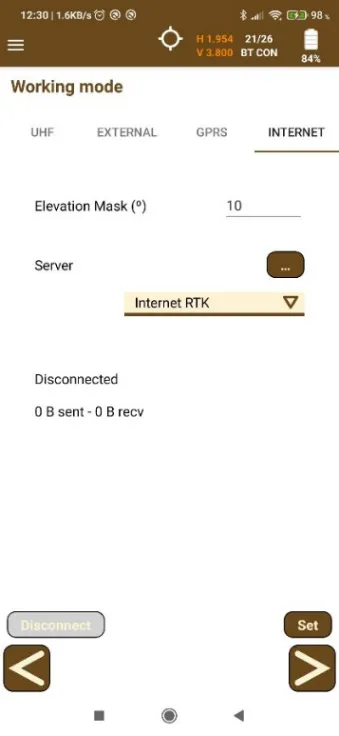
When selecting this work mode, the RTK corrections are received on the smartphone or tablet and sent to the GNSS receiver. In this case, the configuration screen has a button to connect to and disconnect from the server. The connection status and the number of bytes sent and received are also shown on the screen.
For iRTK mode, the app asks for the Name, IP, Port and Base Receiver serial number.
If the selected mode is NTRIP, the app asks for the caster parameters, such as IP, Port, User Name, Password and Mountpoint.
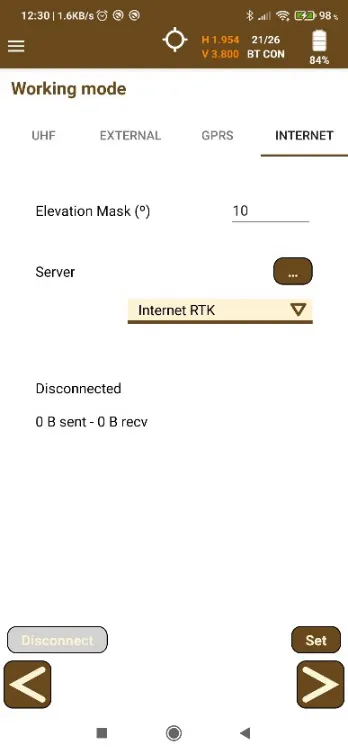
After clicking the Set button, the app starts configuring the receiver as rover.