Support
Configuration of EMLID receivers with data collector (ReachView)
Note: this procedure uses the ReachView 2 application, later replaced by EMLID Flow. Kept here as historical reference.
Requirements
Hardware: Android device, EMLID GNSS Reach RS, RS+ or RS2 with firmware v2.26
Software: Android OS, ReachView 2, TcpGPS for Android 2.0+
Objective
Configure EMLID receivers using Reach View and start working with TcpGPS Android.
Video:
Details
In TcpGPS Android the models REACH RS, REACH RS+ and REACH RS2 are supported. These models can be used once they have been configured through EMLID's software by enabling NMEA output.
EMLID Reach View configuration
This section describes the steps to configure EMLID devices using the Reach View application.
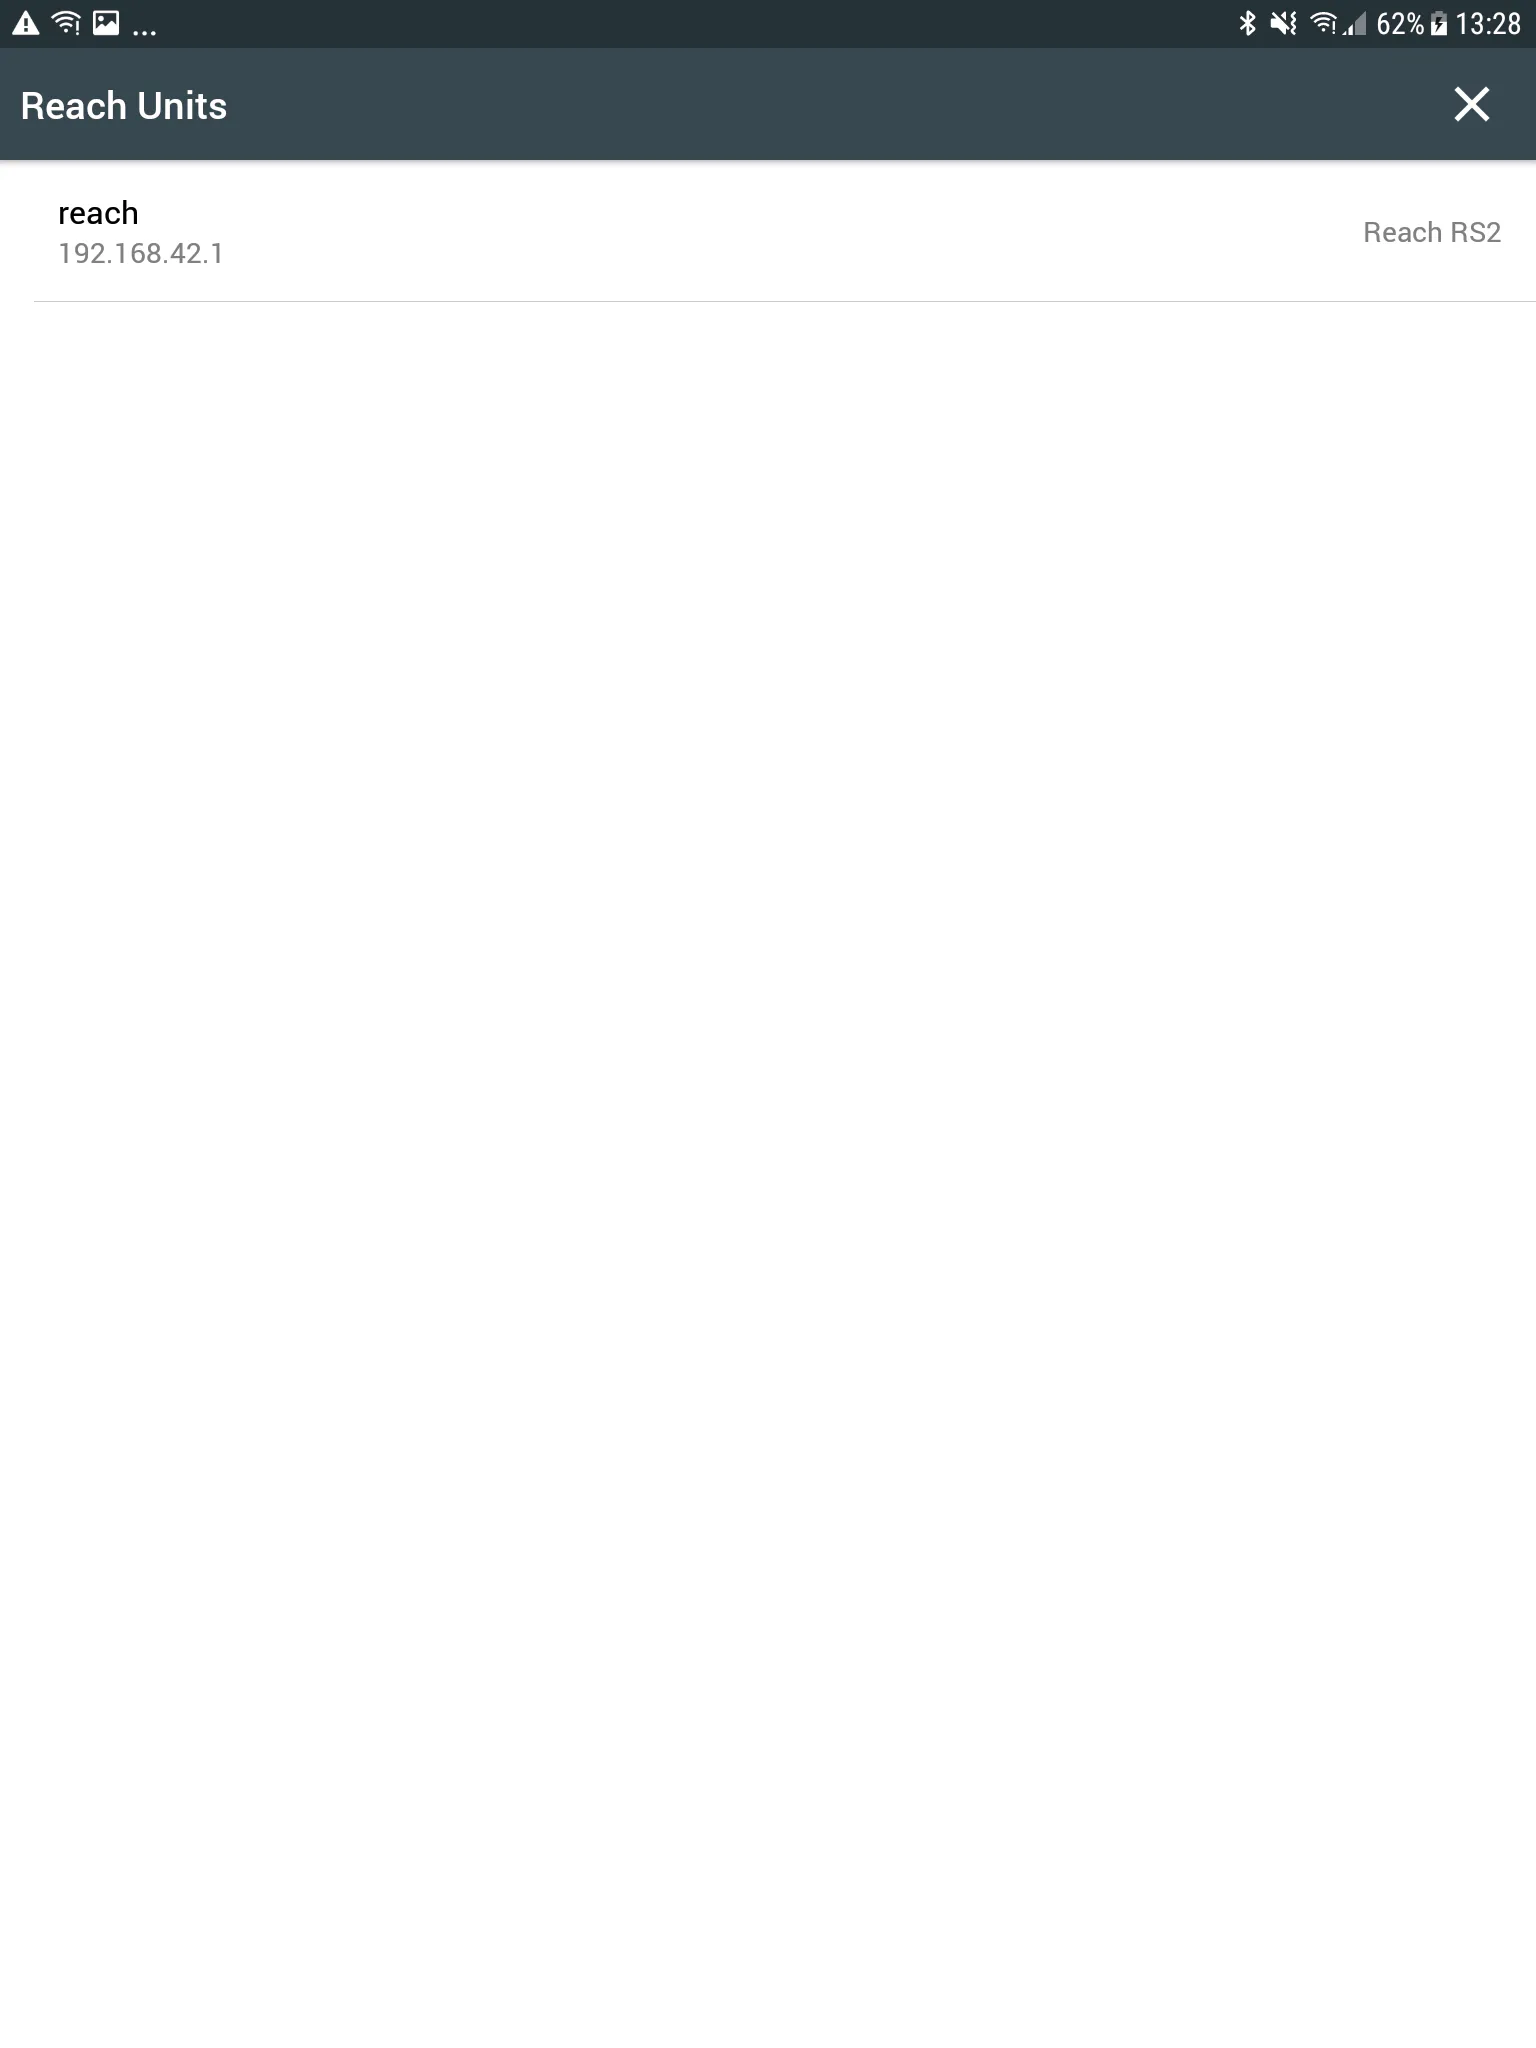
Open the ReachView app and select the EMLID receiver.
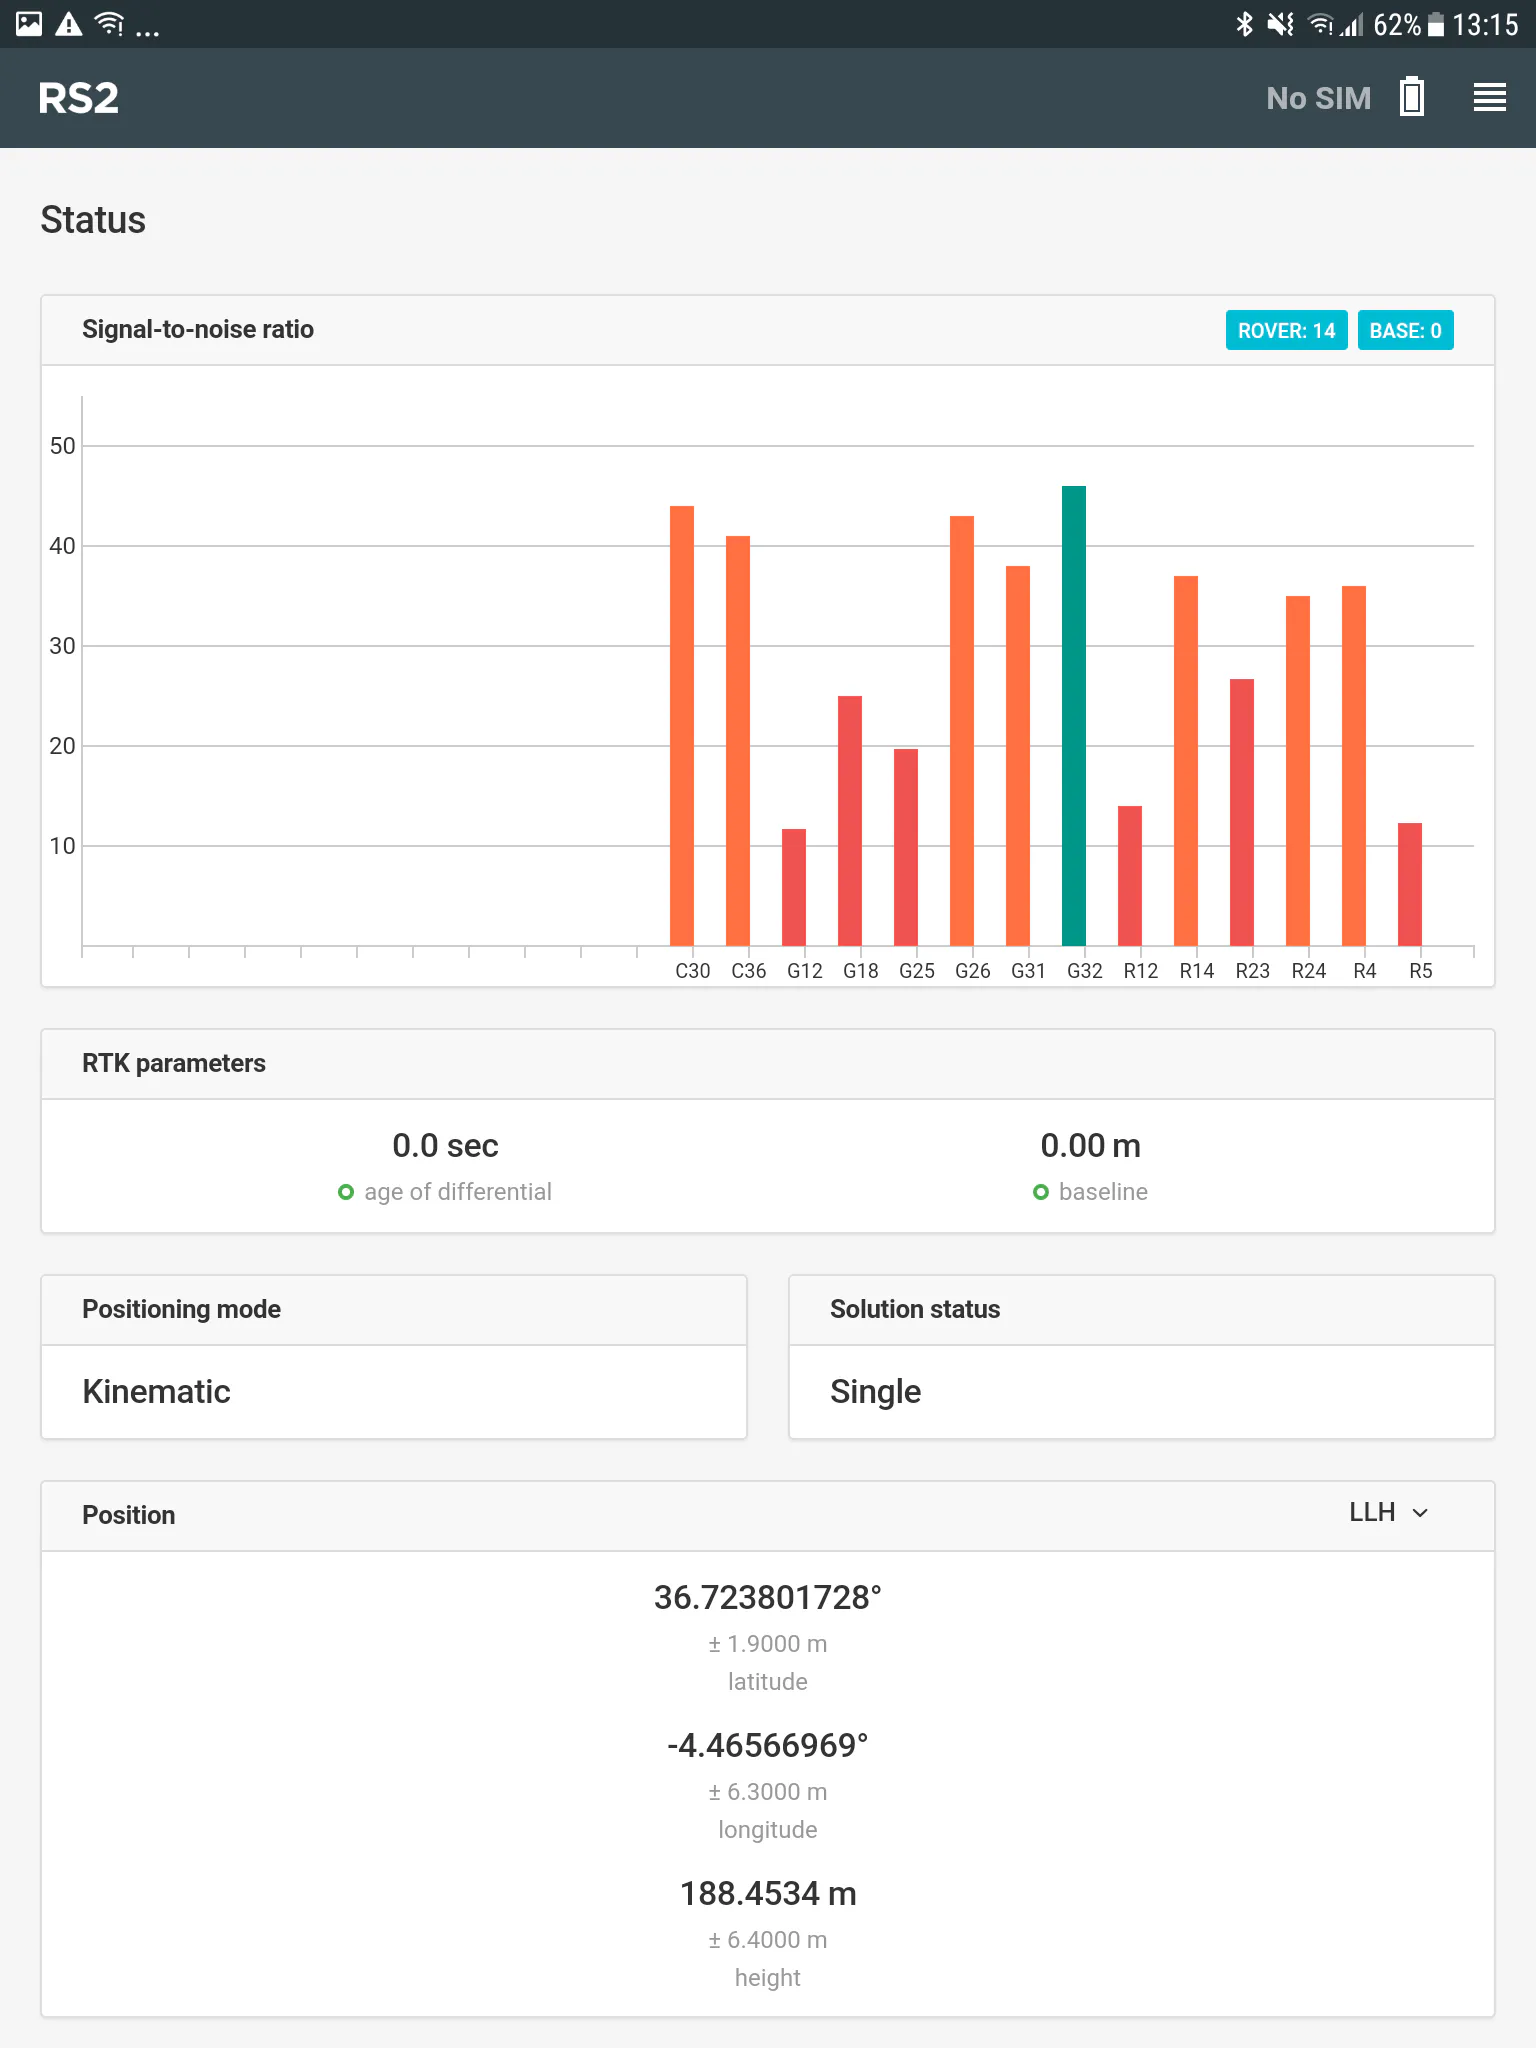
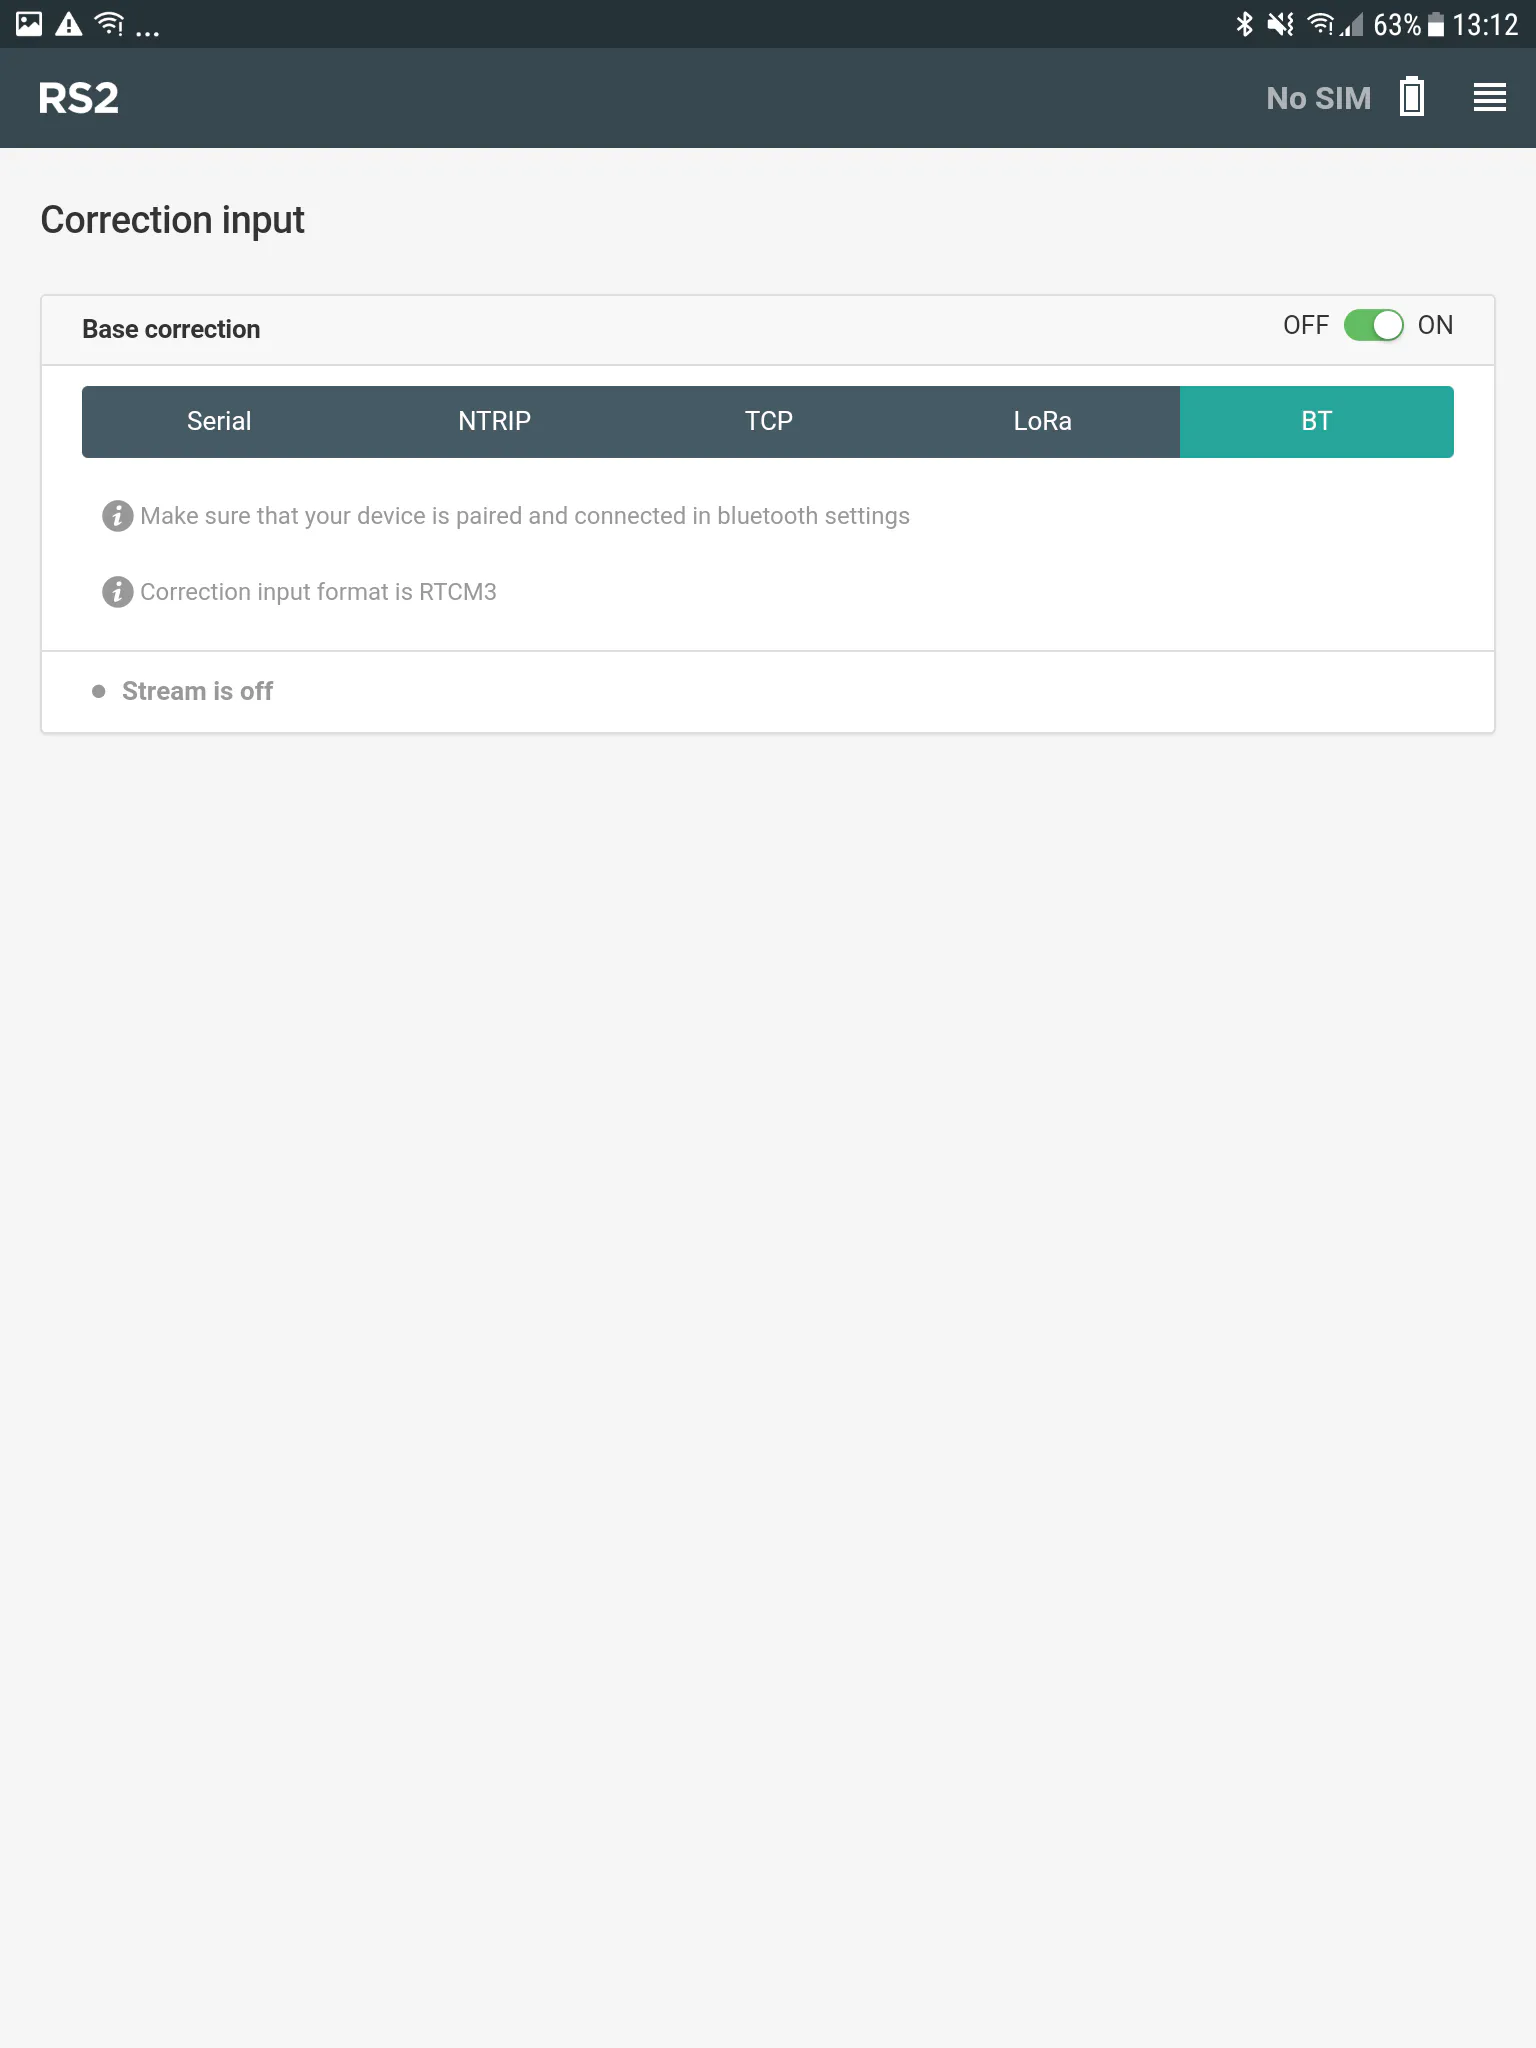
Open the ReachView menu and select Correction Input.
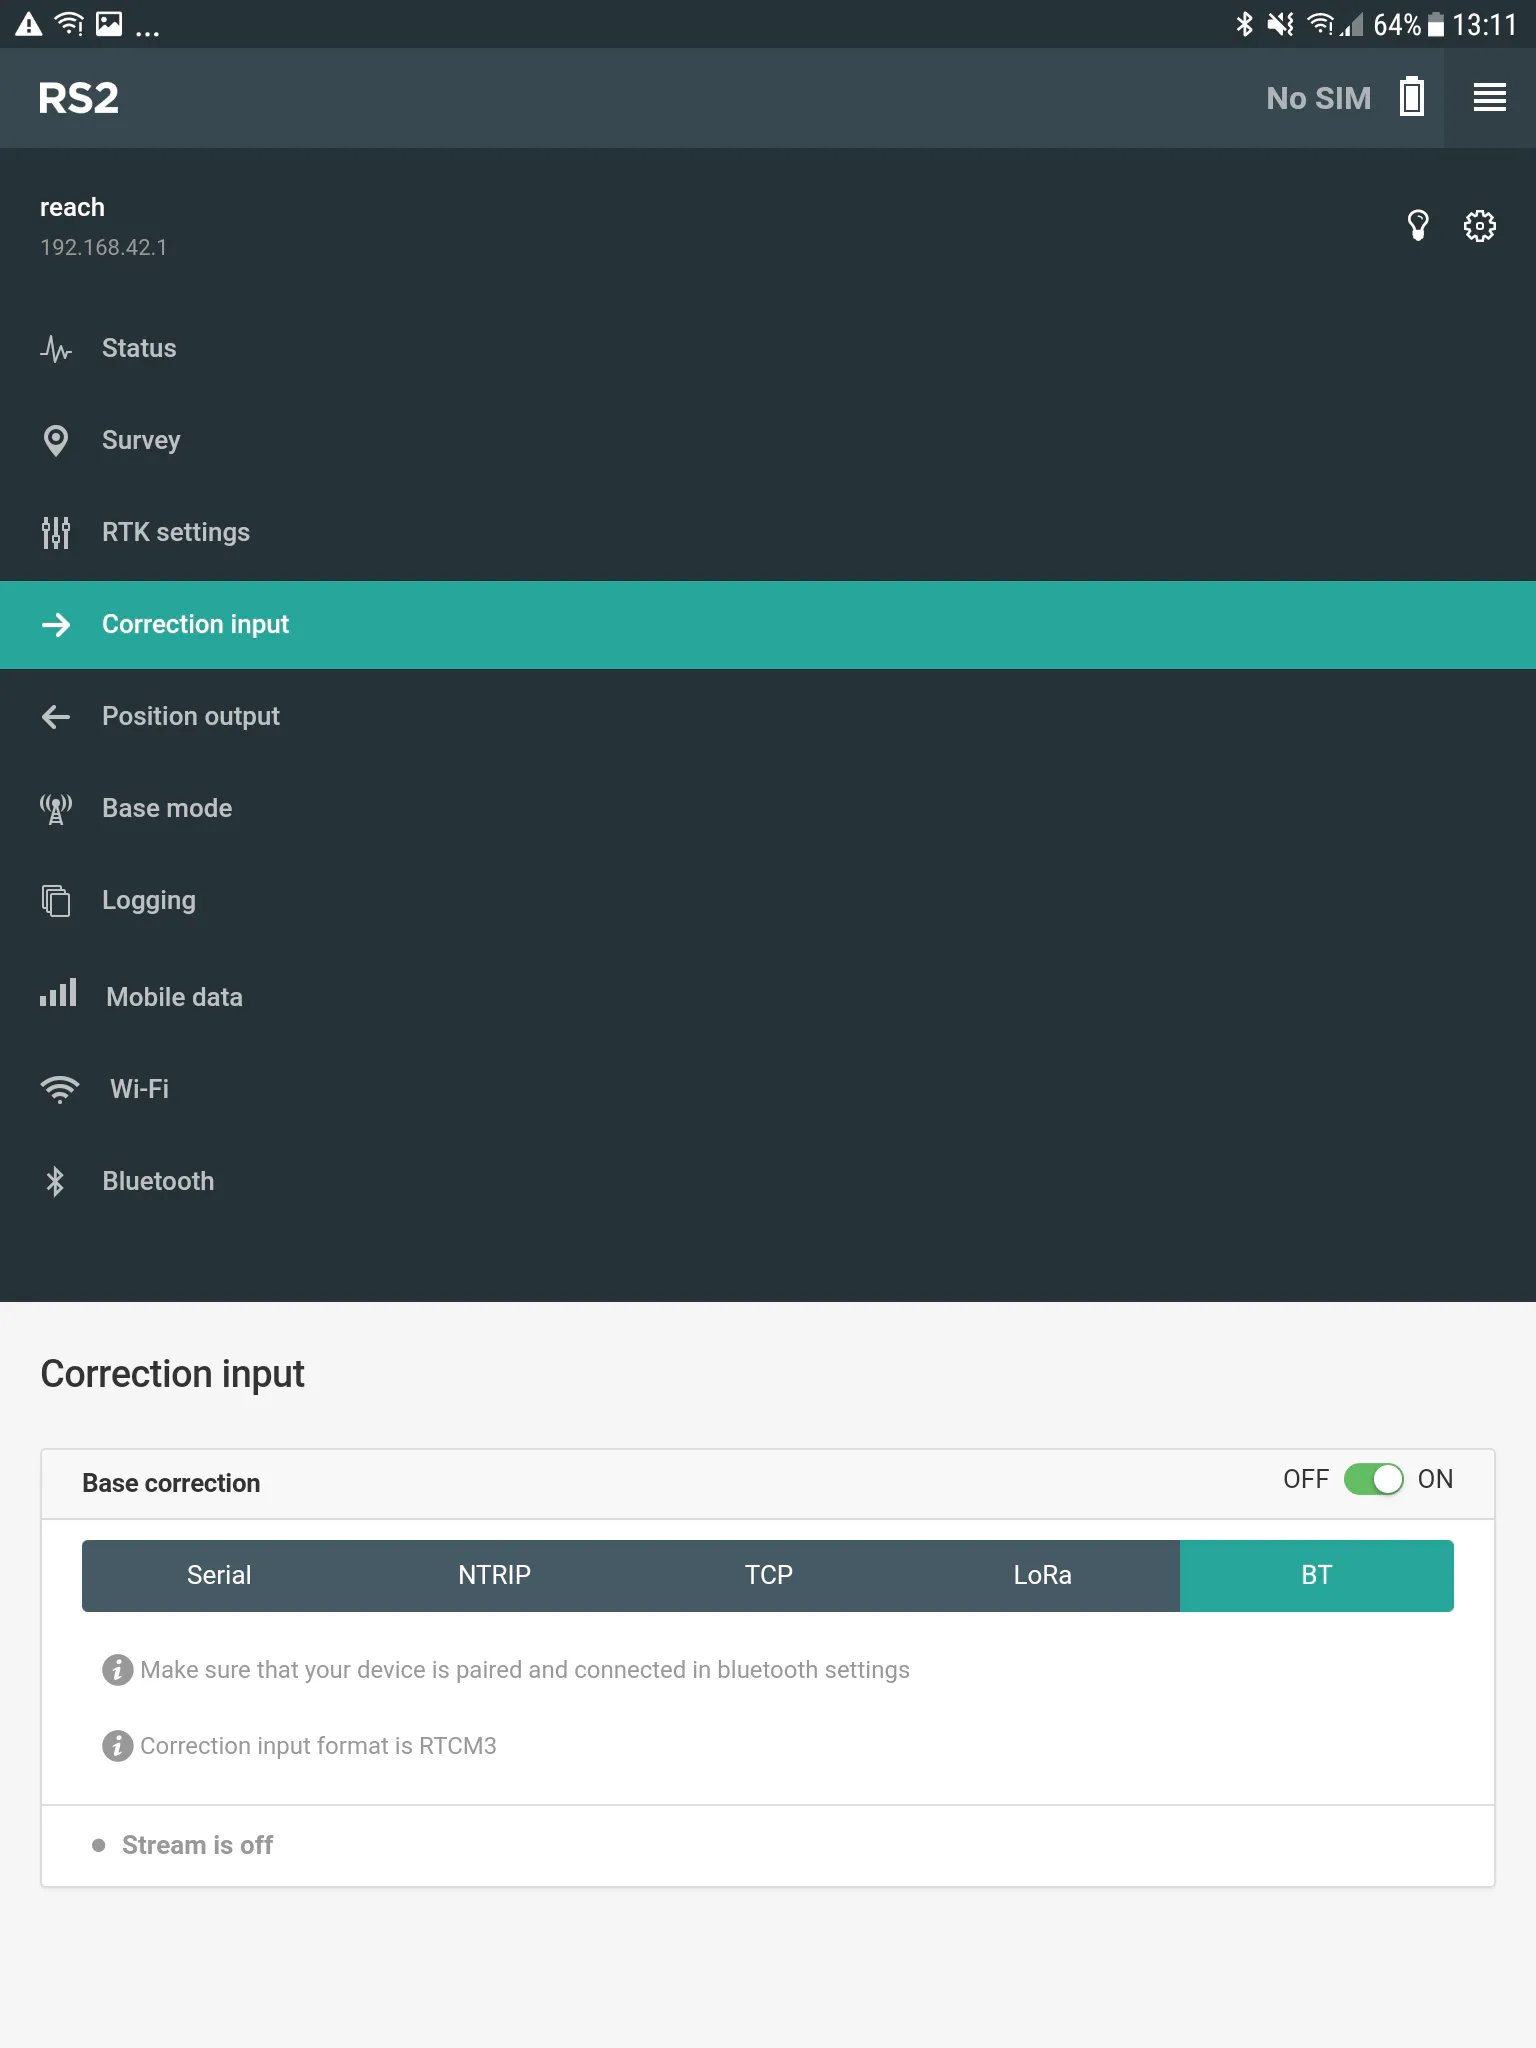
Select the BT option, set the corrections Format of the mountpoint you are going to connect to, and check Send NMEA… if the mountpoint needs it.
Open the ReachView menu and select Position Output.
Select BT, switch on Output 1 and set NMEA as the output Format.
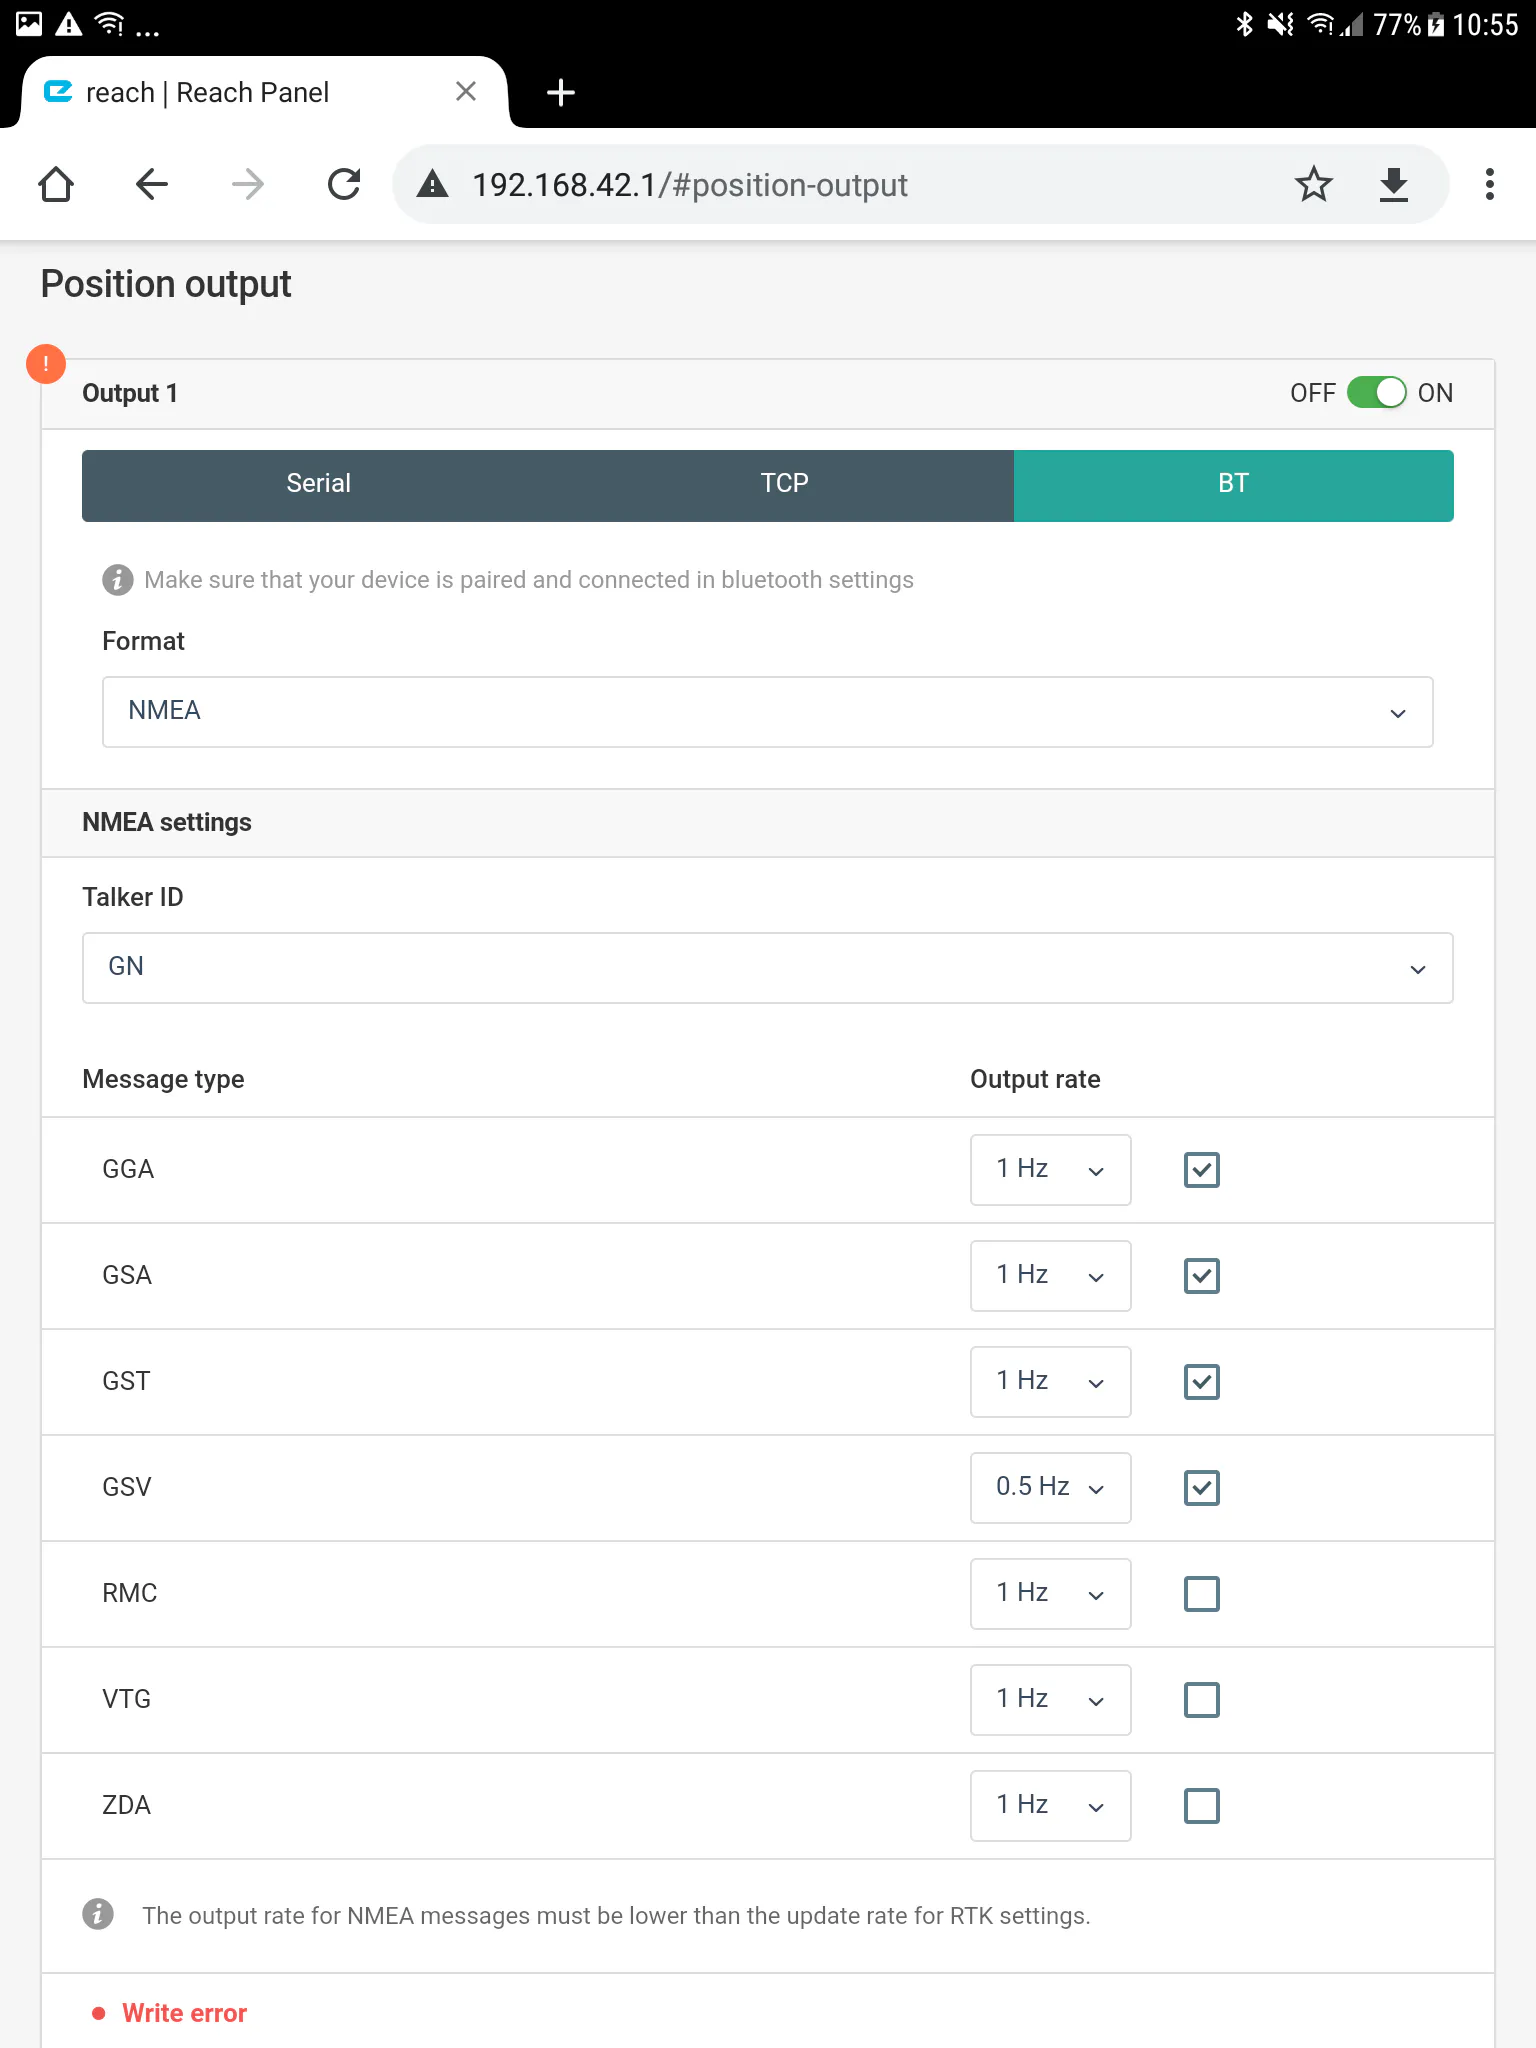
To get TcpGPS working with any receiver, it needs the following NMEA messages:
GSA (1Hz)
GGA (1Hz)
GST (1Hz)
GSV (0.5Hz)
The remaining messages are not processed by TcpGPS, so it is better to disable them to avoid saturation and improve the performance of both the GNSS and the application.
The frequencies described here are the ones recommended for normal field work. A higher frequency for GGA may be necessary if, for example, you are taking points in a vehicle at high speed.
Close the ReachView app and open TcpGPS.
Connection to the EMLID GNSS receiver in TcpGPS
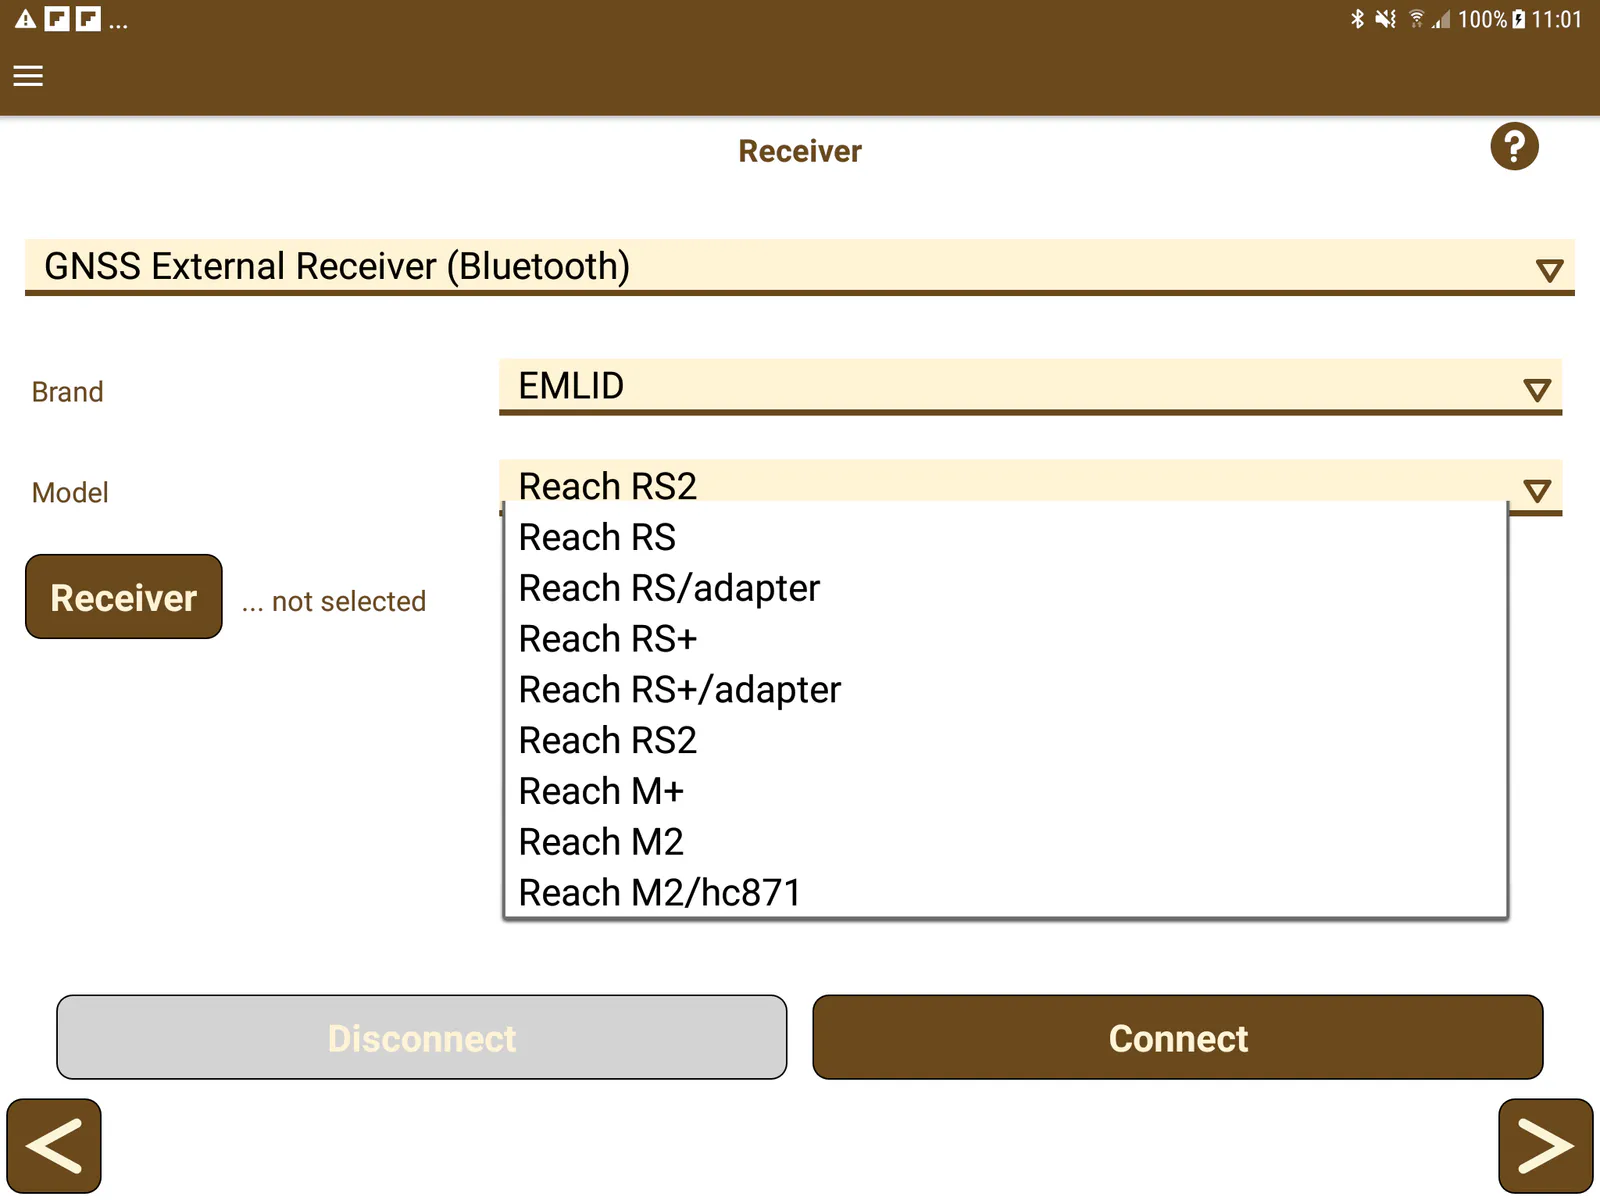
From the receiver assistant at the start of the application, clicking the receiver button, or via Menu > Receiver > Connection on the main screen, the user accesses the section for connecting to a receiver via Bluetooth.

In this screen the user must select the brand (EMLID) and the model to connect to. Then, by clicking the Device button, the Bluetooth search screen is displayed. This screen shows a list of the devices available via Bluetooth, and it can be refreshed by clicking the Search button if the receiver's identifier is not listed.
Rover NTRIP with data collector
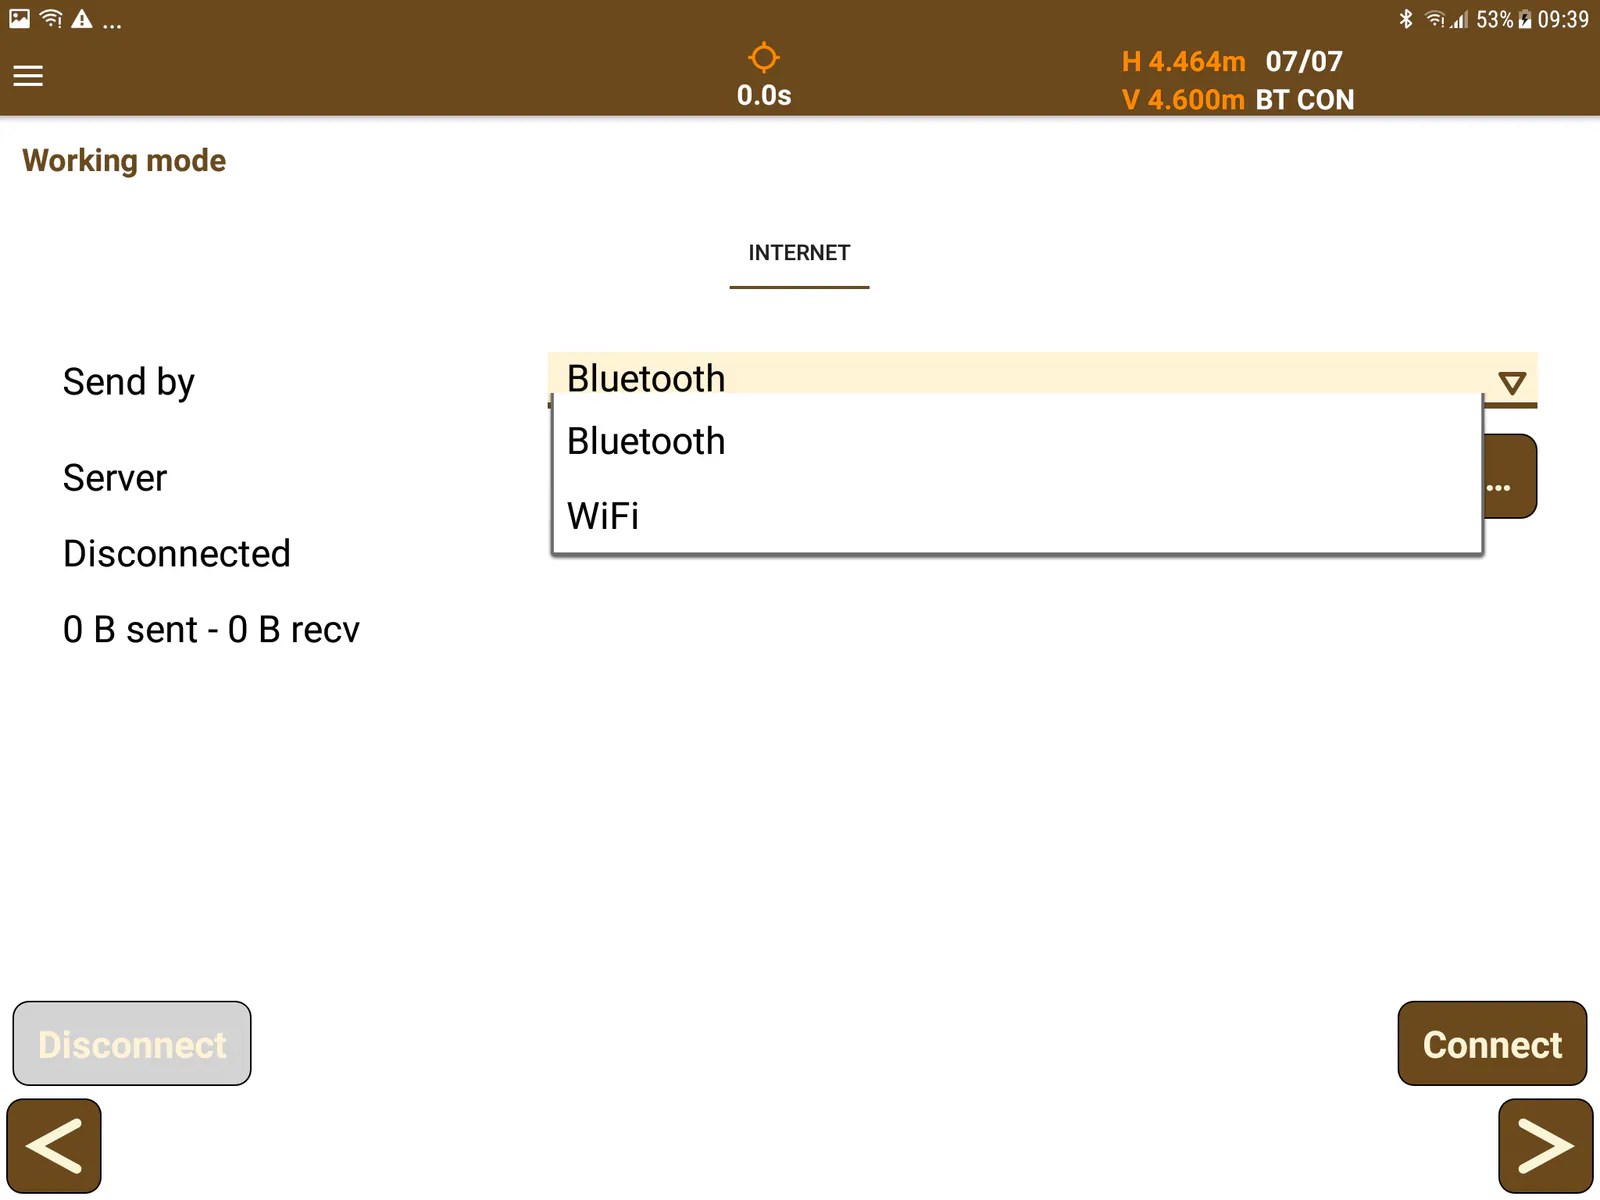
In this case, TcpGPS connects to an NTRIP server and sends the corrections received to the GNSS device, using Bluetooth or WiFi.
In this mode, the available parameters are:
Parameter | Description |
|---|---|
Send by | Select the connection to send the corrections: Bluetooth or WiFi. |
IP/URL (WiFi) | IP or URL to connect to the GNSS using WiFi. |
Port (WiFi) | Port to connect to the GNSS using WiFi. |
Server | NTRIP server used as the source of corrections. |
If WiFi will be used as the correction input, it is recommended to follow these instructions:
Configure the RS2 to connect to the device's WiFi hotspot, which can be set up on the Android device.
Insert the SIM card into the Android device.
Enable the shared WiFi hotspot.
Reset the RS2 and it should connect automatically to the configured WiFi hotspot. You can check whether it has connected from the shared WiFi hotspot section of the Android device, and also check the IP that has been assigned to it.
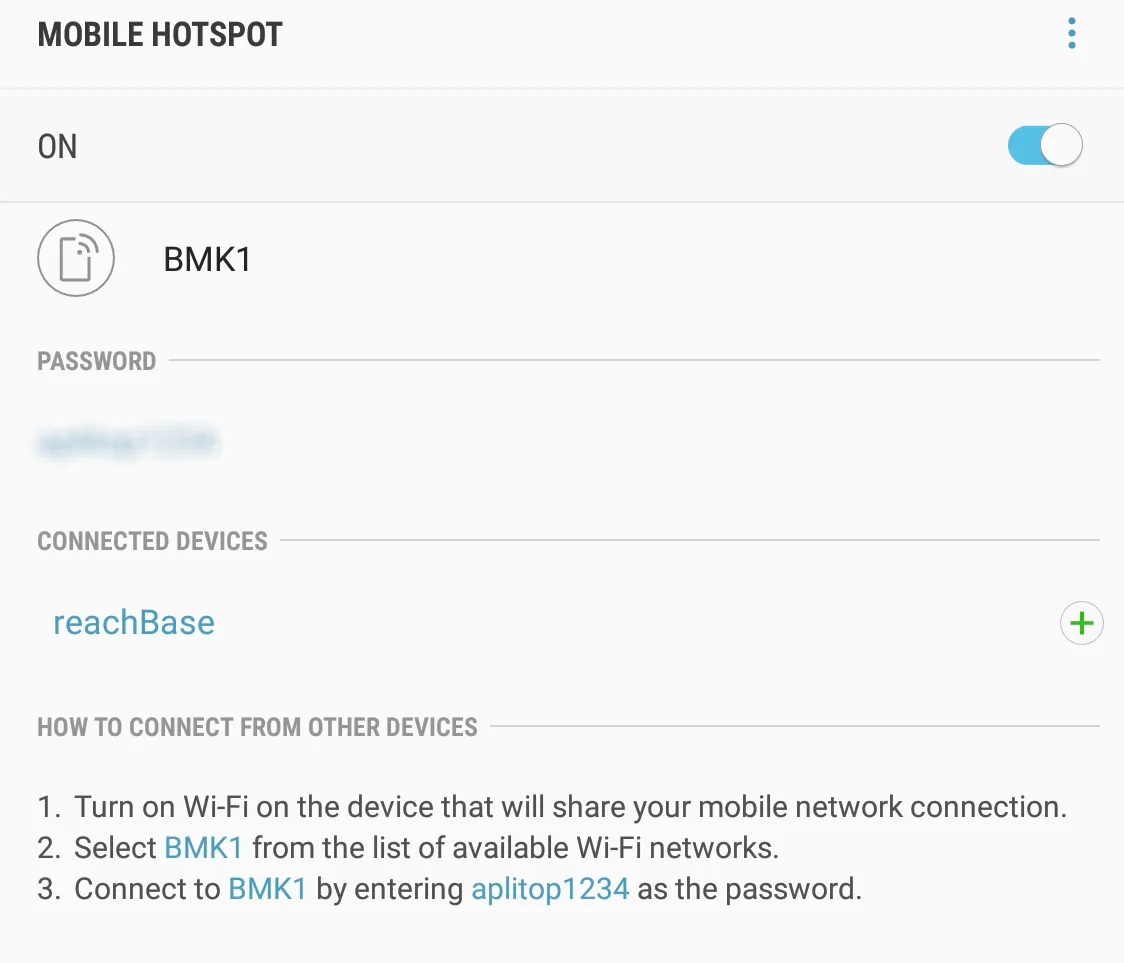
Enter the Emlid configuration in the Web Service option of the Working Mode section.
Go to Correction Input and select TCP.
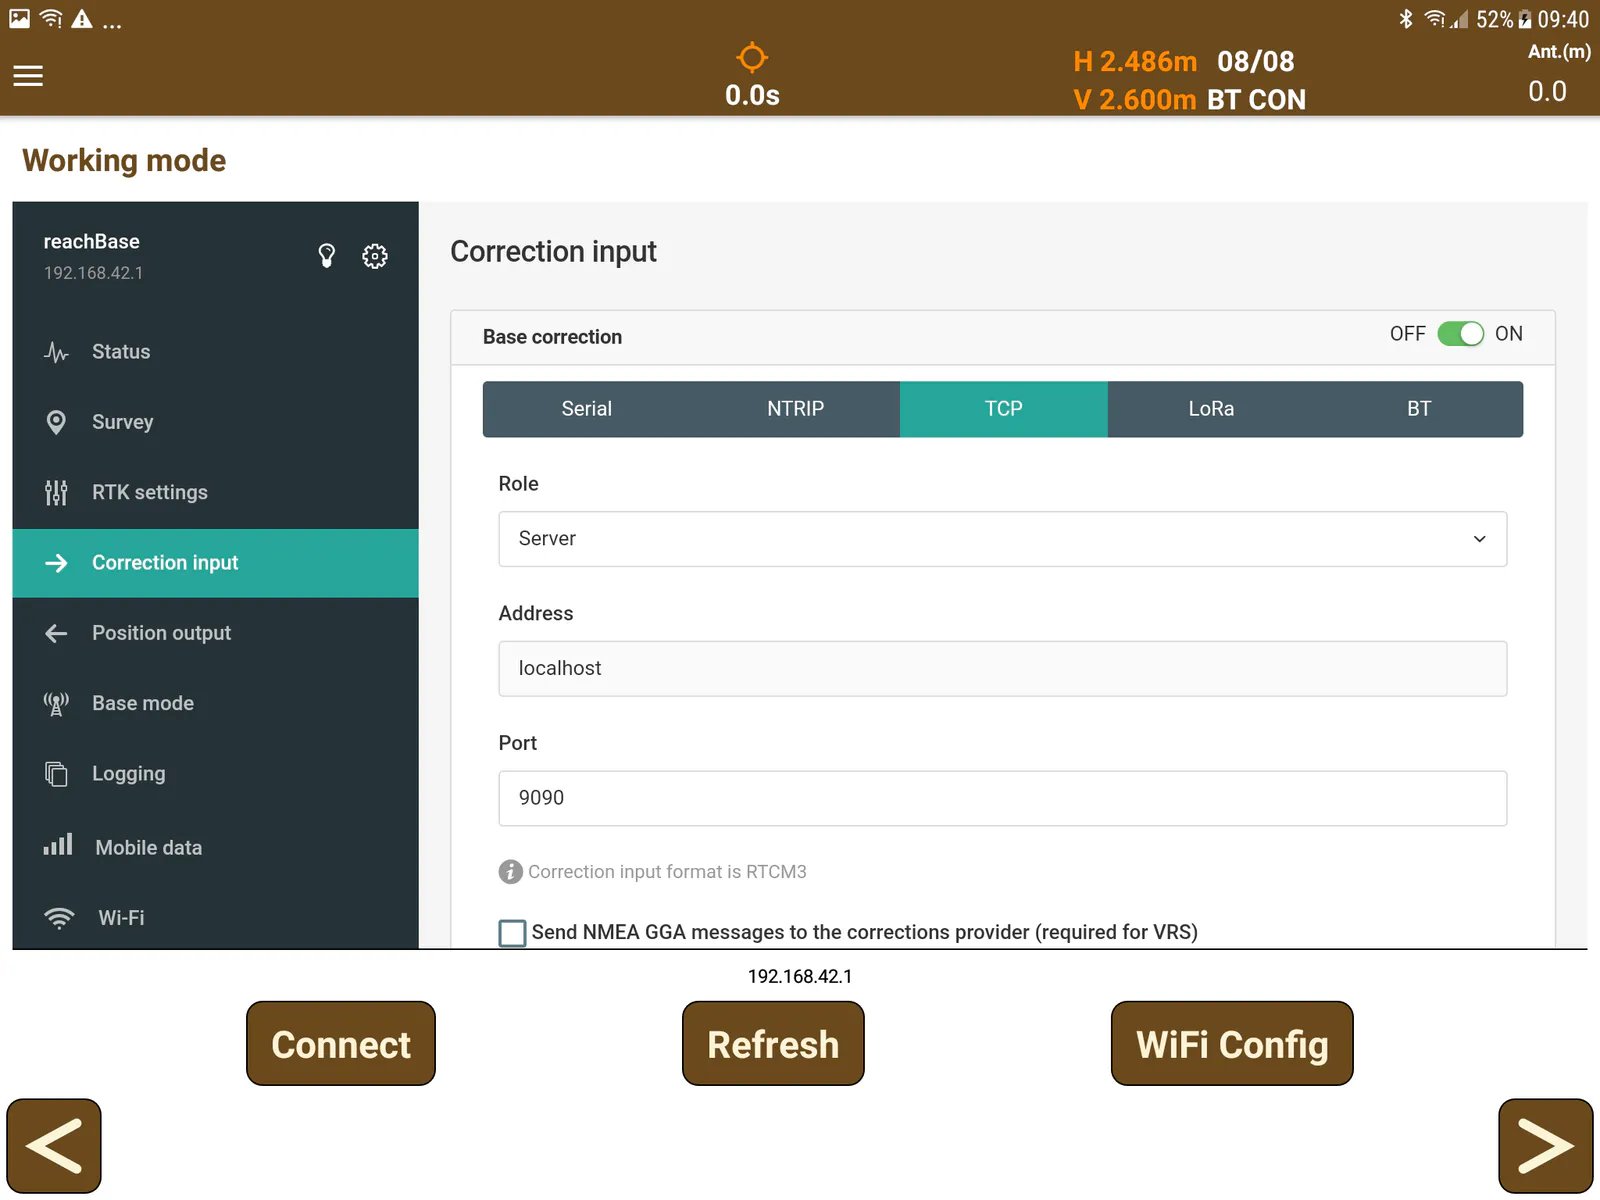
Set the server option and choose a port for the connection.
The corrections can now be sent over WiFi from TcpGPS, simply by adding the IP/port configuration.
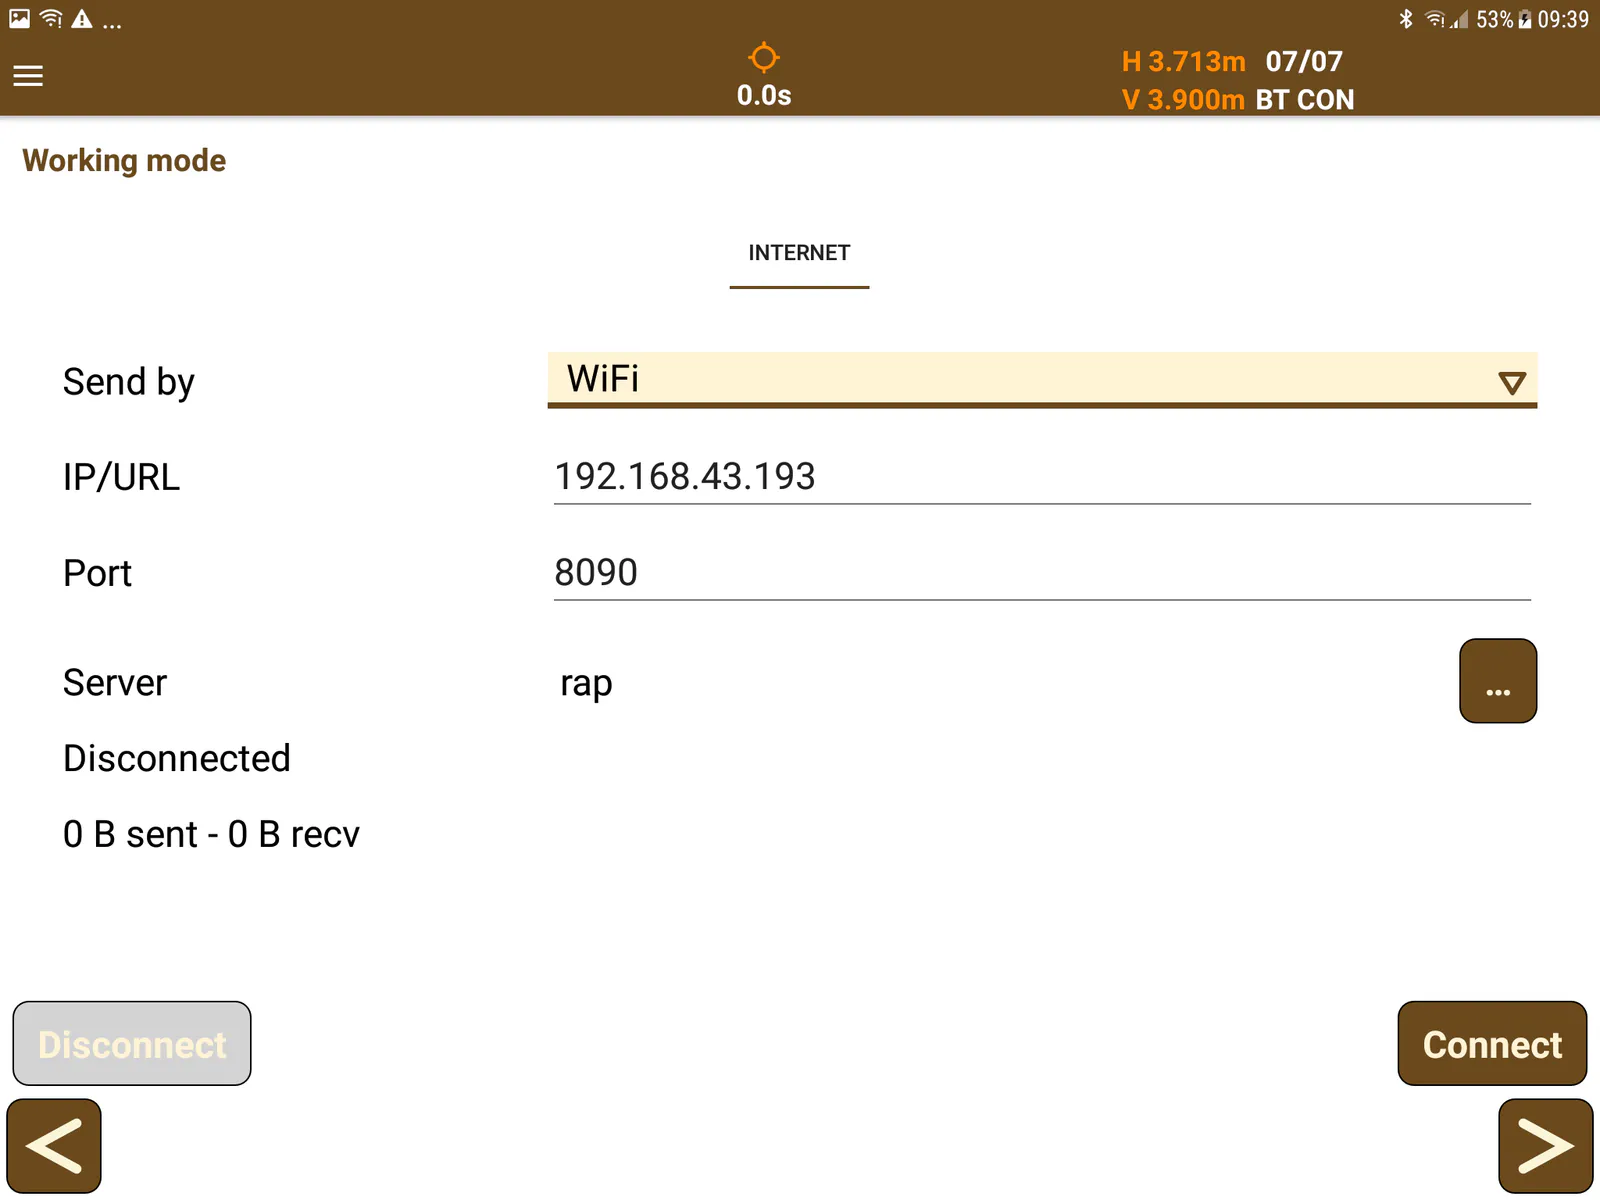
NTRIP server configuration
The Networked Transport of RTCM via Internet Protocol (NTRIP) is a protocol for streaming differential GPS (DGPS) data over the Internet in accordance with the specification published by RTCM. NTRIP is a generic, stateless protocol based on the Hypertext Transfer Protocol HTTP/1.1, enhanced for GNSS data streams.
A dialog lets the user configure an NTRIP server, either by adding a new one by selecting the New option from the list, or by choosing a previously configured server from the same list.
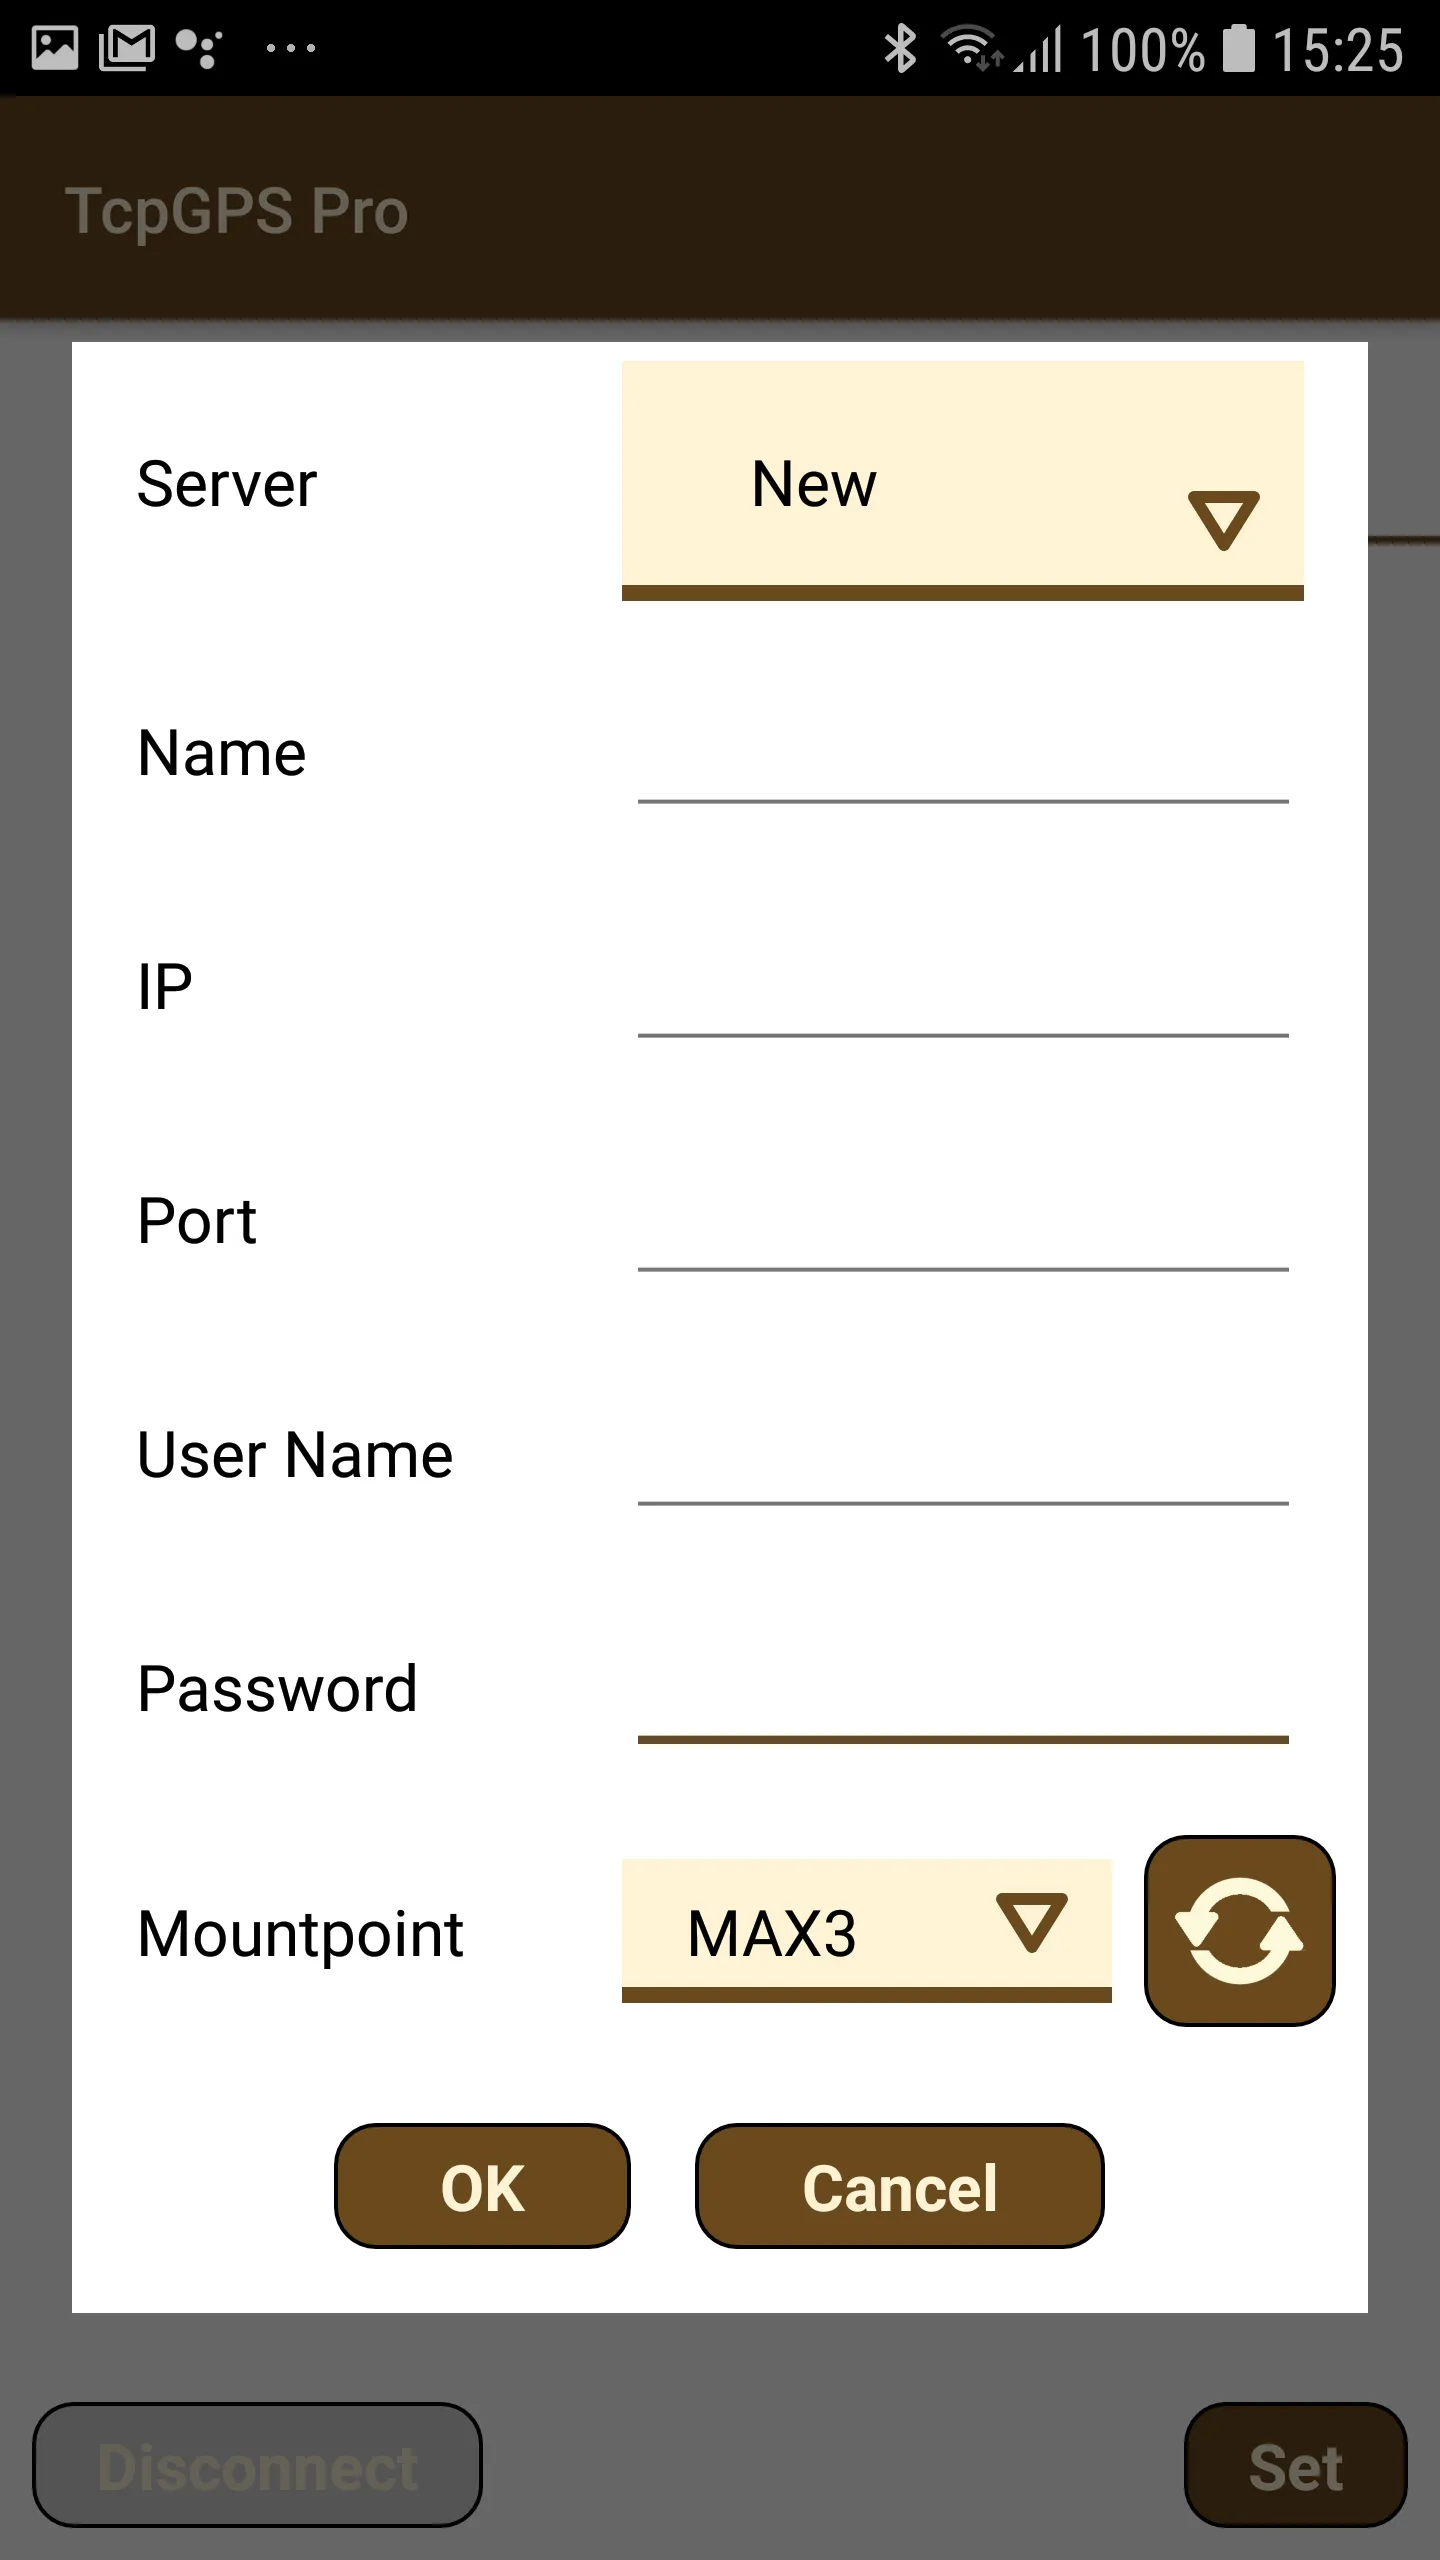
To add a new NTRIP server, the user must enter a name for the server configuration and its data: the IP and port to access the service, and the username and password for identification. Once these details are entered, clicking the refresh button requests the list of mountpoints, which provide different types of corrections depending on their configuration.