
Support
How to create an NTRIP profile?
REQUIREMENTS
tcpGPS v2.0+
Details
Previous considerations
Not all brands and models support RTK configuration with NTRIP servers.
Creating an NTRIP profile is only available if you have previously connected to the GNSS receiver.
NTRIP profiles can be used for both the tcpGPS NTRIP client configuration and the NTRIP client incorporated, in many cases, into the GNSS receiver.
The tcpGPS NTRIP client is configured via the Rover > Internet option (or NTRIP in some cases), and the receiver's NTRIP client via Rover > GPRS.
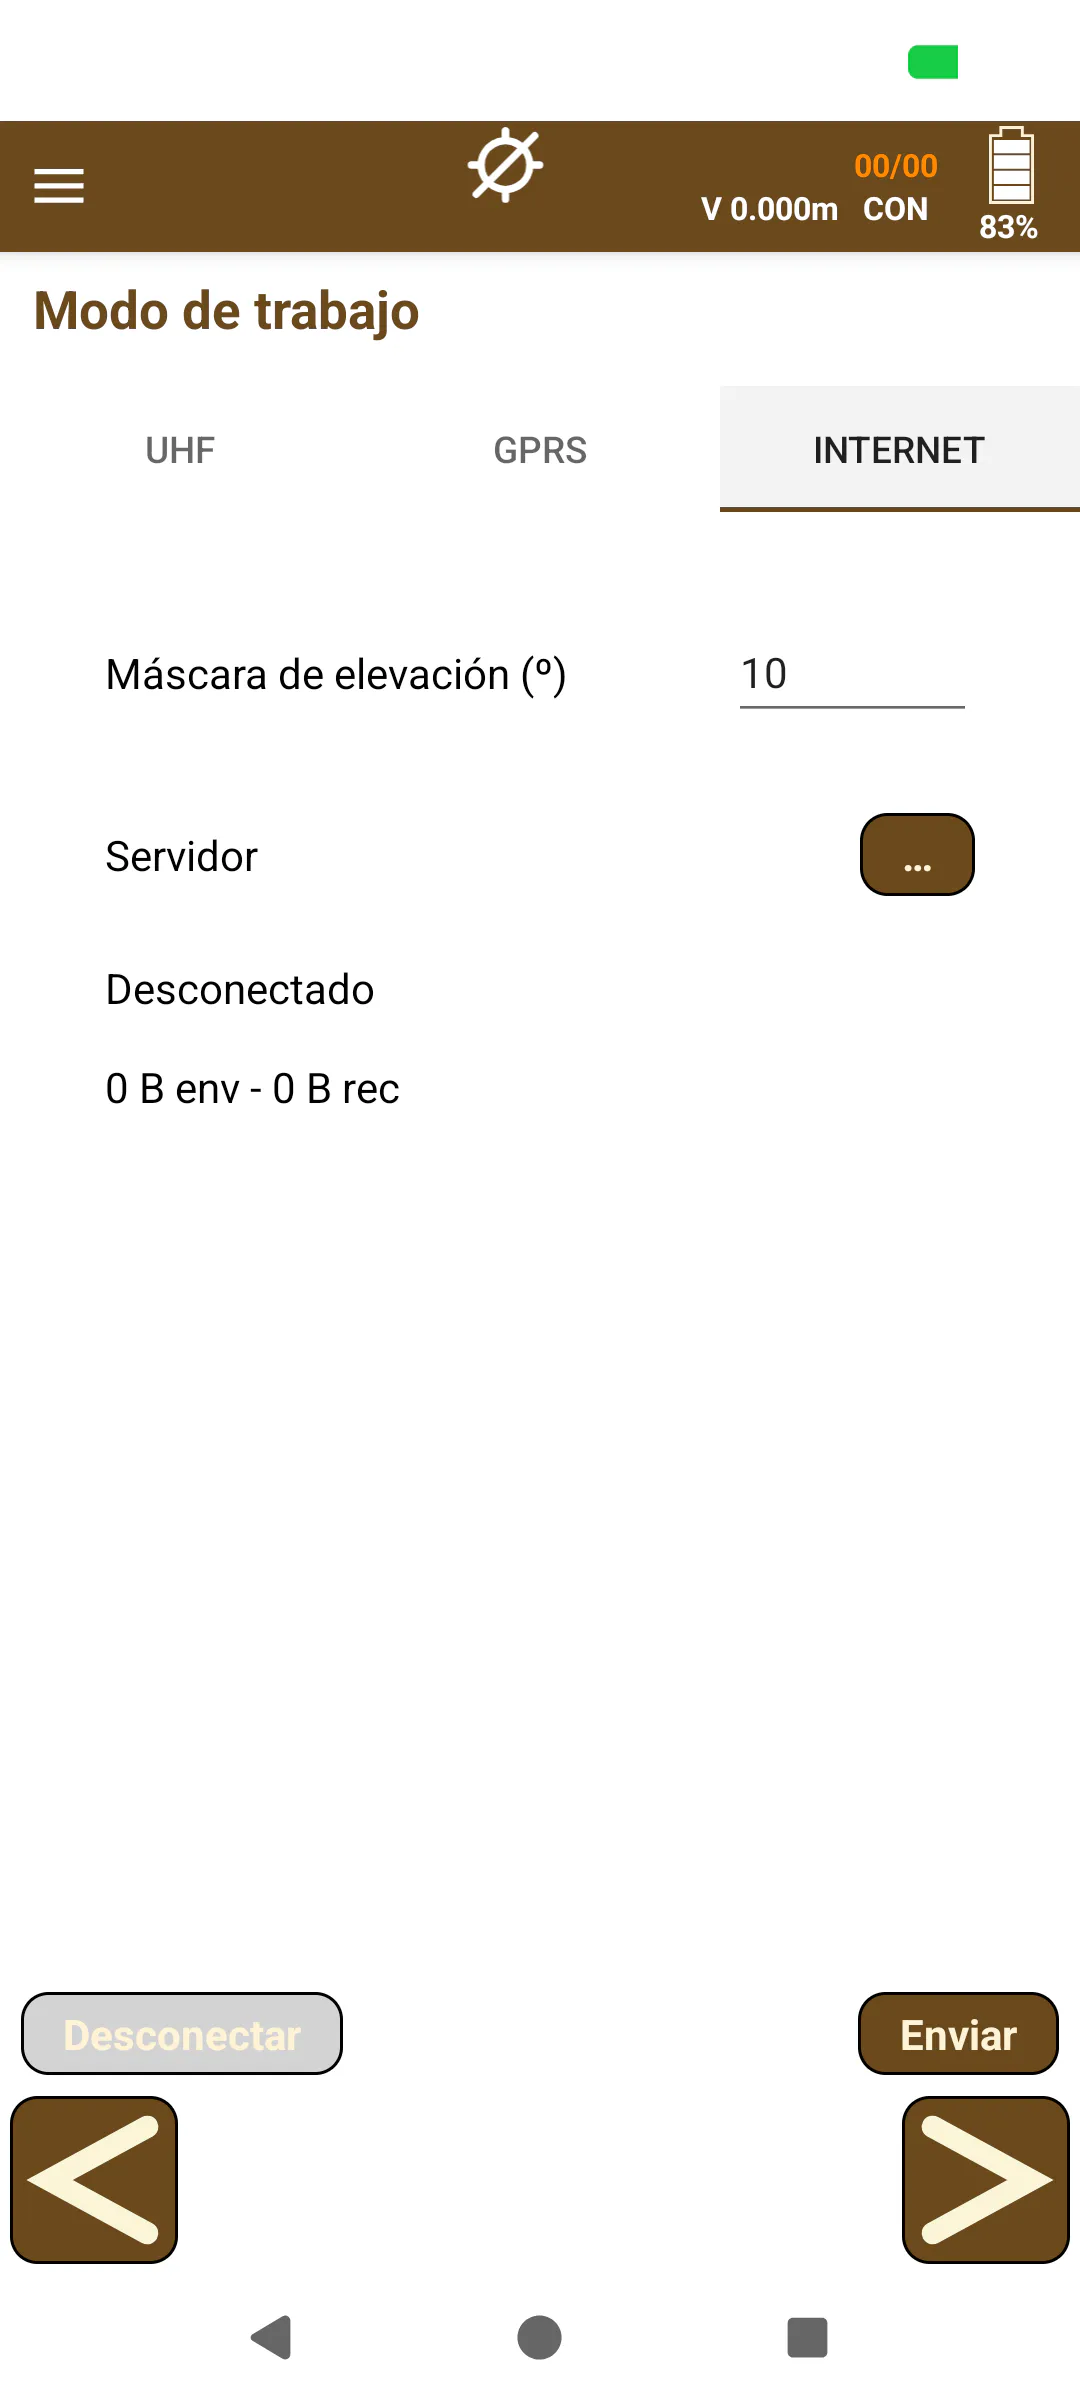
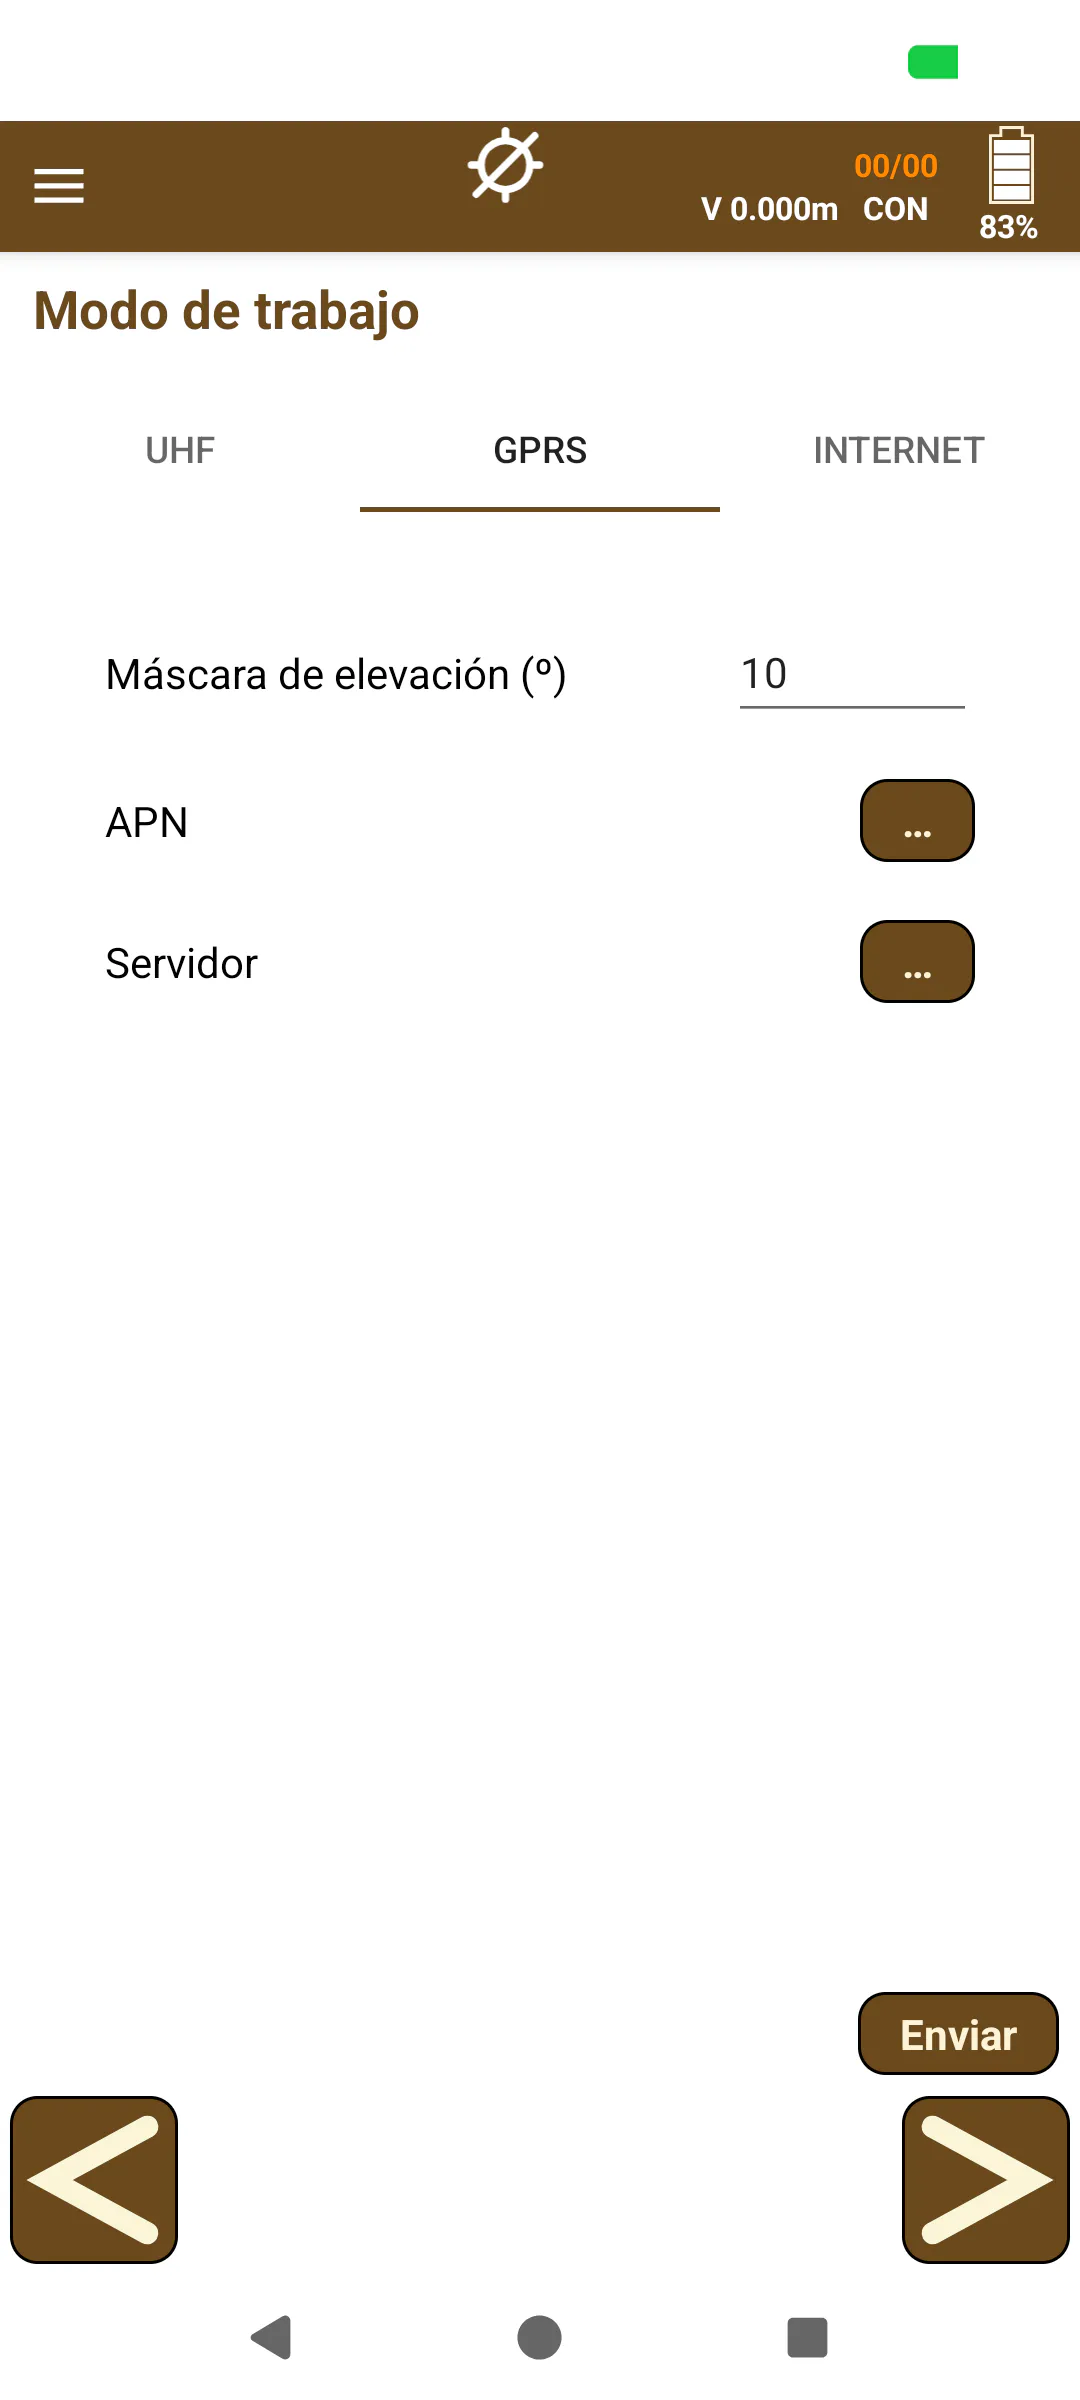
Steps to create the NTRIP profile
Run tcpGPS.
Connect to the GNSS receiver.
Go to Device > Configure Receiver.
Press the Rover button.
Go to the Internet (NTRIP) tab, or GPRS, if available.
Press the ellipsis button, to the right of the Server label.
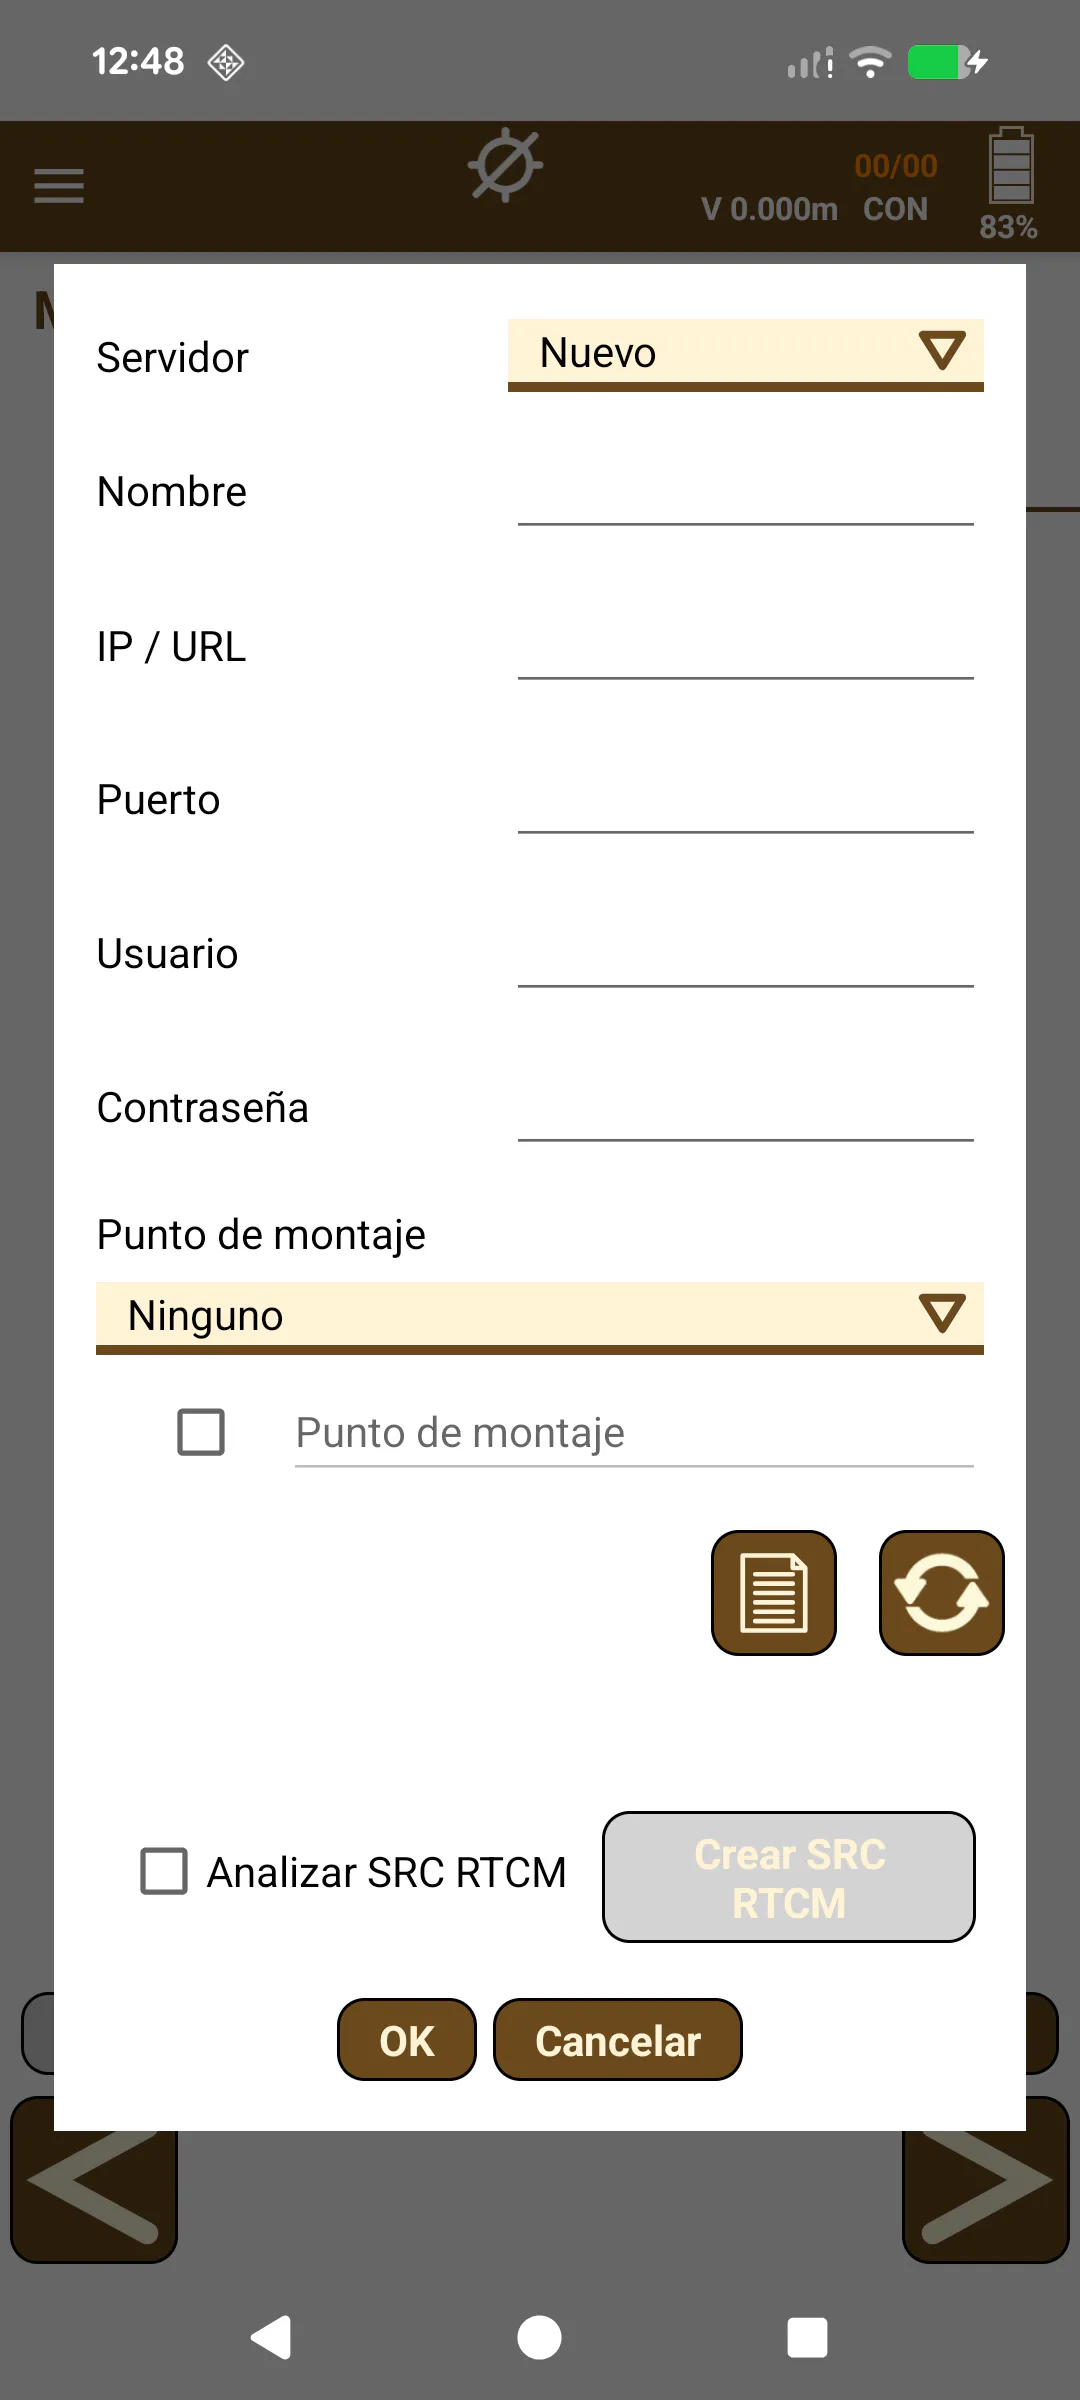
Select New, in the Server list.
Enter a Name for the profile.
Enter the IP or URL. It is important to check that there are no blank spaces.
Enter the Port.
Enter User and Password.
Load the mount point list with the button:

Select a mount point from the list and press OK.
Notes
Although it is recommended to select the mount point from the list, you can manually enter the name by checking the box located below that list.
If the mount point includes RTCM transformation messages, it is possible to create the corresponding coordinate reference system by activating the Analyze RTCM CRS checkbox.