
tcpGPS
CAD tools - GPS v2
10.10 CAD tools
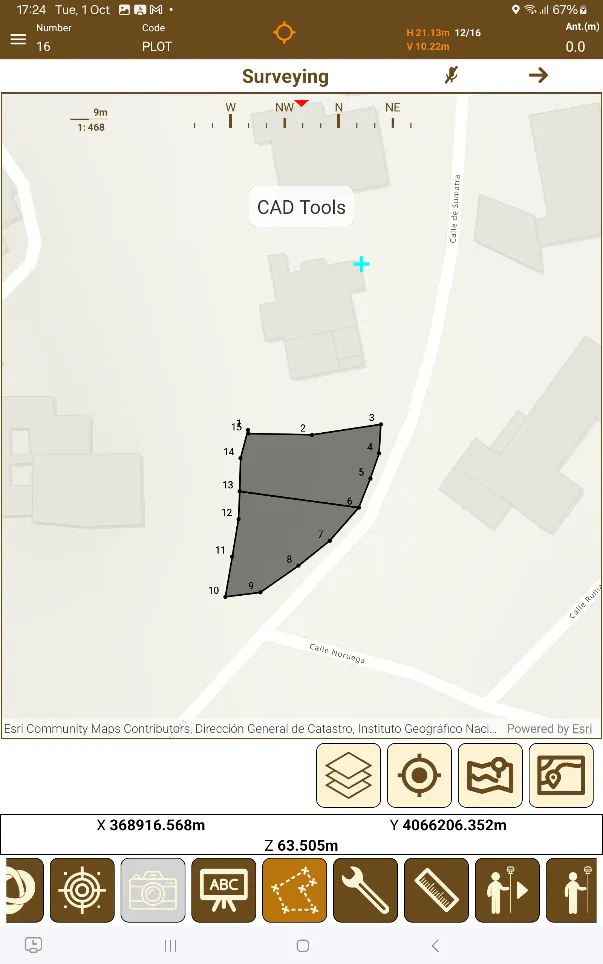
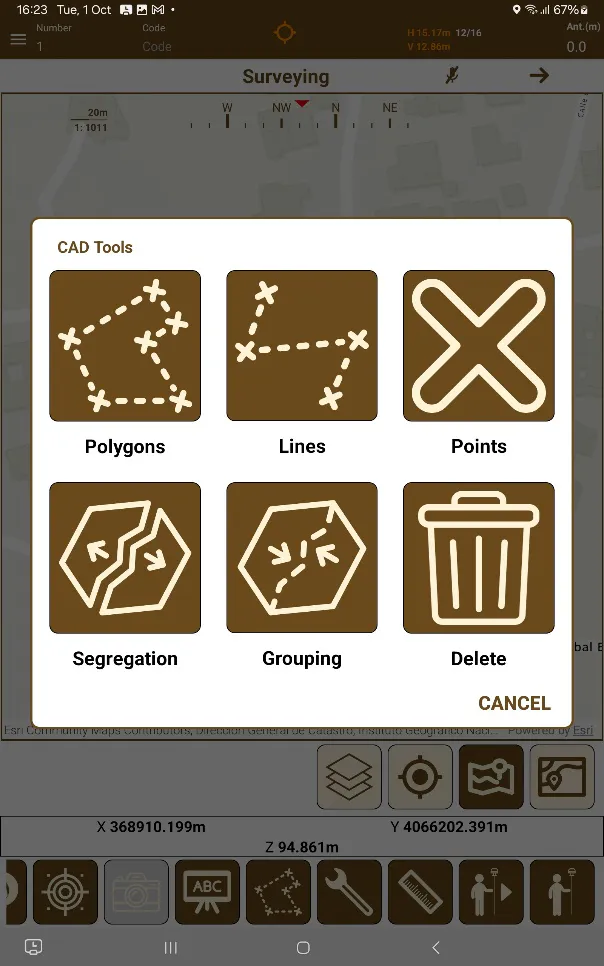
Pressing the CAD tools button  located in the Survey window button panel opens the dialog containing the different CAD options, which are described in the headers below:
 |  |
|---|---|
Figure 91. Launching CAD tools | Figure 92. CAD tools dialog |
Polygons
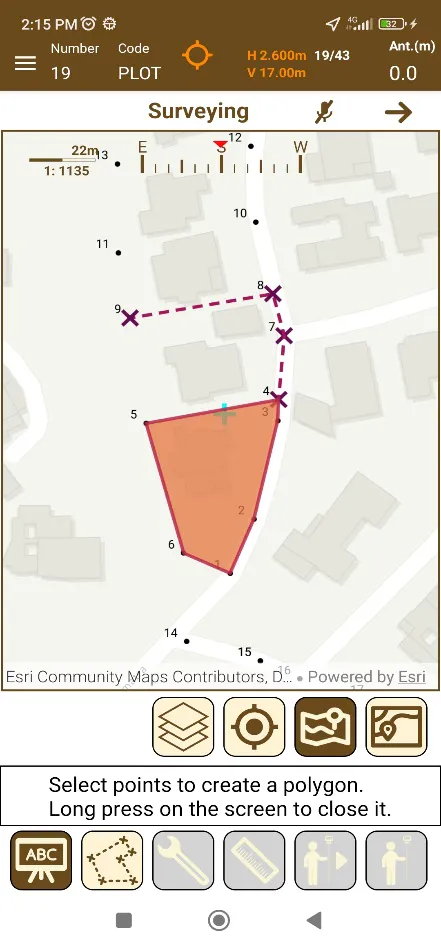
The button allows the adding of polygons or parcels consecutively. The button to be added as vertices must be touched to create the entity.
To save the polygon, press its first vertex again or long press on the screen. After this confirmation, the edges of the plot will become continuous, and the interior area will appear colored. After this the tool proceeds to take the next polygon. A Polygonal type of code must be selected first.
To close this tool, press the button icon again, which now appears blank.
 |
|---|
Figure 93. Creating plots with polygon tool |
Lines
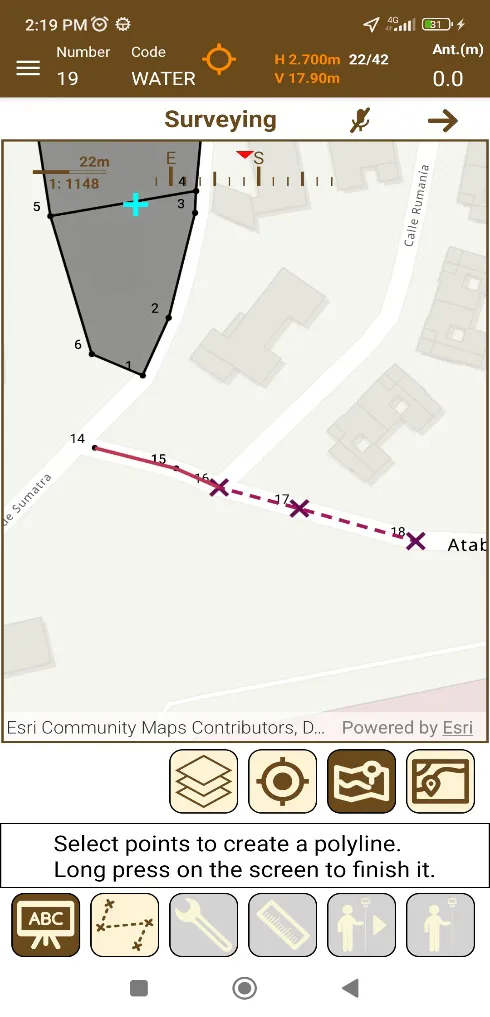
Pressing the  button allows adding lines by clicking on the points previously taken as vertices, if the current code is of a line type.
To confirm the line, long press anywhere on the screen, this will save the current line and prepare the tool to take the next one.
To close this tool, press the button icon again, which now appears in a lighter color.
 |
|---|
Figure 94. Creating lines with line tool |
Points
Pressing the  button option allows taking a point by touching the screen as long as the current code is of the point type and the layer associated with this code exists.
Keep in mind that these points taken with a manual screen tap lack the precision of those taken with a connected GNSS receiver.
Since they are not taken using geolocation, they lack associated raw data or height.
Segregation
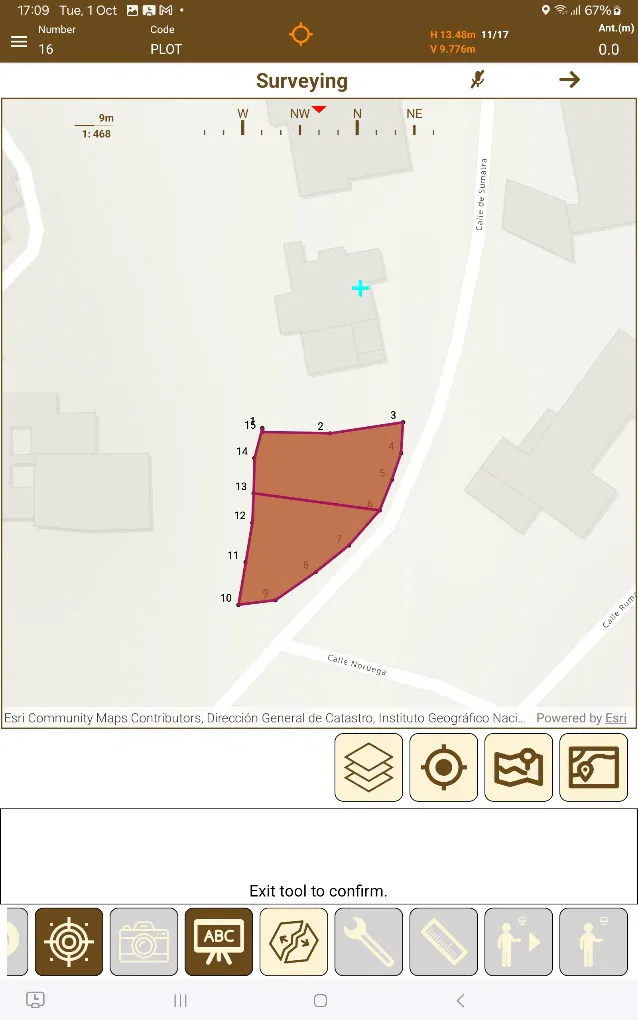
After selecting the  button, it's possible to segregate a single parcel or polygon into two different ones. The two parcels created from the one being split will both share the same code as the one being split into two as well as GIS data.
To do so, first select the parcel or polygon to segregate, and then touch two vertices, the polygon will be split. To save the changes touch the button again, which has a light background now.
 |
|---|
Figure 95. Split a plot into two different ones using vertices |
Grouping
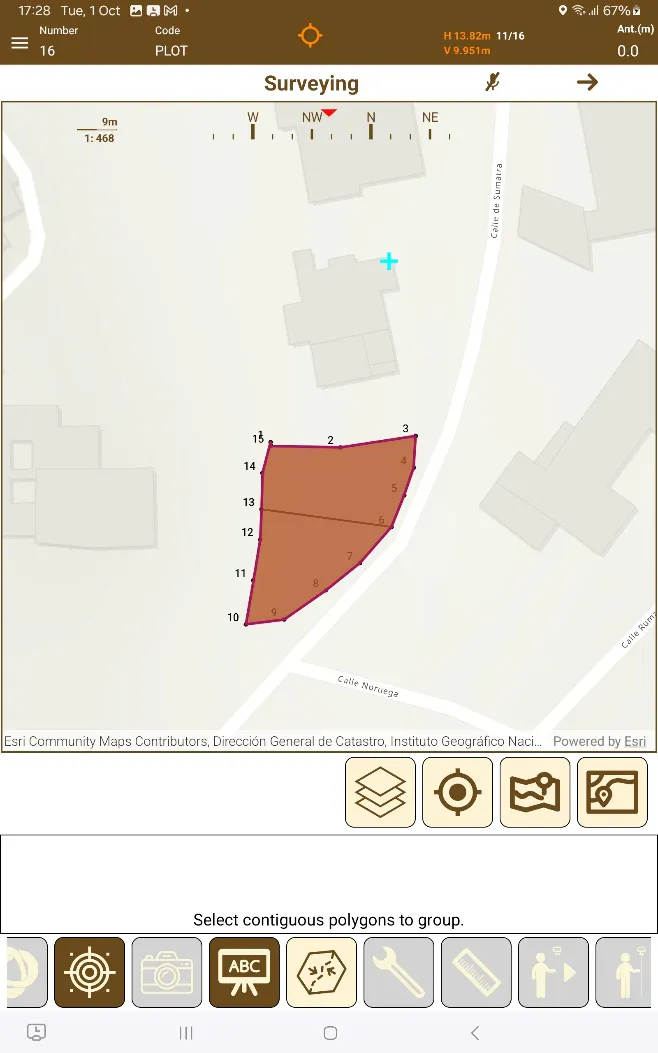
Pressing the  button allows merging two contiguous polygons or parcels into one.
The codes and GIS data from the polygon selected first will be used on the second polygon as they become one.
 |
|---|
Figure 96. Creating a single polygon out of two |
Delete
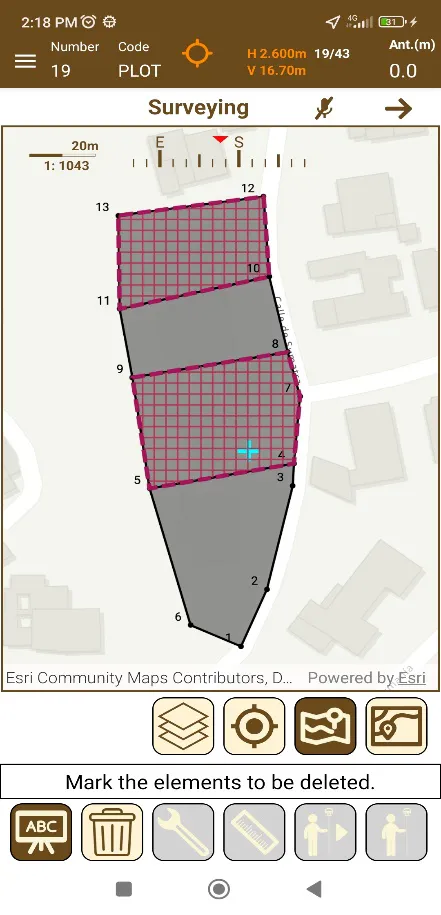
Pressing  Allows the deleting lines and polygons from the project.
Elements to delete are added one by one as they are tapped on the screen, the selected elements will be marked with a shade and by pressing the delete button again, these same elements will be deleted after prior confirmation.
 |
|---|
Figure 97. Deleting Tool |