
tcpMDT
Defining vertical alignment - MDT26
8.5 Defining Vertical Alignment
To define the vertical alignment, we will previously define its vertices, without entering curves. For this, we execute the command Vertical Alignments> Enter Vertical Alignment (or Vertical Alignments> Create> Enter) and create a new file called solera.RAS, with Parabolic type curves.
Once the new vertical alignment has been selected, we will introduce the station and elevation of each one of the vertices. Hence, we enter the vertices according to the information in the following figure.
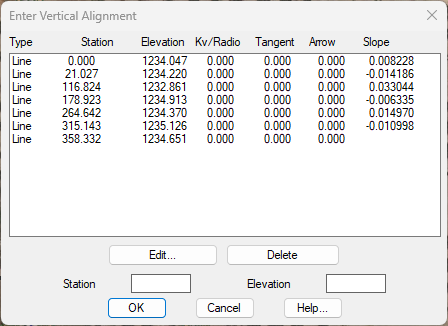
Once the data corresponding to the previous vertical alignment has been entered, we will define the final one. To do this we are going to draw the vertical alignment by running the option of Vertical Alignments > Draw Vertical Alignment. We draw in Model Space, Continuous paper size and scale 1000:1000.
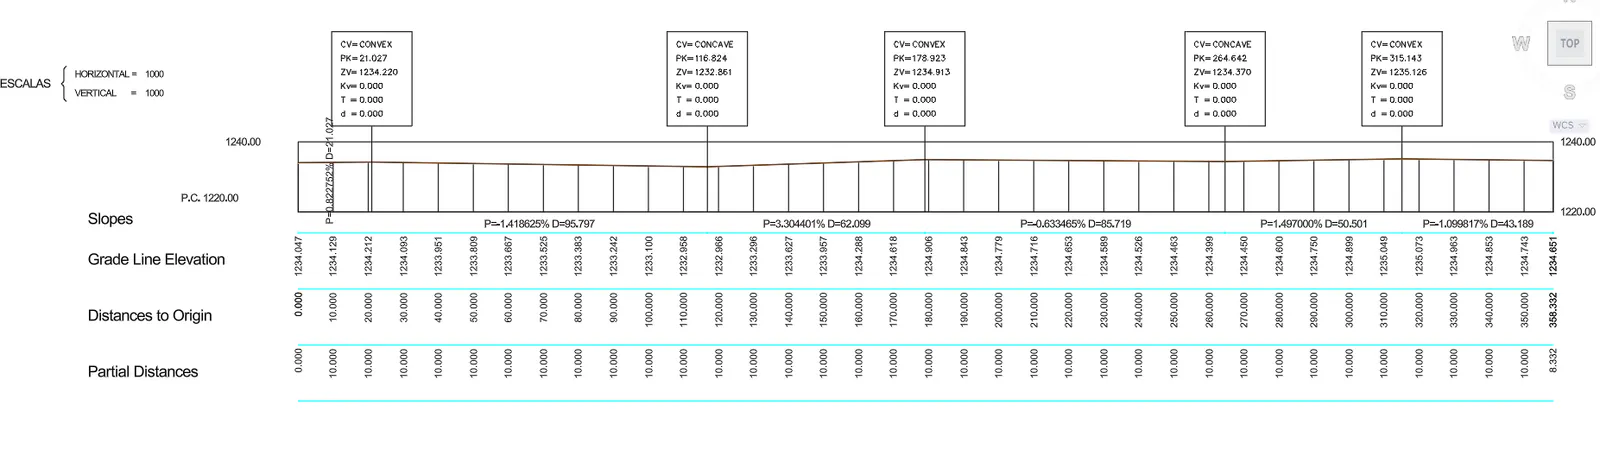
Then we will execute the option of Vertical Alignments > Vertical Transition Curve and select the second vertex of the vertical alignment. Edit as KV in the Current vertex the value 1000 and press the "enter" key.
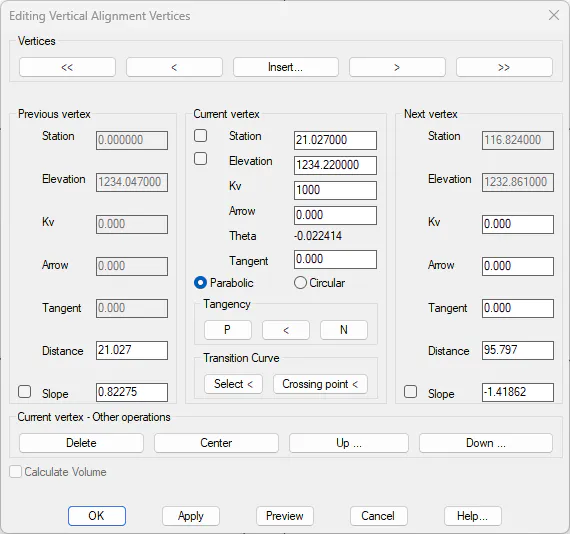
Next, press the ">" button and go to the next vertex, in this case we will enter a KV value of 600.
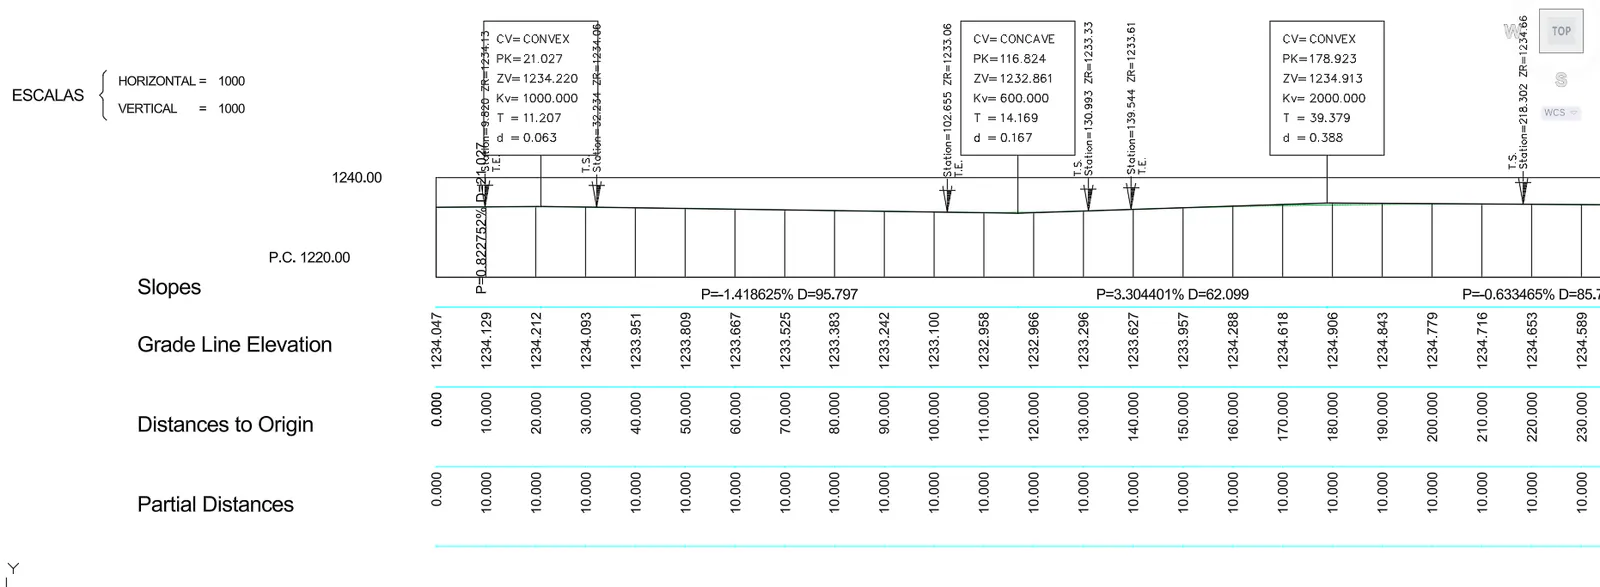
In the same way, for the next four vertices we enter the values of KV 2000, 750, and 1300 respectively.
If we press the Apply button we observe how the drawing is automatically updated. Finally we accept and the final result would be the one we can visualize in the next figure.
Export the changes using command Vertical Alignments > Export Vertical Alignment and update the solera.RAS file.