
tcpMDT
Select points - MDT25
2.2 Select Points
Allows one to choose certain points in order to execute an action on them, including: delete, list, move, etc. Different selection methods are allowed, which are explained in the following sections.
From the Select Points window, one can choose the most appropriate selection method for the job's needs or even combine various selection methods.
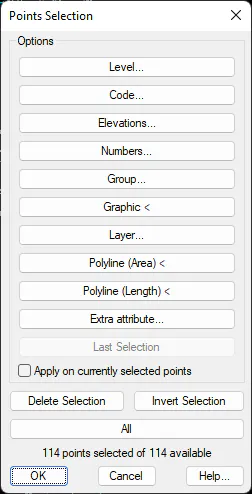
Once the points have been selected, the number of points selected and the total number of points in the drawing is displayed in the text line. The selection can then be validated or cancelled. In the latter case, the command that caused the points to be selected will not be executed.
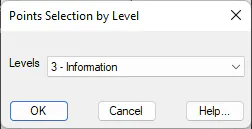
Select by Level
One can select all the points belonging to a specific level by means of this command. A list containing all the names of the levels defined is displayed in the selection window.
Select by Code
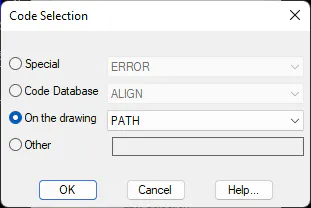
This option allows one to determine the code in four different ways inside the Select Codes dialog box:
Special: There are the default codes the program assigns in its different commands, for instance: Interpolated, Inserted, etc....
Codes Data Base: Lists all the codes included in the program's codes database.
In the drawing: Shows all the codes that in the current drawing
Other: Allows one to enter a new or different code. Capitals and lower-case letters are considered as equivalent. Wildcards such as asterisks (*), which indicate any series of characters, and question marks (?), which correspond to a specific character are allowed. In the case of points having composite codes (those that include a comma ","), these are selected if the code chosen coincides with any of the point code's parts. For example, AT, BR.
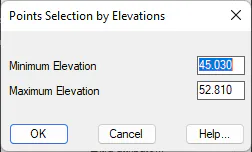
Select by Elevation
This possibility allows one to easily choose points using a specific elevation range. In order to do so, the minimum and maximum elevations defining the interval are entered and points within these values are selected. The scatter plot's extreme values are taken by default.
Select by Number
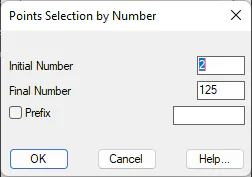
This option allows one to define a points interval to be selected from the first and last ordinal numbers entered. You can also optionally specify a prefix, so you can select points whose name is not numeric, for example P2.
Select by Group
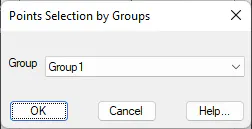
Once the corresponding point groups are created, this option makes it possible to select the said groups individually. All the point groups created in the drawing are displayed in the Select by Groups window
Select Graphically
This possibility allows one to select points graphically through the standard AutoCAD selection options, including: by window, capture, crossing capture, etc....
Select by Layer
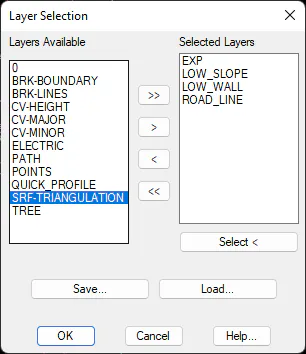
By default, the program draws all points on the same layer, but if there are different groups of points represented in different layers, this option allows for the selection of all the points of a specific layer. When it is executed, a window containing a list of the drawing's layers is displayed. Select one of the layers and press OK or press the Select button to select an object in the drawing so that the layer to which it belongs is selected from the list. Only one layer at a time may be selected, but several selections can be made consecutively.
Selection by Polyline (Area)
This feature allows to select graphically a polyline in the drawing. All points inside the area delimited by polyline are selected.
Selection by Polyline (Length)
This option asks for a polyline in the drawing. Then the program asks in command line for Maximum Distance to Polyline. Along the polyline, the program selects all points whose distance is less than this parameter.
Select by Additional Attribute
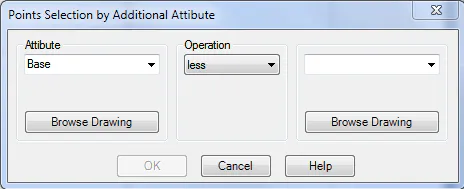
In the case that the points have additional attributes, this option facilitates their selection according to their distinct criteria.
First select the attribute for which the selection is being made. Initially, all the attributes possible are listed. Clicking Browse Drawing updates it so that only the attributes present in the drawing are displayed. Then select the type of operation of comparison to be carried out with the value of the attribute (lower, equal to or lower, higher, distinct and between). Finally, the value to be used for the comparison is introduced. Clicking on the corresponding Browse Drawing button creates a list with all the values present in the drawing for the attribute selected.
Last Selected
This button allows you to get the last selection carried out during the working session, with the aim of selecting the same points as the previous command.
Delete Selection
It clears any kind of selection carried out until the moment, with the aim of redoing a new one.
Invert Selection
It reverses the state of each point, that is to say, it selects all those that are not currently selected, and vice versa.
Select All
You can select all the points of the work in order to do any operation on them through this option