tcpMDT
Review Alignment - MDT26
Review Alignment
 | Command to execute in the CAD |
|---|---|
Vertical menu | MDT26 > Alignments > Review Alignment |
Ribbon menu | H.Alignments > Edit > Check |
Command line |
This application allows us to visualize horizontal alignment files (EJE), import horizontal alignments from LandXML (xml) and make precise adjustments with the tools provided by the application.
Once we run the application, we'll see something similar to this:
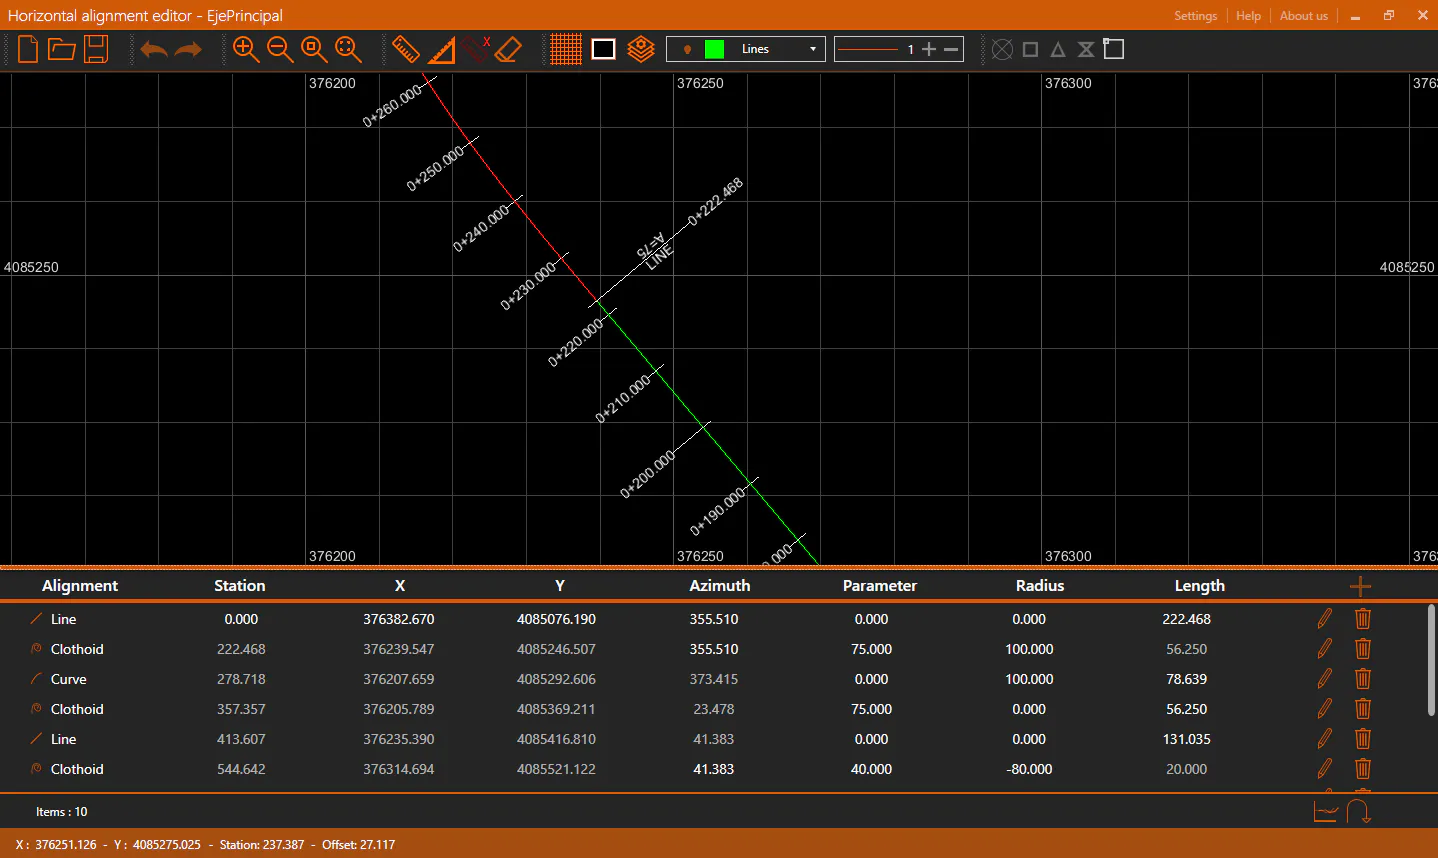
Along this document we are going to detail each of the parts, as a general overview we can distinguish multiple sections in the application's interface:
Title bar: At the top, the orange bar. The application's title appears at the left side. To the right we can find some options: Settings, Help and About us. Further to the right we have the usual window's controls: minimize, maximize/restore and close.
Toolbar: Just under the title bar. It allows us to manage the state of the view and to access to all the different edition tools.
CAD View: The application provides a CAD view in which the horizontal alignment will be represented as polylines, it also allows us to take measures.
Horizontal alignment's panel: Under the CAD view we can see a panel with the active aligment's information.
Status bar: At window's bottom, the orange bar. It provides us with general information as: the cursor coordinates in the drawing, which station and offset correspond to the cursor coordinates on the alignment and information messages during the edition commands.
Settings
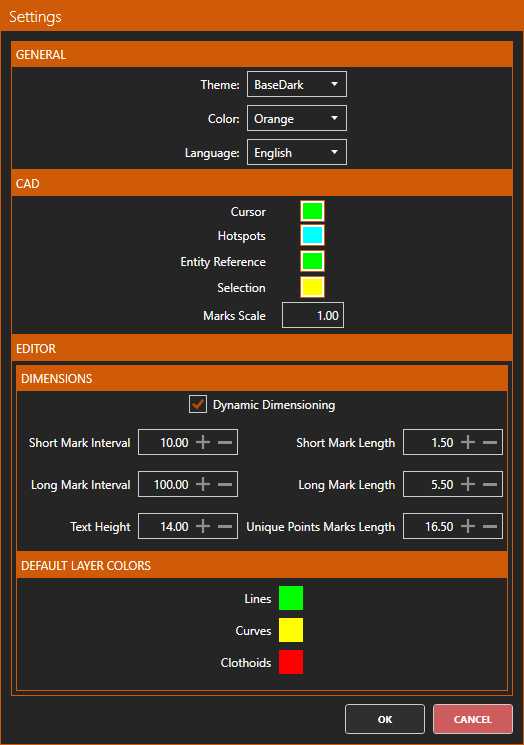
At the window's top right corner, we'll find a Settings button. When it's clicked the following dialog will show:
General
Theme: Defines the application's visuals. By default, it's setted as BaseDark so the application should have dark background and light foreground. The alternative would be the BaseLight theme which inverts the previous color scheme: light background and dark foreground.
Color: Defines the color palette used by the application. By default, it's settled to Orange. It can be stablished from a variety of colors.
Language: Allow us to choose the application's language
CAD
Cursor: Sets the color of the CAD view's cursor. This cursor it's only visible when there's an edition command active.
Hotspots: Sets the hotspots color for the selected entities in the CAD view.
Entity Reference: Sets the color for the entity reference marks in the CAD view when it's doing an operation which uses those references.
Selection: Sets the color for the selected vertices in a CAD view's entity.
Marks Scale: Sets the size scale for the CAD view's marks: hotspots and entity references.
Dimensions
Dynamic dimensioning: When it's enabled the marks, intervals are automatically adjusted according to the zoom level.
Short Mark Interval: Distance between short marks. It's only strictly followed when dynamic dimensioning is disabled or there's enough zoom on the alignment.
Short Mark Length: Length of the short marks segments.
Long Mark Interval: Distance between long marks. It's only strictly followed when dynamic dimensioning is disabled or there's enough zoom on the alignment.
Long Mark Length: Length of the long marks segments.
Text Height: Sets the size of the dimension's texts.
Unique Points Mark Length: Length of the unique points marks segments. This marks will be visible only when dynamic dimensioning is disabled or there's enough zoom on the alignment.
Each mark type is drawn on its own layer, so it can be set as visible or not at any time.
Default Layer Colors
It allows us to define the default colors for the lines, curves and clothoids segments of the horizontal alignments. By default, lines are green, curves are yellow and clothoids are red. It's also possible to change these layer colors manually with the CAD Menu's Layer Configuration, but if the colors are not set on this dialog they won't be remembered.
Once the dialog is accepted, the current settings will be stablished for current and future program's executions.
Toolbar
In the toolbar we find all the controls that allow us to manage the CAD view and the alignment edition:

File Menu
With the file menu's controls we can create new horizontal alignments, open existing files or save the changes of the alignment in edition:
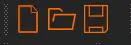
 New: It will ask for a file path for the new horizontal alignment and it will add a blank alignment to the panel.
 Open: Asks for an EJE file or a LandXML file and adds it to the panel and the CAD view. In case that it's a LandXML with multiple horizontal alignments, the following dialog will be shown to choose the alignment to import:
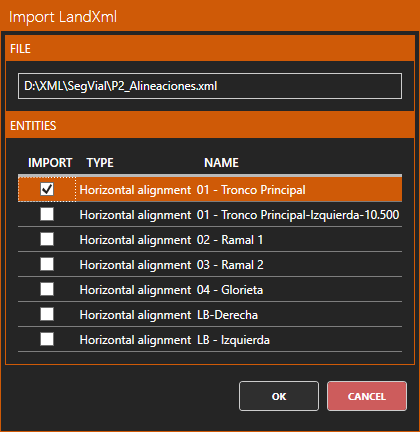
Once we click ok, the application will ask for a path for the imported EJE file and it will be stablished as the active one.
 Save: If there's an alignment active, by default it will ask for a path to store a new EJE or LandXML file with the current alignment's data: if it has been modified the changes will be stored, otherwise it will be an exact copy from the original. If the output's file extension is changed, or there's no active alignment when the button is clicked, the following options will be presented:
Save as dxf: Saves the current drawing in the CAD view in a dxf file. This includes polylines and measures drawn by the user.
Save as jpg: Allow us to store a georeferenced screenshot of what is currently visible in the CAD view. To adjust the screenshot settings the following dialog will be shown:
Georeferenced Screenshot
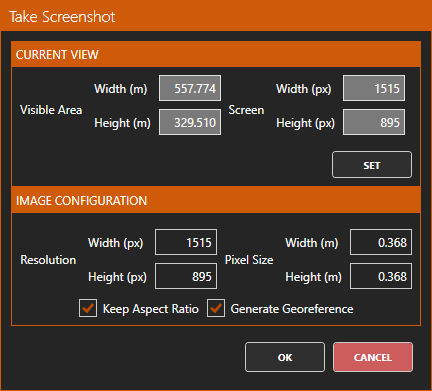
Current View
Visible area: Shows the screen size in meters and pixels.
Set: On click, we enter in a zoom by window command that we can use to set a region in the drawing.
Image Configuration
Resolution: Allow us to set a custom resolution, in pixels, for the screenshot. If the option Keep Aspect Ratio is on, the resolution will maintain the current CAD view's aspect ratio. Varying the resolution will affect the pixel size.
Pixel size: Shows the scale of each pixel in the generated image. For example, for an image which has a visible area of 100x100 meters and a resolution of 100x100 pixels, the pixel size will be 1x1 meters. If the option Keep Aspect Ratio is on, the resolution will maintain the current CAD view's aspect ratio. Varying the pixel size will affect the resolution.
Keep aspect ratio: When it's active the pixel size and resolution are forced to have the same aspect ratio than the CAD view.
Generate Georeference: When active, exports a jpw georefence file along with the jpg image so the screenshot will have the pixel size information and could be drawn or measured on any CAD software that supports georeferenced images. The output image will always be located at the origin X=0,Y=0
History Menu
With the history menu controls we can undo/redo the changes performed in the alignments:

From left to right:
Undo: Undoes the last change in the active alignment.
Redo: Redoes the last undone change in the active alignment.
These controls will be active only when there's an active alignment with any changes.
Zoom Menu
With these controls we control the CAD view zoom level:

 Zoom in: Increases the current zoom level.
 Zoom out: Reduces the current zoom level.
 Zoom window: After selecting two points, to set a window, the content of the window will become the current view by stablishing the required zoom level and centering the view at the window center.
 Zoom extents: Fit all the drawing entities on the screen.
Measuring Menu
With these controls we can add measures to the drawing, remove them and remove entities from the drawing:
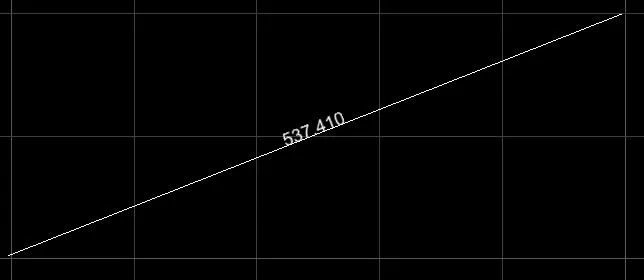
 Measure: The measure command will ask for two points and it will tell the distance between them. A new line will be added to the drawing, along with a text with the line's length, to a special measures layer.
 Measure (XY): It's the same as the measure command except that once the command finishes two additional lines with text will be added showing the distance in the X and Y axis between the two selected points.
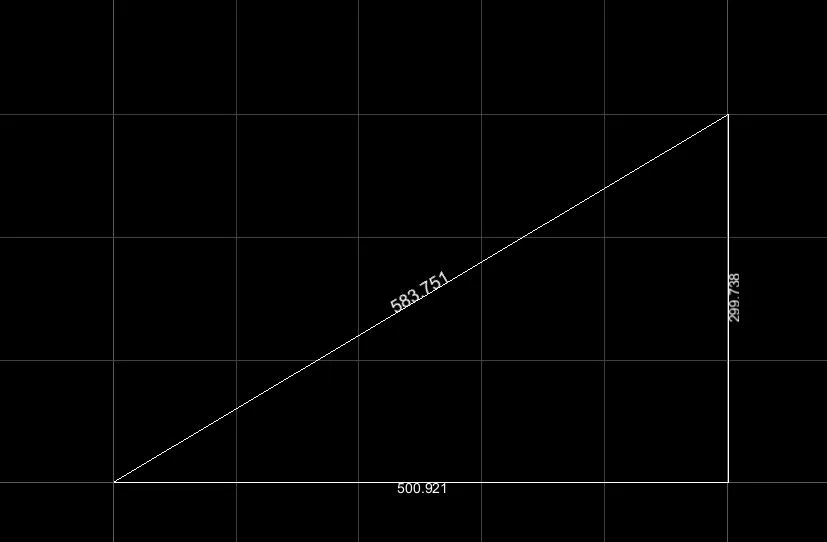
 Remove measures: Removes all the measures from the drawing.
 Erase entities: It allow us to select entities and remove them from the drawing. Once we run this command, when an entity is selected, we'll see that it's lines will become dotted, that means that it's selected for removal. Once all the desired entities are selected, by pressing Enter, or using the analogous function in the context menu, the removal is confirmed. Entities can also be removed by selecting them in the CAD view (clicking on them) and pressing the delete key. There are special entities that can't be removed.
CAD Menu
With the CAD menu controls we can manage the CAD view:

 Grid: Enable/Disable the grid
 Background color: Sets the CAD view's background color.
 Layer configuration: Allow us to manage the CAD view's layers. When we click the icon, the following dialog is shown:
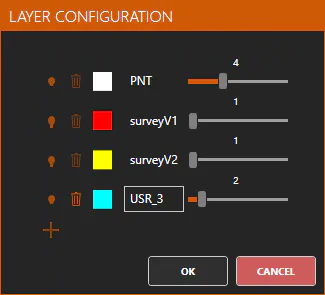
Each layer has the following controls:

 Visibility: Sets if the layer is visible or not.
 Remove: Deletes the layer from the CAD. This is not always possible, there are special layers which can't be removed and whose life cycle is managed by the application.
 Layer's name: Allow us to modify the layer's name. There are special layers that can't be renamed.
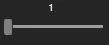 Line/Point width: Allow us to set the line/point width for the layer. Is bounded between one and ten.
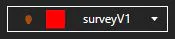 Current Layer: Allow us to select the current layer. layers can be shown or hidden by clicking the visibility icon
 Global line width: Sets the line width for each layer simultaneously.
Entity Reference Menu
With these controls we can manage the CAD view's entity references:
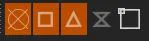
From left to right:
Point reference: When enabled, points are considered in entity referencing. Useful to measure distances between points or drawing on points.
Final Point reference: When enabled, entities vertices are considered in entity referencing.
Middle point reference: When enabled, middle points of linear entities segments are considered in entity referencing.
Near Point reference: When enabled, the nearest vertex to the drawing cursor is considered in entity referencing. Vertex could be final point, middle point or any vertex in a linear entity segment.
Enable/disable references: Sets if entity referencing should be performed or not.
Horizontal Alignment's Panel
Under the CAD view we'll see a panel with the alignment segments data:

 Add: It will show the Edit Horizontal Alignment's Node dialog to insert a new segment at alignment's end.
Segment list:
For each segment the following information is shown, from left to right:
Alignment: If it's line, curve or clothoid
Station: The first segment's station. If it's double clicked it can be edited, only on the first segment.
X: The X coordinate at the segment's start. If it's double clicked it can be edited, only on the first segment.
Y: The Y coordinate at the segment's start. If it's double clicked it can be edited, only on the first segment.
Azimuth: The azimuth at the segment's start. If it's double clicked it can be edited, unless the segment is preceded by a curve or a clothoid.
Parameter: In case of clothoids, the value of the parameter (A). Otherwise it will always be zero. If it's double clicked it can be edited.
Radius: In case of curves or clothoids, the value for the radius. Otherwise, it will always be zero. The sign tells if the curve it's interior or exterior. If it's double clicked it can be edited.
Length: Segment's length. If it's double clicked it can be edited, unless it's a clothoid with a radius not equal to zero.
 Edit: Shows the Edit Horizontal Alignment's Node dialog to edit the segment.
- Remove: Removes the segment.
Whenever a segment it's removed or modified, the alignment will be recalculated.
Horizontal alignment's tools:
At the panel's bottom right there's some tools available for specific operations on the horizontal alignment:

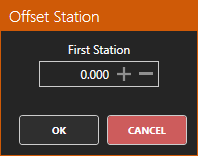
 Offset Station: Allow us to set a new initial station for the alignment, modifying the station of each segment.
 Invert: Inverts the alignment's direction so that the first segment will become the last one.
If the alignment has any changes and we attempt to change the active alignment or the application closes, the following dialog will be shown:
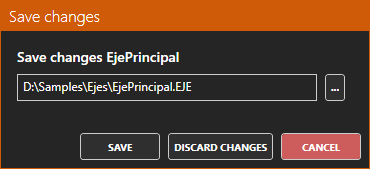
We can store the changes in the original file or a new one, discard the changes or cancel the application's closure/active alignment change.
Edit Horizontal Alignment's Node
This dialog will appear when we make insertions or changes in the active alignment's segment definitions:
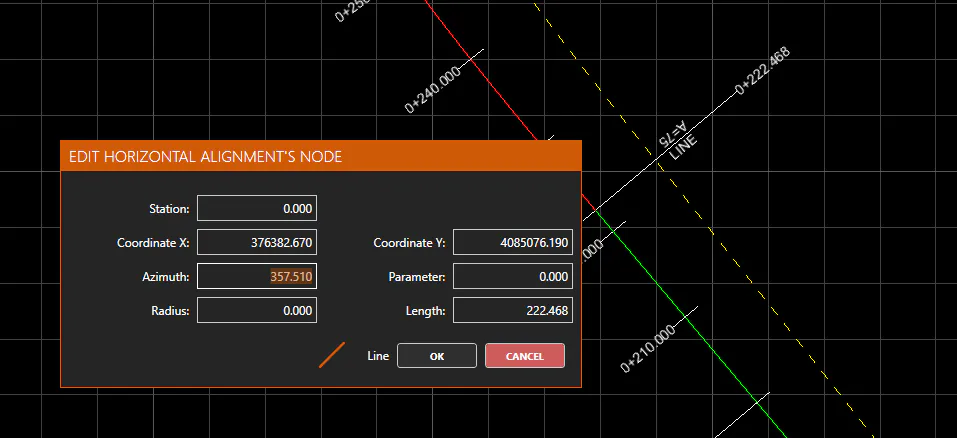
Station: The first segment's station. It can only be edited on the first segment.
Coordinate X: The X coordinate at the segment's start. It can only be edited on the first segment.
Coordinate Y: The Y coordinate at the segment's start. It can only be edited on the first segment.
Azimuth: The azimuth at the segment's start.
Parameter: In case of clothoids, the value of the parameter (A). Otherwise, it will always be zero.
Radius: In case of curves or clothoids, the value for the radius. Otherwise, it will always be zero. The sign tells if the curve it's interior or exterior.
Length: Segment's length. It can be edited if segment it's a clothoid with a radius not equal to zero.
Next to the ok button, the segment type is displayed. This information is deduced from the segment definition: line if radius and parameter are zero, curve if the parameter it's zero but radius it's not and clothoid when parameter is not zero.
At any time, a preview from the modified alignment will be displayed as a dotted yellow polyline on the CAD view. Changes can be visualized in real time.
CAD View
The alignment will be drawn on the CAD view as a set of polylines, one for each segment, along with its dimensions. Each segment type it's represented with a different color, that can be adjusted on the layer configuration or, permanently, on the application's settings.
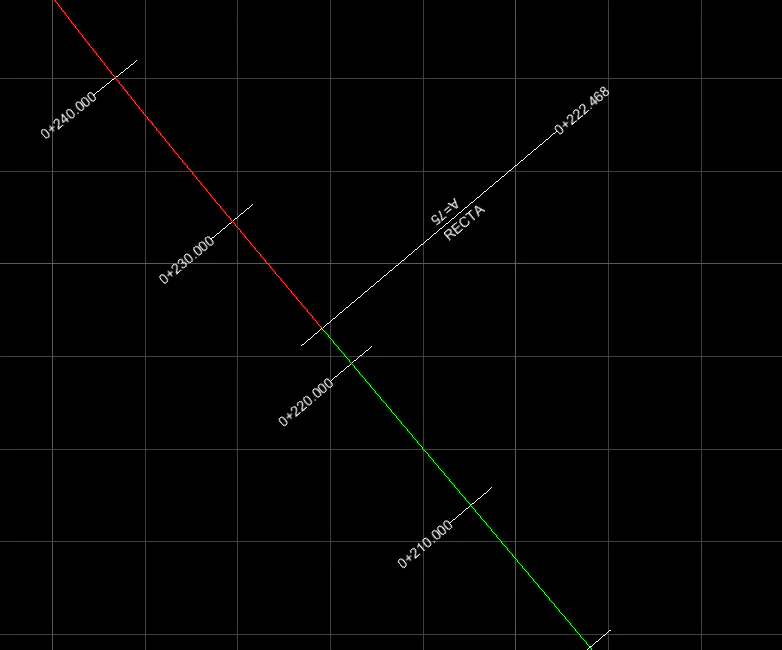
If an alignment's segment is clicked, it will be highlighted on the CAD view and on the horizontal alignment's panel. Once it's selected, the segment will be displayed as a dotted line, wider, with the color inverted and with its vertices as hotspots.
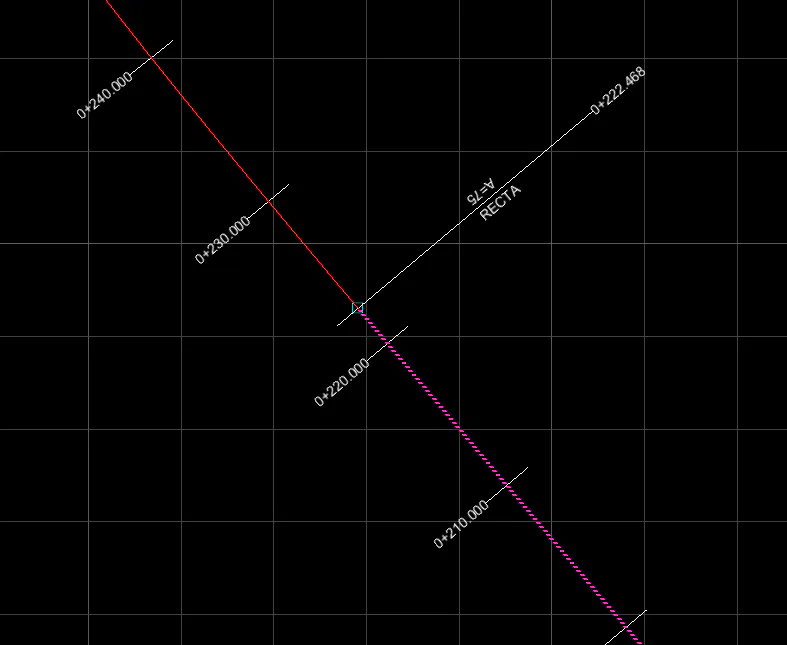
From this moment, if we move the cursor over one of the vertices it will be highlighted, and the radial context menu will appear.
Radial Context Menu
When the cursor is over a polyline's vertex from a selected alignment's segment, the radial context menu will be shown with the available edition options:
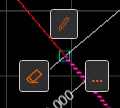
 Edit: It will show the Edit Horizontal Alignment's Node dialog for the selected segment.
 Remove: Removes the segment. It's also possible to remove it, once it's selected, by pressing the delete key.
 More options: Will show the context menu.
Context Menu
Any time that we right click on the CAD view, the application's context menu will be shown:
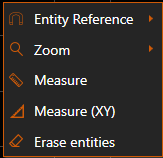
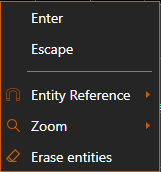
The measuring and entity removal operations are the same than the ones on the Measuring and Removal Menu on the toolbar.
In a similar manner, in the Entity Reference and Zoom submenus we'll find the commands from the menus with the same name from the toolbar:
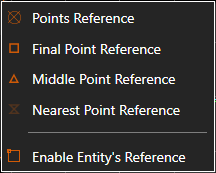
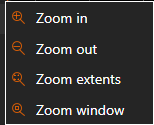
If the application it's in an interactive command and the context menu is opened, by right clicking on the CAD view, additional options will be shown for finishing the command, by Enter or Escape.