
tcpMDT
Codes Database - MDT26
Codes Database
 | Command to execute in the CAD |
|---|---|
Vertical menu | MDT26 > Points > Codes > Codes Database |
Ribbon menu | Points > Operations > Code Database |
Command line |
This command displays a window allowing one to view and interactively edit the Codes Database's contents.
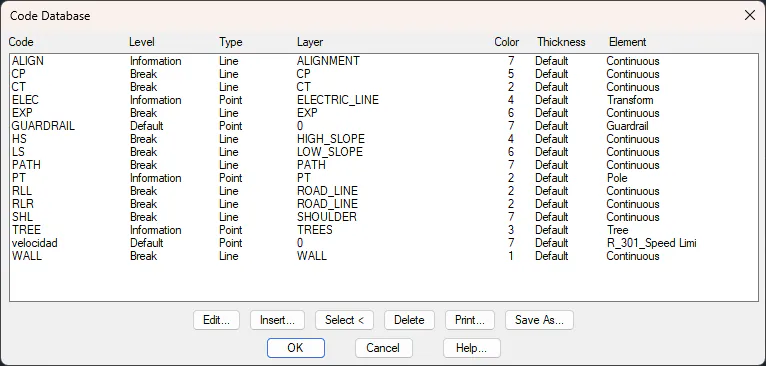
The list's parameters are as follows:
Code: Text which should coincide with a point's code. Wildcard characters such as "?" (coincides with any character) and "*" (coincides with any group of characters) can be entered. These increase the versatility of drawing from codes, avoiding the need to define more codes than is necessary.
Level: Level assigned to the points when the Classify by Levels command is executed.
Type: the type of entity drawn by the Draw command under Codes. It can be Point, Block (2P), Block (3p), Line or Area.
Layer: CAD layer used to draw polylines or insert blocks.
Color: Sets the color used to draw polylines.
Element: Depending on the Type field, can be the name of the block to be inserted if it is Point, the type of line if it is a Line, or the hatch pattern if it is an Area.
The dialog box is equipped with the following buttons:
Edit: Modifies the parameters of the code selected by displaying the dialog box called Codes Database Element.
Insert: Enters a new code into the Database. It displays the dialog box called Codes Database Element.
Select <: Allows you to select a point, block, or polyline in the drawing. Depending on the selected element, the program will search the drawing for possible similar elements (points with the same code, other insertions of the same block, other polylines on the same layer) and display a window that will help the user create a new code.
Delete: Deletes the code selected from the list.
Print: Generates a list of codes for the printer or stores it in a text file with a .PRN extension. It displays the List for Printer dialog box.
Codes Database Element
The parameters of the code selected can be modified by clicking the Edit button, whereupon the following dialog box is displayed:
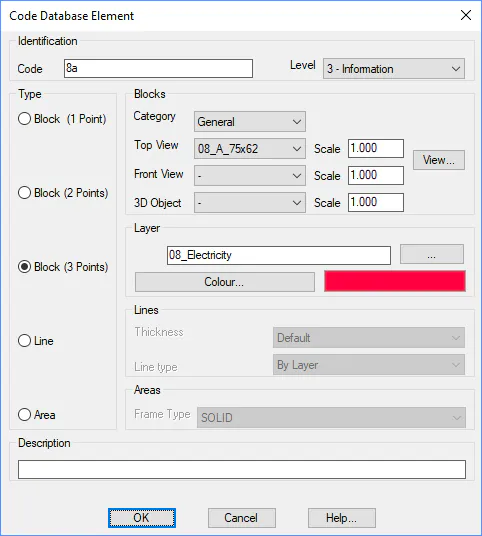
For Block (1 Point) type elements, three different blocks can be set. Each block is classified into categories (Signs, Miscellaneous, Vegetation, etc.), we first choose a category element before choosing an element of the block types. The Top View blocks are inserted with the Draw from Codes command. When longitudinal profiles and cross-sections are drawn, Front View blocks are used at the vertices having the relevant code. 3D Object blocks are used for the Route by Terrain and Route by Road commands. Each block has an associated scale factor that is multiplied by the specific scale used by the command.
Elements of the Block (2 Points) and Block (3 Points) type are similar to Block (1 Point) elements, but only the Plane category block is used. When a code is configured as a block with two points, it is only drawn if there are two points with this code. The coordinates of the first point coincide with the insertion point of the block and the distance and direction to the second point determine the scale and rotation of the block. The program assumes that the scale of the block is 1 m, and that it is drawn horizontally, from left to right. Hence, two points (0.0.0) and (0.1.0) insert the block as defined, the scale is 1.0 and the rotation 0.0.
The program works in the same manner for blocks with 3 points, only there are two scales. One horizontal, the distance between the first and second points, and another vertical scale that calculated as the distance between the third point and the straight line between the first and second points.
Each element in the database includes a field description where once can enter a more detailed description of what the code represents. This description can be included in points lists (see List Points command).
In the Blocks section, there is an Add button for each type of block (Top View, Front View, 3D Object), if we press the Add button of the Top View type, it allows us to select a block with DWG extension, which will be copied into a new category called "User" in the user's block directory, therefore, these objects can be selected by choosing the "User" option from the Category drop-down. The same happens with the Add button of the Front View type. In the case of the Add button of the 3D Object type, allows us to select a file of type OBJ or FBX and then opens the Model Importer for 3D objects, where these objects can be treated for later visualization in the viewer, the object will also be added to the category "User".
Code Database Wizard
If we receive a drawing with points that have different codes, and polylines that join those points, the Select < button helps to add new codes to the CDB so that in case we receive more coordinate files of points from the same source, we can automate the drawing of the polylines and the insertion of blocks with the command Draw from Codes.
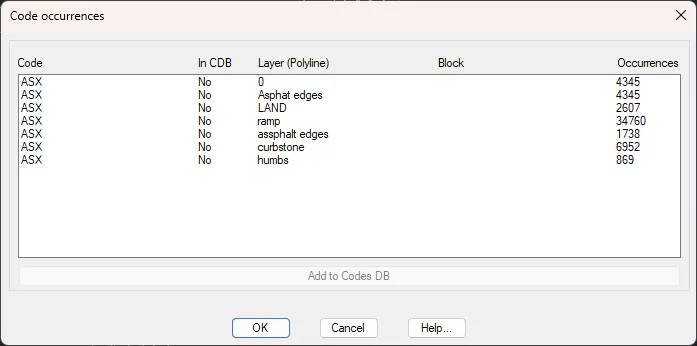
By clicking the Select < button and selecting a point in the drawing, when the drawing analysis is finished, a window similar to this one appears:
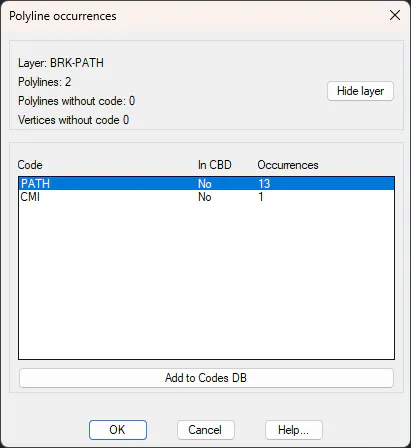
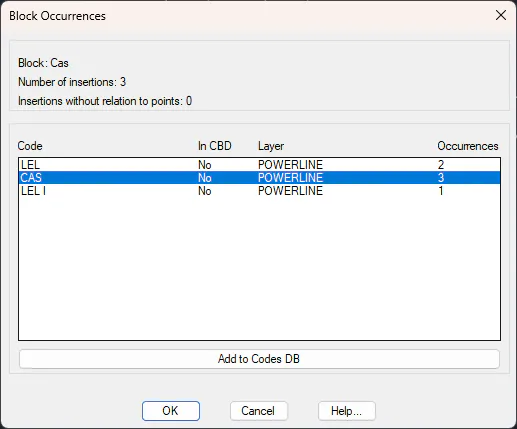
On the other hand, if user select a block entity, after analyzing the drawing, the window that appears indicates the number of occurrences of the block, if there are occurrences of the block that do not coincide with points, and a summary separated by codes, of the points that coincide with block insertions:
Finally, if user selects a polyline, the information that appears includes the layer of the polyline, the number of polylines in the layer, and how many polylines/vertices do not match points. A summary of the codes that match the polylines in the layer also appears:
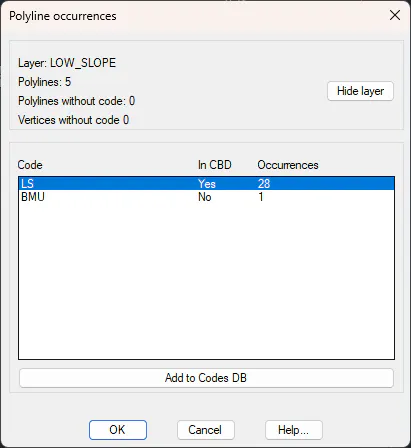
Once we have decided whether or not to include the code in the CDB, with the Hide layer button we will be able to avoid that if we redesignate an entity, we will repeat the same layer.